How to use the Win button? WIN key - useful functions
- one of mandatory conditions use of this operating system. Its licensing is carried out by us, the users, purchasing a product key for the corresponding version and edition. But Microsoft does not require us to buy a product key right away (unless of course it comes with the OEM device)
. For all versions and editions of Windows, there is a trial format for its use, limited in certain capabilities.
What is this trial format? In other words, what happens if you use Windows without activation?
The question posed has two levels of consideration. The first is when we talk about legal liability, but this topic is more relevant to companies using a Microsoft product for business purposes. Although theoretically you can be held accountable for using unlicensed software (at least in the form of a fine) any citizen who uses the operating system purely for personal, non-commercial purposes. Another plane is the mentioned functional limitations of Windows. So, in fact, in this vein, let’s look at the question.
Win7 comes with 30 -a daily trial period, during which you can freely use all the features of this version without exception.
But these same features, in addition to system updates, will be available after the trial period. So, as we see, in terms of functionality it is not activated "Seven" almost no harm. If desired, update packages can be installed manually by downloading them from the Microsoft website. Or, for example, using the utility Windows Update MiniTool.
But already 3 days after installation the system will begin to put moral pressure on us to activate it. At first, loyally, in the form of an activation window that appears occasionally, and closer to the end of the trial period - more persistently, with this window being displayed every 4 hours and every time you log into the system. Well, for greater effect, an inscription will appear in the lower right part of the screen that the copy of Windows is not genuine. Your desktop wallpaper will turn mournful black. They can be changed in the personalization settings, but after a while the mourning color will again fill the desktop space.

That, in fact, is all the restrictions. Moreover, the trial period for using Win7 can be extended to 120 calendar days if desired. But more on that later.
But in modern versions Win8.1 And 10 There is no specific trial period. The entire time you work with them without activation is a continuous, timeless trial. But without a legal basis, as provided by the official 30-day trial period "Sevens". And the desktop picture in modern versions of the system is not painted in mourning color. However, they have their own problems.
Windows 8.1
Activation problems Win8.1 may arise directly during the installation of this version from the official distribution created using the utility MediaCreationTool. To install the system, you need at least a temporary product key. Naturally, it does not give the right to legally use Windows; it is only suitable for installing it. But this red tape with the key can also be avoided if you download the distribution kit of this version from the website tb.rg-adguard.net. This is a web resource maintained by enthusiasts where clean system images are stored. Only, as is the case with Win8.1, configured to allow the key entry process to be deferred during the installation phase, as happens in Win10.
Not activated since installation Win8.1 contains an inscription in the lower right corner of the screen, but unlike Win7, this is no longer a text that puts pressure on the psyche "Your Windows is not genuine" , but simply a statement of information about the version and build of the system.

In non-activated Win8.1 personalization settings for start screen design are blocked Modern UI and lock screen.

At the same time, Windows themes can be changed as much as you like using the personalization settings in the control panel format. And choose any wallpaper, any colors for the taskbar and windows. At the same time, the ability to download ready-made desktop themes from the official Microsoft website is not even blocked.

After some time, the system will remind you of activation by displaying an activation window in the application.

And this window will periodically pop up while working with the system. Otherwise functional Win8.1 will be exactly the same as that of a full-fledged, activated system.
Windows 10
And here Win10 does not display any annoying activation windows. We are informed that the system is not activated by a modest inscription on the main page of the application, which is also a link to the required section to complete the activation procedure.

Like Win8.1, Win10 contains an inscription in the lower right corner of the screen about the version and build of the system. When installing "Dozens", as mentioned, you can not enter the product key, but skip this step, even if the system distribution was downloaded in the official way using the utility MediaCreationTool.
The terms and conditions for using personalization settings "Dozens" tougher than its predecessor versions. Since there is no separately developed modern interface in the form of a full-screen add-on Modern UI, and the type of classical and UWP-applications exist in a single environment, then, accordingly, without activation, there is no access to all design settings of this environment. And we will always be forced to see the signature blue theme Win10 and the same blue picture with a window through which rays of light weakly penetrate.

In all other respects, the system will not differ from the activated one.
Windows 10 Enterprise Trial
Microsoft has a special resource for IT-specialists and developers Evaluation Center, where this special caste of users can get various company products for free. And it is legal to use them for some time for informational purposes. Among such products are trial editions Windows Enterprise And LTSB (the same Enterprise, only with a minimum scope of delivery of system updates) . These editions are supplied already activated with a key Evaluation- licenses for a period of 90 days.

In a legal sense, this is essentially the same trial format as in the case of Win7. The same introductory edition with 90 -day Evaluation-there is also a license for Windows 8.1 Enterprise. But it can no longer be downloaded from the website. Evaluation Center, unless a distribution kit is found somewhere on third-party resources.
Smooth 90 days you can use corporate Win10 with free trial Evaluation-license. After this period, you must either activate with a paid key, or, according to Microsoft requirements, honestly and conscientiously refuse to use the system. Well, or carry out some manipulations to extend the trial period until 360 days. What to do next? Once a year, it seems like you can reinstall Windows. If you do not activate the trial Win10, it will reboot at certain intervals.
What kind of manipulations are these that extend the official trial period for using the system?
How to extend the trial period of using Windows
Win7 and introductory Win10 Enterprise/LTSB– systems supplied with a legally fixed trial period – as mentioned, you can use them longer, respectively, 30- And 90 -day period. To do this, you need to reset the activation at the end of the period so that the trial period starts counting again. You can reset Windows activation no more than 3 times, therefore, we get the maximum trial period 120 days for Win7 And 360 days - for trial Win10.
There are two ways to reset the activation. The first one is with the help command line. Run it as administrator, insert:
slmgr -rearm
Ideally, you should receive a notification that the operation was successful. After that, we restart the computer and in the system properties, see if the activation has been updated.

The second method is to use a standard tool for preparing the system for deployment on corporate devices Sysprep. Enter this name in the command field "Run", in the explorer that opens, launch the tool, set the settings in it, as shown in the screenshot, and click "OK".

After this, the computer will restart. With its new launch, we will see the stage of selecting regional parameters and creating a new account, as with Windows installation. Here you just need to create a new account, you can delete it later. Our old account will be available on the lock screen.
Methods to combat the manifestations of inactivated Windows
Locked personalization settings and inscriptions in the lower right corner of the screen are not the most stifling conditions for free use of the system. But if you wish, you can resolve the issue with them. The inscriptions are removed by the utility Universal Watermark Disabler. Well, there are many solutions for changing the appearance of Windows - from simply changing the desktop picture using image viewers to installing third-party programs for managing wallpaper, including dynamic ones. Using programs like WindowBlinds and you can even apply alternative design themes to the system.
Windows 8 is a new generation operating systems Microsoft Windows. Many system features remain unchanged compared to Windows 7, and the redesigned design has become more convenient for use on mobile devices.
Steps
Part 1
Home screenPart 2
DesktopPart 3
General navigation- Remember, the desktop is a separate program, and you may need to launch the desktop to go directly to the program you want.
-
Launching programs. To launch programs, click tiles in the Start menu or program icons in desktop mode. Creating separate tiles for frequently used programs will be discussed below. As before, programs can be pinned to the desktop taskbar.
- To pin a program to the taskbar for which you can't quickly find the application icon in desktop mode, use the Search Express button to find the program and select Pin to taskbar. This feature is not available for all programs, but pinning to the Start menu is always available.
-
Closing programs. Close programs using the familiar "x" button in the upper right corner of the program window. If this button is not available, open the side taskbar (hold the pointer in the upper left corner of the screen and drag down) and right-click the program you want to close.
- You can also use the Alt+F4 combination to close a program, but this way you can only close the program you are currently viewing.
-
Using several programs at the same time. As you will notice, for example, when you go from the Internet access window where you are running a video on YouTube, playback will stop. If you want to use two programs simultaneously in Windows 8, you will need to switch your computer to windowed mode.
- To switch to windowed mode, both programs must be running. Hold your mouse pointer in the upper left corner until another program you want to view appears. Capture the image and then hold it at the edge of the screen until the program outline appears. Release the image, after which both programs will be launched and active.
- Windows 8.1 allows you to run up to 8 apps at once, but this number also depends on your screen size. For example, on tablets you cannot run more than two programs.
Express button panel. To bring up the Quick Keys menu, move the pointer to the top-right corner and drag down. This way you can call up the system time and control menus for some computer functions. Be sure to check out the wide range of options available in this menu.
Switch between windows. To switch between windows, programs, and applications, hold the pointer in the upper left corner of the screen and click the left mouse button. This way you can view running programs. To quickly jump to a specific program, hold the pointer in this corner and drag down to get to the equivalent of the taskbar, where you will see all the open programs.
Part 4
Main programs-
Office software package. If you have the latest version of the Office suite, which is designed in the same style as Windows 8, you will notice that the interface has become more elegant. Compared to Office 7, the functionality remains virtually unchanged. If you are familiar with this version of office tools, you can easily upgrade to new version programs. In order to improve, some programs have received new functions. Now using office programs has become even easier and more convenient.
Mail application. This is a very useful application that can handle all your email accounts in one program. The program can be synchronized with Hotmail, Yahoo, AOL, Gmail or Google services, Outlook and many others. You can view, send and organize all your correspondence using one program.
- To add email accounts, tap Options in the Hot Keys menu, then select Accounts and Add Accounts.
-
SkyDrive app. The SkyDrive application allows you to store files on the Internet and access them from any computer. Files can be stored as private or public, and you can also share files with specific people. You can also create folders, upload files, and perform other actions like refreshing the screen and viewing details by right-clicking the window background.
- SkyDrive usually requires a subscription, but some features may be available for free.
-
"Shop" application. The Store service allows you to find and download new programs for your device. Some of the programs are free. You will have access to games, productivity apps, social, entertainment and sports programs, reading apps and much more.
Standard programs. You may need programs like Notepad and Calculator, which used to be in the Accessories menu. Such programs and utilities are also present in Windows 8. To find them, click on the search button in the Express Keys menu and scroll all the way to the right.
- Such programs usually run in desktop mode and are treated as a single program.
-
New printing tools. Make sure your printer is set up using the Devices express button. In programs that run on the desktop or have a familiar interface, printing is the same as before. For applications with the new "modern" interface of Windows 8, you will need to find a dedicated print button or bring up the print dialog using the Ctrl+P hotkey combination.
Setting up custom tiles. You can create new tiles from the Start menu by right-clicking on an application icon in the search menu. In the same way you can change appearance tiles, choosing the appropriate size (if available). Using third-party programs, you can create fully personalized tiles with your own image and text.
Part 5
Changing programs, settings and appearance- You should understand the difference between deleting a program and simply deleting a tile. Removing tiles is described in the next paragraph.
-
Removing tiles. To remove a tile, right-click on it and select Remove from Start Menu. This action is different from uninstalling programs because the program will remain installed on your computer and will be accessible. It will simply no longer appear in the Start menu.
Change six basic parameters. There are six main options available in the Express Buttons menu: network settings, volume, screen brightness, notifications, power and keyboard. The purpose of these parameters is self-explanatory and allows for general system management.
Extra options. To change advanced settings, you need to select Change PC settings below the six main options. This menu allows you to personalize the screen, change user settings, personalization, synchronization and much more.
- In desktop mode, there's a more familiar way to change settings.
-
Control Panel. To quickly access Control Panel, you can find it by using the Search Express button or by clicking Control Panel under the Settings Express button. To access the Control Panel and other options, you can position the pointer in the lower left corner and right-click.
-
Personalize the appearance of the device. There are several in various ways changes in the appearance of the device. They allow you to personalize your device. If desired, these parameters can be synchronized between different devices, so you'll see the same screen in front of you every time, no matter what device you're using.
- Personalize your home screen. To change the background and color scheme of the Home screen, choose Settings from the Hot Keys menu, then click Personalize. This action can only be performed from the Start screen. In this menu, you can set the Start screen to be overlaid on top of the desktop instead of a dramatically different screen. With this, you can also set your own image as the Start screen background.
- Desktop personalization. Right-click the background in desktop mode and select Personalize. Set the desired background image from those available on your computer or select one of the preset images.
- Personalize your lock screen. To personalize your lock screen background, select Change PC settings below the six main options. Tap Personalization and Lock Screen. To choose your own background images, click Browse.
- Change your account picture. To change your account picture, select Change PC settings below the six main options. Next, click “Personalization” and “Account Picture”. You can upload an existing photo or take a new photo using your webcam.
-
Security Settings
- Set up a Microsoft account to take full advantage of Windows 8.
- One of the new features of Windows 8 is a universal “Spell Checker” that runs in the background. This feature is useful when writing a comment on a blog, creating or editing an article on wikiHow or similar sites, prompting you to make corrections. For the convenience of online users, many words from modern computer jargon have been added to the dictionary.
- You can safely install Windows 8 Preview alongside your existing version of Windows. During installation, pay special attention to the partition in which you are installing Windows 8. This installation will require an empty partition.
Warnings
- Don't forget to check software compatibility. Many programs may not work correctly in Windows 8.
- If you install Windows 8 Preview alongside your existing version of Windows, do not leave your computer idle while in Windows 8.
- If Windows 8 automatically goes into standby mode, subsequent booting of an earlier version of Windows may result in a hard drive corruption report. Nothing bad will happen, but it may take you some time. When Windows wakes up, it can't choose which partition to return to, so you may have to manually turn off your computer and turn it on again.
- The reason lies in the Windows 8 dual boot menu, which is activated by the mouse and has a solid background fill.
- Configure the msconfig.exe file on an earlier version of the OS. You won't be able to use the menu from Windows 8, but you will get a stable boot.
- When dual booting or even a clean install of one system, you need to ensure that the Windows system partition is on the correct partition.
- If you are not sure about the advisability of upgrading to a new version, you can use booting from a removable device, which allows you to familiarize yourself with the capabilities of the system. A version for downloading from such devices is available for download.
- Don't dual boot if you don't have much practical experience. Numerous articles on wikiHow cover many topics in depth and help you gain the knowledge you need.
Installation of programs. Programs can be installed the old fashioned way from disks or from the “Store” (discussed above). You can also download and install programs from the Internet, as in previous versions of Windows. There will be a huge variety of programs available to you, but keep in mind that not all of them will work (or work correctly) under Windows 8.
Removing programs. To remove some programs, just right-click on the corresponding tile or program icon in the search menu. You can also use the familiar Add/Remove Programs tool. To quickly navigate, press the Search Express button and type Add or Remove Programs in the search bar. The program will be under the Options tab on the right.
We would like to give you a brief overview of the features of the Windows 7 operating system. Microsoft has added and improved several features such as new themes, graphic effects, and taskbar features.
In this tutorial we will look at Aero function, let's study and find out how to set up Desktop.
If you used earlier versions of Windows, then I hasten to please you - everything is the same in Windows 7. There are no major changes in this version, all the same familiar functions, desktop, etc. The design is certainly more attractive. But if you are new to Windows, then you need to know about some basics like Taskbar, Start Menu, etc.
1) Cart: When you delete a file, it is moved to the Recycle Bin. You can restore files from the Recycle Bin. And to delete a file completely, you need to delete it from the trash.
2) Folders on the desktop: You can store folders, files or shortcuts on your desktop.
3) Open folders: Double-clicking opens the folder in Explorer.
4) Background: Desktop background. You can use your photos as your desktop background, or you can choose one of the built-in images.
5) Start button: Click the Start button to open a menu that allows you to access applications, files, and settings. Also, the Start menu is used to turn on/off. computer.
6) Icons on the taskbar: Some programs will have icons on the taskbar for quick access.
7) Taskbar: The taskbar contains the Start menu, quick access, date and time. When you open a program or file, it will appear on the taskbar and you can easily switch between open programs.
8) Date and time: IN Right side The taskbar shows the current date and time. There are also various settings such as audio volume, internet settings, etc.
Aero function
Windows 7 uses a group of features called Windows Aero. Aero is a visual desktop that combines translucent windows, attractive colors and graphic effects with user-friendly functionality. Aero includes Peek, Snake and Flip.
Snap
Snap feature allows you to resize open windows. The images below show two windows, before and after using the Snap feature.

- Drag the window to the left or right side of the screen until a transparent window appears, then lower the window.
- Your windows should fall into place.

Peek
The Peek feature allows you to view open windows in the taskbar as thumbnails. Just hover your mouse over the icons of open programs on the taskbar and thumbnails of open windows will appear.

- Hover your mouse over the open window icon in the taskbar and a thumbnail of the window will appear. Now hover over the thumbnail and the full window will appear.
- Click on the thumbnail to open the window or click on the "X" button to close the window.

Snake
When your desktop is cluttered with open windows, you can use the Snake feature to keep one window open and minimize all the others.
- Press the top of the window, hold the window, shake. All other windows will disappear except the one you were holding.
- Shake the window again and that's it closed windows will appear again.

Flip
Flip and Flip 3d functions - 2 ways to view thumbnails of all open windows at once. When using Flip, thumbnails of all windows in a row will appear, and Flip 3d will display all windows in a stack.

- Hold down the Alt key and press the Tab key.
- While holding down the Alt key, press the Tab key to switch between windows.
- Stop at the window you want to open and it will appear in full screen.
Flip 3d (3d version of the Flip function)

- Press and hold the Windows (Start) button on your keyboard, and then press the Tab key.
- Use the Tab key to scroll through all open windows.
Instead of holding down the Windows key, you can press Ctrl+Windows and press Tab to keep Flip 3D open.
Features of the Taskbar
Microsoft has improved the taskbar. It has become very convenient for viewing and accessing files and windows.
View tasks
When you open several windows of the same type, for example, the same browser is opened several times, the icons in the taskbar will look like the picture.

- Aero Peek will show you all windows when you hover over an icon on the taskbar.

- If you want, you can change the order of the icons by simply dragging and dropping.
Pin a program to the taskbar
You can pin programs to the taskbar. This is done in order to have quick access to them.
- To pin a program, drag it to the taskbar.

- And to remove a program from quick access, simply right-click on the icon and select “Remove program from taskbar”


1) Hidden icons: Click to view additional settings and icons.
2) Action Center: View important notifications. A red cross will appear on the icon if there are notifications.
3) Internet access icon.
4) Adjust the sound volume.
5) "Collapse all windows" button
You can easily minimize all windows with one click.

Personalize your desktop background and theme
Windows 7 has attractive new themes and backgrounds to choose from. They include vibrant photographs, digital images and Aero themes, using colors and glass effects in an attractive way.
Themes and background
In the Start menu search bar, type “personalization.” Or right-click on your desktop and select .

1) You can change the appearance of your desktop icons.
2) You can change your account picture.
3) Desktop themes
4) You can set your image as the background, or select one from the Windows collection. You can also create a slideshow and your background will change automatically from time to time.
5) You can choose a color for your windows and taskbar.
6) If you want, you can change the sounds for Windows 7.
7) Windows 7 offers a variety of screen savers that you can select and customize.
Font and ClearType settings
You can adjust the font and ClearType settings on the desktop based on your preferences.
To change the Font:
- In the search bar in the Start menu, type “Fonts.” Or Start -> Control Panel -> Appearance and Personalization -> Fonts
- Select the Font you like.

To change the Font size:
- On the left side of the Fonts panel, click on “Change Font Size”
- Select the desired font size and click Apply.

Please note that larger font sizes may prevent some elements from appearing on screen.
You can also customize ClearType for your screen. ClearType helps improve the readability of text on LCD monitors and screens.
- To configure ClearType, select Setting ClearType Text from the menu on the left side of the font panel and select best example text from those proposed.

Gadgets
Gadgets are mini-programs that are installed on your desktop. Gadgets can show you information about the weather, date and time, news and much more.
To add gadgets to your desktop:

Setting up Gadgets
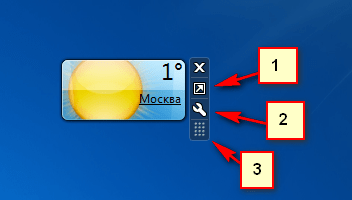
1) Click on this button to resize the gadget.
2) The options button for your gadget.
3) Use this button to drag and drop.
Today I will talk about one button on the keyboard that many beginners simply don’t use, don’t notice, and don’t know that they can perform quick actions with it. This is the "Win" key.
Where is this "Win" button located? It is located in the first (bottom) row of the keyboard in two places: on the left - between “CTRL” and “ALT” and to the right of Spacebar next to ALT

Now let's see what you can do by using this key in combination with others.
First, just click on it. The Start menu opens in front of us. Pressing it again closes it.
Now we will use Win with other buttons on the keyboard.
To quickly open " Search» on your computer, press the button combination Win +F. IN Windows 10 - these buttons will open "Feedback Center" To search use Win +Q or Win +S
Win +D– this key combination will help you quickly show Desktop.
Win +M – minimizes all windows.
Win +B- will allow you to quickly go to tray icons. Using the arrows you can select the icon you need.
Win +E– when using these buttons you open Explorer Windows systems.
Need to see " Properties of the system"? No problem. Win+Pause
Win +F1– get access to Windows Help. IN Windows 10 To access help, go to the Start menu and select Get Started app.
Win +R- quite a useful combination. Calls Run window.
Win +T- will allow you to activate " Task bar" And using the cursor keys, you can select the application you need on the taskbar.
Win+L– produces blocking the computer.
Win +U– opens settings Accessibility.
Win +X– a combination of these keys in Windows 10 gives access to the Quick Links menu. In Windows 7, go to the Mobile Application Center. In Windows 8 – opens the Start menu.
Win + right/left arrow– helps to move the application window, folders from one side of the monitor to the other.
Win + up/down arrow– another useful feature. It minimizes and maximizes the window of the current program (folder).
Win + Space– at 8 and 10 windows versions quickly switches the language layout on the keyboard. In "Seven" this combination switches to the Desktop.
Win + "+" button- calls up Screen Magnifier
Win +Tab– switching between windows of different programs
Functions of the “Win” key in Windows 10
Win +A– opens the “Notification Center”
Win+W– and in front of you is Windows INK Workspace
Win+I– Windows Settings
Win +P- the “Project” panel will open
Win +G– notification about the opening of the game panel.
Win +K– connection of wireless devices
Win+Enter– enable or disable Narrator
As you can see, many actions can be performed quite in a simple way– using just one button in combination with others.
If you have any additions for using this button, write in the comments. Also share how often you use the “Win” key in your daily work.
Users can easily find Windows MovieMaker on most operating systems, with the exception of the most latest versions. Unfortunately, Microsoft has decided to discontinue this software. For users who do not have Windows MovieMaker on their computer, but want to work with this program, there are two options. The first is to install earlier versions of operating systems Windows systems, and the second involves downloading and installing this program from the Internet. If you already have Windows MovieMaker, then most likely you can find it in the “Standard” folder (if the program was not moved to another directory and installed along with the operating system).
This program is ideal for beginners who are just starting to work with editing. With this program, you can add various effects, create original videos, and even capture videos from various sources. Sometimes it happens that the capabilities of the Power Point program are not enough and then Windows MovieMaker comes to the rescue. Using this software, users can easily create their own presentations.
Regions in Windows MovieMaker
Windows MovieMaker has one work area, a field for performing certain operations with a fragment of a video recording or the entire video recording, a field for displaying the result, and a storyboard field. First of all, after starting the program, you need to open the source file. This is done by simply clicking on the “Import video” button (there is also “Import images”, “Import sound or music”). Then, after certain files are opened, you need to transfer them to the timeline (storyboard), which is at the very bottom.
Editing Video in Windows MovieMaker
You can add effects to change the video recording. To do this, click on the corresponding “Video Effects” button. It is located on the left side of the window. In order to apply certain effects, you just need to drag them onto the timeline or storyboard, and then they will be activated.
Transitions are one of the most acceptable ways to connect different fragments of a video. To view and add specific transitions to the storyboard, you need to select “View video transitions” in the options. In addition, you can add music, sounds and much more to the video, you can even trim the video. This can be done on a special field, in the “Timeline” mode.