How to make a chandelier with your own hands at home. How to make a lampshade (plafond) at home. Homemade lamp in boho style
When starting to arrange the interior space, it is important to think through every little detail. After all, we all subconsciously strive for comfort and it is the smallest details that can create a special atmosphere, convey the general idea, mood and character of the room. Professional designers claim, and interiors clearly prove, that right choice Chandeliers can not only decorate the interior of a room, but also make life brighter and more fun. Beautiful lampshades for chandeliers with an original design give special grace and luster to the lamps. You can find out how to make them yourself and what materials are best to use for this in this article. Detailed, step-by-step master class, as well as a visual photo, will be an excellent help for you in this exciting process.
Material selection
When making a chandelier, it is difficult to single out one material that would meet all the requirements. Each of them has its own individual characteristics and features. For example, paper, which is the simplest and most accessible material, lends itself well to transformation.
Lamps made from glass shards and strips of metal have a dazzling shine and beautiful appearance. Wood and fabric add warmth and comfort to the interior. Lace lampshades are distinguished by their special beauty, captivating everyone at first sight.
In a word, you can make a chandelier with your own hands from anything, the main thing is to be smart and use your imagination in time.


A chandelier made of paper napkins is a rather bold, but justified experiment.
We will describe in detail how in an ordinary object you can discern its creative potential to create an exclusive decorative element in this article.
Step-by-step instructions, with a description of each step, will help you make from available materials incredibly beautiful and unique lamps that will be an excellent addition to your favorite interior.
What you need to pay attention to before making a chandelier
Many people are interested in how to properly make a chandelier in and other rooms. After all, you want this element of the interior to be not only beautiful, but also functional.
On the one hand, a chandelier is a lighting device that can provide the proper level of lighting in an apartment. After all, a lot depends on the choice of light in the room, including eye safety. On the other hand, I want the ceiling structure to complement the interior design, creating a special atmosphere of warmth and comfort.
When making a chandelier, first of all you need to take into account the height of the ceiling. For example, for low people a chandelier with a bar mount is suitable. So, the ceiling will look visually higher. If the ceilings are high - 3 m or higher, then it is better to opt for a pendant lamp with a hook mount.


Lamp selection
For any room you need to take an individual approach to the intensity of its lighting.
For a small bathroom you will need 80-100 W.
Kitchens require a lamp power of at least 120-150 W.
The living room and hall cannot do without light bulbs in the range of 150-300 W.
The number and power of lamps is calculated based on established standards - 20 W are required per 1 m². electricity. It is also necessary to take into account the parameters of the room, its dimensions and reflective properties.

Designer Edison lamps - look beautiful and unusual
Design of the lampshade
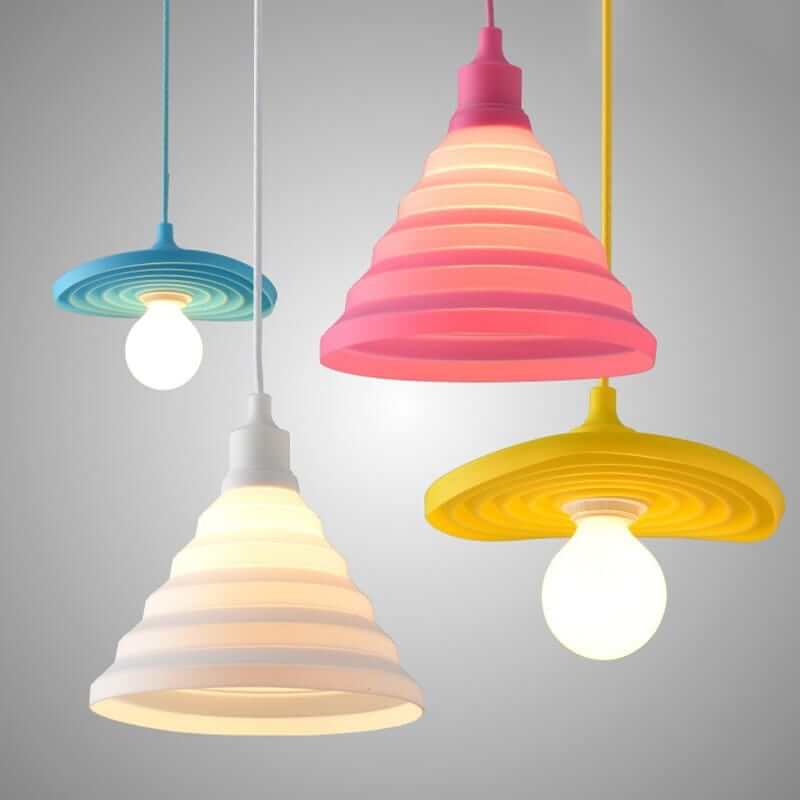
The appearance, decor and design of the lampshade occupies an important place in the design of a chandelier. It is selected to match the interior of the room, depending on the style. Crystal for classics, metal and glass for, wood fits perfectly into country or chalet style, fabric and silk are perfect suits the style Provence
To illuminate a room in several levels, you can additionally make wall sconces or floor lamps.


Step-by-step master class on making
To make a beautiful ceiling decoration, you don't have to start from scratch. Look around, you probably have something in your house that you haven’t used for a long time. And who knows, maybe it will become the main item in production original lamp. Moreover, there are now more than enough ideas and inspiration for creativity on the Internet.
Important! The best place to start looking for the things you need is in the kitchen or balcony. It is there that we store all sorts of rubbish that we once needed so much and which, as often happens, is so difficult to part with later.
Spectacular chandelier made from mugs
No matter how strange it may sound, it is from dishes and other kitchen utensils that the most unusual and interesting models of lamps are obtained. For example, tea mugs are an ideal material to make a spectacular lamp.
For work we will need:
- Mugs
- Saucers
- Drill
- Porcelain drill with special hole

We make it quickly and easily
- In the bottom of the mug, use a drill to make a small hole for the wire, attach the electric cartridge and bring the wire out. It is advisable to seal the hole with a plaster mixture.
- Next, you need to glue the mug to the saucer, where there should also be a hole, insert a light bulb and hang the newly made lamp in the right place.
As you can see the original and fashion design can be obtained from completely ordinary items.


Mesmerizing yarn chandelier
Since this is a fairly simple product, to make it we will need a minimum of things, namely:
- Wire with a cross section of 4-5 mm.
- Wire cutters
- Thin thread
- Multi-colored yarn
Manufacturing instructions:
- A ring is made from wire, the diameter of which will correspond to the future size of our chandelier. To get a perfectly even circle, it can be wound on some object that has a cylindrical shape.
- We bite off the excess wire with wire cutters, leaving a reserve of 2-3 cm on each side. We tie the ends with a thin thread.
- All that remains is to decorate our chandelier beautifully and brightly. To do this, we cut the yarn threads so that the length of each segment is twice the height of the lampshade.
- One by one, we tie the resulting strings onto a knot until we hang them all over the ring. From the same yarn we make a fastening for the hook.
Such a lampshade can be used both as a chandelier and as a decorative element decorating the interior of a room.


By combining the skills of macrame and papier-mâché you can get a stylish chandelier for the bedroom
Important! To make such a lamp, instead of wool yarn, you can use any other thread. The main thing is that it harmoniously fits into your interior.
Unusual lamp made from a teapot
You will learn how to make a chandelier from an ordinary teapot yourself in this master class. Here's what we need for this handmade masterpiece:
- Kettle
- The wire
- Electrochuck
- Metal chain
Step-by-step manufacturing guide
- First of all, the lower part of the teapot is cut out. This is done in such a way that the resulting cutting edge is not sharp, otherwise you could get hurt on it.
- Next, an electric cartridge is fixed to the lid of the kettle, the wire of which is led out through a small hole drilled at the top.
- A chain is attached to the handle of the kettle, and a wire is threaded through the links. The lamp is ready.


Let's breathe new life into bottles
Glass bottles, especially if they have beautiful shapes, can be used to make a wonderful chandelier. Required material:
- Thin rope
- Flammable liquid (alcohol or gasoline)
- Glass bottles (preferably colored)
- Edison lamps (having a beautiful spiral)
- Wire and electric cartridge
Do it yourself
- We wrap a rope around the bottom of the bottle, after wetting it in a flammable liquid. Then we set it on fire and let it burst, and we begin to slowly rotate the bottle around its axis until the rope burns out completely. After this, we lower the bottle into a container with cold water, wrap it in a towel and, with a little effort, break off the bottom.
- To ensure that the cutting edge is not sharp, it must be sanded. To do this, it will be enough to swirl the bottle in sand or fine gravel for a couple of minutes.
- All that remains is to mount the electric socket correctly, stick the wire through the neck, and screw in the light bulb. From the remaining bottles in a similar way the rest of the lampshades are being manufactured.
This chandelier will fit perfectly into any interior, especially if you hang it above the bar counter.


Decor from cans
Lamps made from cans are no less beautiful. They are made in the same way as from bottles. The only difference is that the bottom of the jar does not need to be cut off, since clear glass is usually used for lampshades.
We need:
- Beautiful thick-walled jars (preferably with a relief pattern)
- Hammer and nails
- Wire, electric socket
- Spray paint
- Edison lamp
How to do it right
- To begin with, using a nail and a hammer, holes are punched in a circle in the lid, after which the inside is carefully squeezed out. The diameter of the circle must correspond to the diameter of the base in the cartridge.
- We insert the cartridge into the cover and mount the wire.
- Next, we paint the lid together with the cartridge in the color of our choice. Metallic paint with a golden shimmer will look best.
- All that remains is to screw in the light bulb, close the lid and install the lamp in its proper place.


We all know what a globe is, but not everyone knows what amazing things can be made from it. For example, a cute lampshade for a chandelier that will fit perfectly into the interior of a children's room.
Here's everything we need:
- globe
- Bulb
- Electric chuck with holding element
Step-by-step master class
- Usually the globe structure is not solid, so in order for us to get required element, it is necessary to divide it into equal two parts (hemispheres).
- Next, at the top point of the hemisphere, you need to make a hole for the cartridge. For this, it is best to use a drill with a crown.
- The electric cartridge is installed in place and securely fixed by the retaining element. Congratulations, your chandelier is ready!


Hanging structure made of horns
Making a unique lighting device from deer antlers is quite simple, the main thing is to have the necessary material on hand.
Such designs are famous for their special sophisticated appearance and are best suited for rooms with high ceilings. Such chandeliers are used in many interiors, but they look especially attractive in country, chalet or rustic style.
As a rule, the shades of such chandeliers have various shapes, and only natural material is used for their manufacture.
We will need:
- Antler
- Rope
- Copper wire
- Electrical socket and wire
- Bulb
Make a chandelier like this
- Observing the safety rules, we connect the wire to the electric cartridge according to the diagram.
- Next, the wire needs to be beautifully wrapped with decorative rope. For better fixation, you can use universal transparent glue.
- By using copper wire, in the lower part of the resulting rope, horns are attached, placing them 2 cm above the cartridge.
- We repeat a similar procedure with the remaining lampshades, later combining them into a single composition.


Ideas for making beautiful lamps (photo, video)


We hope that useful tips and the photos presented in the article will help you not only make beautiful lampshades for chandeliers with your own hands, but also save your family budget.
The originality of the interior design of a kitchen, bedroom or any other room can be determined by the presence of even a small accessory, the main thing is that it is rare or exclusive. This could be a homemade photo frame, a candlestick, a table for your phone, floor vase, lamp or chandelier.
There are plenty of options for creating an unusual lamp for the living room or kitchen; you just need to use your imagination and it doesn’t matter if your imagination doesn’t tell you anything. You can use step-by-step instructions for making any model you like by studying the master class. Materials for making an unusual accessory can be found even without leaving your own home.
So, let's begin…

Homemade chandeliers or lamps may differ in materials or manufacturing principles. You can make a chandelier out of anything and you don’t have to go to the nearest shopping mall for this, such materials can be found at home:
- paper;
- threads;
- disks;
- disposable tableware;
- plastic bottles;
- kebab sticks;
- hangers;
- newspapers and glue;
- cardboard;
- felt hats and much more.
The choice of material may depend entirely on your imagination, or the future model of the lamp may depend on the availability of certain materials.

You can make a lamp, chandelier or lampshade in different ways:
- using origami or papier-mâché techniques;
- using carving or embossing;
- by weaving or threading;
- using crocheting or macrame techniques;
- by connecting identical fragments.
The manufacturing technique will directly depend on the material chosen.
Chandelier made from barbecue sticks
Having wooden sticks on hand (ordinary kebab sticks are ideal), organza ribbons and glue, you can make original lampshade with your own hands, which will wonderfully decorate the interior of your kitchen if it is decorated in the appropriate style or has some of its details.

Making such a chandelier for the kitchen at home is not difficult:
- Sticks are laid out around the perimeter of the square and connected with glue. The task is quite painstaking, but excellent results await you. The height of the lampshade will depend on your desire, the height of the ceiling in the room or the amount of material.
- The upper part of the lampshade must be sealed with cut sticks (so that their ends do not protrude), laying them crosswise or parallel, leaving a hole in the middle of the required size for the cartridge.
- After the glue has dried, you can begin decorating the product.
- Multi-colored organza ribbons are tied at the protruding ends of the sticks; you should not skimp on their quantity. Several ribbons can be threaded between the sticks in the corners and in the middle of the product.
- You can hang the lampshade on a hook placed on the ceiling of your kitchen using the same tapes, and secure the socket in it through the hole left.
Cardboard chandelier
You can make an unusual chandelier from simple cardboard, which will become an elegant touch in your interior design.

A short master class will show you how to make it:
- Using a printed stencil, two identical parts with slots for connecting them in the center are cut out and joined into a single whole.
- If the color of the cardboard is not as desired, the parts are painted before assembling the chandelier.
- In order for the chandelier to be firmly assembled, its connection points should be duplicated with wire or strong thread through holes made in advance.
- The chandelier is attached to the ceiling with a chain through which the power cord is threaded.
- The chains and cord are painted to match the chandelier.
- The connection point between the cord and the socket is hidden under a plastic glass, also painted to match the chandelier.
Using the same principle, you can make your own chandelier from plastic or hardboard. It will be much stronger, but cutting out parts with scissors will be quite difficult; it is better to use a jigsaw.
You can decorate such a chandelier with any elements. For example, paint the flames of candles with glitter varnish, decorate the bowls of candlesticks with sequins or lace. Pendants, rhinestones or fabric flowers would also be appropriate.
Lamp made from laser discs
If there are a lot of laser discs left in the house that are a pity to throw away, but they are no longer suitable as storage media, you can use them to make an original chandelier, lampshade or lamp. The design of the accessory will depend only on your imagination, the materials at hand and the number of accumulated disks.


What you need
To make an original lamp from disks, you will need two round wooden boards of different thicknesses, which are slightly larger in diameter than disks, wooden or metal stands. You also need a fluorescent lamp of the required length, a magnetic starter and the disks themselves. Wooden planks can be ordered from a carpenter you know or cut out yourself; racks can be purchased nickel-plated.
How to do
We make a hole in a thick board, install a starter with a switch and connect it to the lamp. Next, disks in the required quantity are strung onto the lamp, racks are installed around the disks and the upper part is attached.
Thus, old media in the form of an original lamp made of disks will serve their owners for a long time.
Chandelier “Birch leaves” made from plastic bottles
A chandelier made in the form of leaves will look quite unusual in any interior. A master class will show you how to make it yourself. It is made from ordinary plastic bottles, the color of which can be chosen at your discretion.

Step by step instructions:
- The bottles are cut into pieces of any size chosen for future leaves.
- Each piece needs to be shaped like a leaf.
- Using a soldering iron with a thick tip and a one-sided bevel, it is necessary to melt the sections of each workpiece so that future leaves look more impressive.
- Also, using the edge of the sting, it is necessary to give the workpiece a leaf structure. This should be done extremely carefully, as you can easily melt a hole in the plastic. A leaf with streaked veins and melted sections will look complete. Since the plastic bottle has a cylindrical shape and when heated the plastic is deformed, as a result the leaves are very impressive.
- A hot needle melts several holes for fastening at the base of each leaf.
- Using thin wire, branches are formed and screwed to a steel wire frame.
If you make a new chandelier in the form of leaves as a lampshade for a floor lamp or table lamp, it will be a harmonious complement to the chandelier that turns the room into a forest.

New life for an old chandelier
Surely, in many living rooms there are still chandeliers that are a pity to throw away, since they are a memory of some person or event.
In order not to throw away an item, you can give an old chandelier a new life:
- First, it should be washed, degreased, plastered and painted.
- Decor for old chandelier You can make it in the form of decoupage, update the cartridges by making them in the form of influxes of candles using hot glue, not forgetting to then tint them.
- You can make original pendants at your discretion from existing beads, buttons and other elements.
How to decorate a chandelier with your own hands (video instructions)
An old chandelier in a new look for a long time hang in its place and please the eyes of its owners.
A DIY chandelier will bring original twist into the design of a kitchen, living room, nursery or any other room and will become a bright, unique accent of even the most unremarkable, ordinary interior.
DIY chandeliers for the kitchen (photo)


Ceiling chandeliers are lighting fixtures that perform two functions simultaneously. Firstly, they are used to organize the main lighting in the room. Secondly, devices are one of the main elements decorative decoration premises.
Numerous manufacturers offer equipment different designs, but it’s not always possible to find something really worthwhile that fits into the overall interior of the room. In other situations, the cost of the chandelier you like may be too high. This is why many people are interested in how to do ceiling lamp with your own hands.
Hand-made products will be unique and original, thanks to them you can express your taste and character. Making such devices yourself is not so easy. The work requires a certain imagination and perseverance. On the other hand, a ceiling chandelier can be created from improvised means and objects that have become trash for you.
Choose any materials for production - wood, plastic, metal or glass. Chandeliers constructed from wine bottles, wooden skewers or straw look very original. Let's summarize: the choice of material for a homemade lamp depends entirely on the imagination and idea that arose in the head of the apartment owner.
Types of lighting fixtures
The final stage of any repair and construction work will be the purchase of lighting fixtures. Often the main one is a ceiling chandelier, installed in the center of the room, provided its geometry is correct. Available on the market a wide range of lamps that differ in design, shape, principle of operation and even the presence/absence of certain structural elements.
Today, all people strive to save money, so it will be important to use a chandelier for energy-saving or LED bulbs. It is advisable to choose products with partially or completely closed shades in which the lamps are hidden. Due to this, you will protect the ceiling structure and be able to protect yourself in the event of a light bulb explosion (the fragments will remain inside the lampshade).
If you still like a chandelier with an open arrangement of bulbs, then inspect it and make sure that after installation the light flux will be directed downward. There is also a simple rule - the simpler the product, the easier the subsequent installation.
Another point that should be taken into account when choosing a chandelier is the purpose of the room and its dimensions. In spacious rooms with high ceilings, volumetric pendant lamps should be installed. For small rooms, saving space is required, so focus on flat (flattened) options.
Conventionally, ceiling chandeliers can be divided into two main types:
- classic hanging;
- flat with placement as close as possible to the ceiling.
And the latter are divided into two subcategories - built-in and overhead. Overhead lampshades are considered the best solution for bathrooms, corridors and kitchen areas. The presence of a separation platform ensures their rapid cooling and high fire and electrical safety.
Recessed luminaires are also called spotlights. They are often installed (more correctly, built in) into furniture, dropped ceilings or arched structures. Manufacturers provide a wide variety of shapes, colors and design solutions for both traditional and flat luminaires.
Finally, in addition to design features the lamps themselves, the type of light sources used is distinguished:
- An incandescent lamp is one of the most common and simple options. The cheapest possible light source. When exposed to mechanical stress, it quickly fails due to the vulnerability of the structure, and burns out relatively quickly (in the case of continuous operation, it can burn out in two or three days).
- An energy-saving fluorescent lamp is one of the best types of housekeepers. The advantages of the product are related to efficiency and long service life. Along with LEDs, it is the most common light source in developed countries.
- An LED lamp is an expensive product, the popularity of which is increasing every year. The efficiency factor exceeds 90%, and in the case of high-quality devices reaches 98%. They are characterized by a longer service life and increased reliability.
An example of a homemade lamp
Let's look at one of the simplest examples of a DIY ceiling lamp.
For production we will need:
- plastic bottle 5 l;
- plastic spoons - their number depends on the size of the bottle that will become the frame;
- quick-drying glue for plastic;
- sharp knife;
- cartridge with wire.
First, prepare a frame from a plastic bottle. Remove any labels from the item, rinse it and dry thoroughly. After this, feel free to cut out the bottom. Cut off all the handles from the plastic spoons, but so that small pieces of 2 cm remain.
Glue the resulting scraps with “scoops” onto the base of the frame made from a plastic bottle. To do this, we just need the remaining pieces of the handles, which need to be poured generously with glue and pressed tightly to the surface (the convex part of the scoop should face outward). Cover the container in a circle until the entire surface is hidden. Ideally, the spoons are placed in a checkerboard pattern and then shifted to ensure a tight fit and no visible areas.
The sockets with wiring can be removed from an old chandelier, then installed and fixed in a new product by pulling it through the neck of the bottle. A decorative bowl can be decorated with the same blanks using glue and placing them on the neck.
To make sure the product is working, at the final stage, screw a light bulb into the lamp and connect it to the power source.
If successful, all that remains is to install the chandelier on the ceiling. For more stylish design
and change colors you can paint plastic spoons. This will increase the originality and attractiveness of the product.
Style selection In addition to the points listed in the first chapter of the article, when choosing a chandelier you need to focus on certain style
. This is also true for those cases when you decide to make the product yourself. Comfort, coziness and how pleasant it will be to be in it depend on the interior created in the room.
The ceiling chandelier is the main element of decor, therefore, with a competent approach, the perception of the environment will improve, but with a careless approach, it will completely deteriorate. As you know, “breaking is not building”, therefore, to ruin the interior, it is enough to choose the wrong style.
Decide in advance on the design of the future lamp. The most common styles for chandeliers are high-tech, modern and Provence.
High tech
This includes products made of glass and metal. Modern appliances fit perfectly into the design of the bedroom and living room. Externally, the chandelier may look chaotic (with a random arrangement of decorative elements). An excellent option for people who want to modernize an apartment or private house, but do not want to make something too complicated. Any errors made during the manufacture of the chandelier may look like an original design solution.
Modern
In accordance with this style, devices are made of glass and wood. The ceiling lamp is characterized by perfectly smooth and clear lines and has the correct geometry.
Provence The most complex design, which is suitable for people who understand the principles of hand-made. Various fabrics, colorful ribbons, beads, and embroidery can be used to decorate a chandelier.
The lamps are delicate and suitable for creating a romantic atmosphere. A Provence style lighting fixture is suitable for decorating any living space.
Installation materials For ceiling mounting
- lamp will require certain materials and tools:
- the lamp itself;
- junction box;
- switches;
- as an alternative - dimmers (rotary toggle switch to adjust brightness, turn on/off a light bulb);
- wires;
- electrical tape;
- indicator (tester);
- pliers;
- connecting blocks.
Ideally, electrical wiring should be laid using connection blocks. If such products are not available, then twist the bare ends of the wires using pliers and hide them under a thick layer of electrical tape. The connections can also be placed under polymer caps. Make sure the wires are tightly wrapped around each other.
When laying the cable, pay attention to the material from which it is made. It is advisable to twist aluminum with aluminum or copper with copper. When two wires come into contact different materials Gradual oxidation will occur, leading to burnout and loss of contact.
Sequence of work
Before installing the ceiling light, determine the phases of the wires. To do this you will need an indicator screwdriver or a special probe. If you attach work surface to the phase conductor, the light bulb will start to glow. Otherwise the wire belongs to zero phase.
Next, you need to determine the phases on the wiring of the lighting fixture. Plug two wires into the outlet, but never touch the third one. If there are several bulbs on the chandelier, then about half of them will light up. Leave any wire in the socket and insert a third one instead of the second one. The second half of the bulbs should light up. Thus, the wire that is constantly in the socket (and when connected in turn with the other two turns on the light bulbs) is the zero phase.
Attach the lamp to the ceiling. To do this, use both a classic hook sticking out from the ceiling and a mounting rail (included in most modern devices). If there is a hook from an old chandelier, it is advisable to dismantle it.
Connecting lamps
If you need to connect a floor lamp or chandelier with a two-core cable, difficulties should not arise at all. Simply connect the ends of this cable to the two ends of the wiring. If the lamp consists of several parts and there are more wires, then they should be twisted correctly in pairs, subsequently connecting to the desired residential electrical wiring in the apartment.
A three-core cable indicates the presence of two normal and one neutral phases. Follow the scheme described above to find the zero phase. After this, connect the device to the house wiring.
Traditionally, the zero phase on the lamp has wires with blue insulation, while the normal phase has brown, black or red insulation. If there are several blue wires, then they need to be connected in pairs, and then connected to the zero phase. Proceed similarly with other colored parts.
Products with four cores are much less common. The latter is intended for grounding and is usually colored yellow-green. It should be screwed to the lamp body using a regular screw. Be sure to insulate all connections.
Any materials can be used to make ceiling lamps with your own hands. The main thing is to choose the style and shape in advance and navigate the installation location. Also, before starting work, it is advisable to draw a sketch of the future product. Everything else is limited to your imagination.
Connecting homemade lighting fixtures is carried out according to the same scheme as purchased ones. Using our instructions, you can easily connect ceiling chandeliers with two, three or even four wires. The main thing is not to forget about safety rules and ensure complete insulation of the wires, excluding short circuits.
The lighting system is an integral attribute of the design of any room. This can be explained by the fact that chandeliers and lamps have an amazing ability to change the environment. Of course, the easiest way is to purchase lamps in a store. But it’s much more pleasant to make them yourself.
Materials that can be used to create chandeliers
What can a chandelier be made from? The answer to this question is: “Yes, from anything.” Make hanging lamp can be from:
- paper;
- thread;
- CDs;
- plastic bottles"
- cardboard;
- natural materials;
- kebab sticks, etc.

Your imagination will help you choose the material. She will also help you choose suitable model. To create a chandelier, you can use techniques such as origami, carving, and embossing. In addition, it is appropriate to use knitting and weaving techniques.


Lamp made from kebab sticks
Let's consider step by step instructions how to make an original chandelier using ordinary kebab sticks.
You will need:
- kebab sticks;
- organza ribbons;
- glue.

It is quite easy to make such a design:
We lay out the sticks so that they form a square and connect them with glue. The height of the chandelier depends on your preferences. But remember that you need to take into account the total amount of material available and the height of the ceiling.

We seal the top of the lamp with cut sticks. They can be laid parallel to each other or crosswise. Don't forget to leave a hole of the appropriate diameter for the cartridge in the central part.
After the glue has dried, we begin to decorate the chandelier. For this purpose, we tie colored organza ribbons at the protruding ends of the sticks. The more of them there are, the more beautiful the lamp will turn out.


We hang the resulting structure on a hook in the ceiling. This can be done using the same ribbons. Next, we fix the cartridge in it. The chandelier is ready!

Bottle chandelier
One of the original ideas for homemade chandeliers is a bottle chandelier. You will need:
- frame of an old chandelier;
- plastic bottles (the color palette can be very different);
- thick steel wire.

Creation instructions:
Cut the bottles. Cut out flowers, animals or geometric shapes from them. Which one to choose depends on your desire.

Attach the cut pieces to the frame of the old ceiling lamp and attach the steel wire. You need to make a “hedgehog” out of it.


To do this, you need to take several wire rods and connect them in the middle using a small piece of wire. Next, you need to cut off the top rod, thereby creating a place for the light bulb.
The last stage is connecting the chandelier to the ceiling. It's not that difficult to do it yourself. This lamp would be appropriate in the hallway or kitchen.

Wooden chandelier
To make a beautiful LED chandelier from wood with your own hands, you need to prepare the following things:
- Wooden planks – 12 pcs. Door frames will fit. It is optimal if they have a length of 0.3 - 0.45 m.
- Glass jars with a volume of 1 l – 6 pcs. They will be used as lampshades.
- Wood paint.
- Self-tapping screws.
- A machine for seaming homemade canned goods.
- White paint.
- Sandpaper.

Creating a wooden chandelier will require the following steps:
- You need to sand the planks using sandpaper.
- Make groove holes for the wire.
- Drill holes for mounting lampshades. To do this, take three planks and make a hole on each side.
- Cover the workpieces with paint that imitates natural wood.
- Assemble the planks using self-tapping screws into a single hexagonal structure.
- Make holes for the cartridge in the central part of the screw caps. Install sockets with LED bulbs.
- Roll up the cans.
- Paint the lids with tone paint, and the jars with light shades of paint. All that remains is to fix the structure to the ceiling.

Cardboard product
A chandelier made of ordinary cardboard can become a very unusual interior decoration. Here is a small master class:
- Using a stencil, cut out two identical pieces. Don't forget to make slots to secure them in the center. Connect the cut out parts.
- If necessary, paint the resulting structure.
- To give greater strength, sew all joints with strong thread or wire.
- Attaching to the ceiling occurs on a chain. The wire runs through them. It is optimal if they are painted to match the lighting fixture.


You can use a variety of things as decoration - glitter varnish, beads, sequins, lace, rhinestones, artificial flower arrangements, beads.

A plastic chandelier is made in the same way. This product will be more durable. But scissors will not be used to make it the best option. It is preferable to use a jigsaw instead.

Today, the popularity of hand-made interior parts is only growing. A handmade chandelier is a reflection of your personality. It will give the whole atmosphere originality and uniqueness.


On the Internet you can easily find not only many different variations of homemade lamps, but also detailed instructions for repairing hand-made chandeliers.

DIY photo of chandeliers


A chandelier is a rather expensive item, but technologically not so complicated. In any case, production processes that could not be carried out at home are almost not required to make a chandelier, or they can be replaced with similar manual ones that visually and reliably give the same effect.
Hobbyists have made and are making many ceiling lamps with their own hands. general lighting(and these are chandeliers), which have no analogues on the market and sometimes have a very extravagant appearance, see, for example, fig. We hope that the reader will not be interested in inventions either. However, unfortunately, in the scattering of images of homemade chandeliers on the Internet, samples that meet the safety and lighting requirements of residential premises are rarely found. More likely, very rarely.

This article discusses, first of all, how to properly make a chandelier yourself technologically and lighting-wise. There is nothing particularly complicated here; this is something like a Molière character who, it turns out, spoke in prose all his life. But it doesn’t hurt to know some basics. Moreover, it is original harmonious design(which is by no means abandoned) also requires a reliable foundation, otherwise how can beauty rest on?
Note: for example, how you can make a chandelier for your living room with your own hands at home, see the video below. In terms of design, it will fit into any interior style that accepts clear forms, and this is a very wide range, from Chinese Mandarin to fusion.
Video: DIY chandelier from scrap materials
Therefore, the subtleties of design and construction of the main lighting equipment and at the same time decorative elements chandeliers – ; frame/support of lamps, which are also important as parts of the overall design -. It would also be a good idea to learn about the general lighting design of residential premises. And in this article we will deal with what is common to all of them, plus the electrical part:
- Lighting technology and design are the very beginning for domestic premises;
- Electrical fittings, mainly from a safety point of view;
- What to make lighting fixtures from, with an emphasis on the possibilities of manufacturing from scrap materials;
- Features of chandeliers for residential premises for various purposes;
- Choosing light sources for a particular chandelier.
Note: to those who doubt why there are any depths here, let it be known - homemade lamps are firmly in the top ten for household electrical injuries, fire hazard and as a cause of vision damage, especially in children.
What should you not be afraid of?
Wood and woodwork. Looking at the curly wood details of chandeliers industrial production, it seems impossible to reproduce them at home. Meanwhile, a completely elaborate wooden chandelier frame can be made in a day or two with your own hands in the kitchen or on the balcony.The fact is that when wood is heated throughout its entire mass to 150-250 degrees, it softens and bends, and when it cools, it retains its given shape. You can heat a piece of wood to this temperature without charring it. construction hairdryer. Just remember to pre-drill the axial holes (say, for wiring an electrical cable); this will not be possible in an already bent part.
Note: The wood that bends most easily when heated is light or medium-density, fine-grained - birch, maple, ash, linden. Bamboo and some types of tropical wood are generally bent when heated to 90-100 degrees by steaming in water vapor. Due to the homogeneity of its structure, MDF bends very well and accurately, but requires more heating.
Finally, quite elegant wooden chandelier can be made from non-bent parts: modern light sources make it possible to implement such a solution. Then the ceiling lamp is made in the form of a ceiling chandelier, see below.
What should you pay attention to?

For old Soviet chandeliers and household lamps in general. The USSR, as we know, was a very controversial phenomenon, which was especially clearly expressed in Soviet consumer goods. If you have an old Soviet-made home chandelier lying around in your closet, then its light-diffusing/light-transmitting parts are probably made of high-quality glass, and its porcelain/earthen decorative parts are made of the same high-quality material. Let 1 “horn” out of 4-5 be broken, the remaining ones will be enough for a new homemade chandelier. Is the paint peeling? Now there are any washes and excellent acrylic enamels on sale. Are some of the pendants lost? From the others, you can also build something very beautiful, if only there was some creativity and taste.
Lighting and vision
About 10 years ago it was measured quite accurately throughput according to information from the optic nerve. It turned out to be 5-6 times less than the amount of information in the picture that the optical system of the eye draws on the retina, and scientists finally had to accept it as a fact: There's something like a video processor lurking somewhere in the eye. Suspicions about its presence arose 200 years ago, because certain visual illusions do not depend in any way on the physical and mental state of the subject. I had to assume, and now I am confident, that the picture that enters the brain is not raw, but somehow processed. From the point of view of lighting technology and the influence of the nature of lighting on health and well-being, this fact is also important: good lamp should provide light that is not only bright enough, but also even, soft, allowing you to clearly distinguish details of different colors and not tiring the eye.
Note: Let us remind the reader that the image on the retina is captured by two types of photoreceptors - rods and cones. The first are the most sensitive, but only perceive general brightness, which is why all cats are gray at night. There are 3 types of cones that perceive separately the red (R), green (G) and blue (B) regions of the color spectrum. Let us also recall that the eye is most sensitive to green rays, somewhat less to red and least to blue.
Spectra of light sources
Light with a continuous spectrum is least tiring for the eye, pos. 1 per pic: all visible details of the object are more or less evenly illuminated. If the spectrum is limited, then those that do not fall into it are simply not visible. The eye processor does not need to “finish” anything, and this is what tires vision most of all and spoils it.

The fact is that in order to “complete” the poorly visible optics of the eye, it must refocus all the time and often, and the photodetecting system must change its accommodation, i.e. general level of sensitivity. This procedure is in some way similar to working out details in Photoshop by normalizing levels and “tightening up” thin curves, but those who know how to do this know: an initially very sluggish picture, if you definitely need to “stretch out” the details, it coarsens to “junk.” And if we are talking about our own vision, the brain eventually begins to understand “junk” as the norm, and accordingly reconfigures the muscles of the eye and the algorithms of the visual processor, which leads to vision disorders.
Unfortunately, of the light sources that meet safety requirements for domestic conditions, only incandescent, conventional and halogen lamps provide a continuous spectrum. Firstly, according to modern requirements, they are uneconomical. Secondly, their spectra are thermal and therefore have a strong slope in the blue region. That is, it is impossible to achieve correct color perception in such lighting.
However, incandescent lamps in household lamps are quite applicable: over millions of years of evolution human eye I’m used to correcting for yellowness myself, and visual disturbances in such lighting are possible only from its insufficient or excessive brightness. As for sodium lamps, which shine only in the yellow region, their light is also harmless to vision, but there is no need to talk about any adequate color perception.
Almost ideal color rendition can be achieved with the minimum possible visual fatigue using a synthetic or additive spectrum, pos. 2. The eye processor does not need to overexert itself: the tops of the R, G and B zones go beyond the optimal illumination level for a given overall brightness, and at their junctions, restoring full detail requires simply adding up partial (private) pictures in the corresponding colors. As a result, the overall white level is almost linear and details of any color are clearly visible, and gray tones blend smoothly into each other.
And again unfortunately: The additive spectrum is provided only by the screens of good cathode ray tubes (picture tubes). They'll get to him slowly but surely fluorescent lamps(housekeepers) with 3-4 layer phosphor, individual samples of LED illuminators and TFT display screens, however, the problem is still far from being completely solved. Therefore, experienced and caring about their vision (which in this case is also the main working tool) graphic designers, photographers and artists working on a computer stubbornly cling to “tube” displays, buying professional ones at exorbitant prices or looking for used ones from not yet dead tube.
Note: Light from sources with an additive spectrum is usually called extremely soft. In nature, the lighting is extremely soft - in the morning with light clouds, when the disk of the Sun is slightly visible through the clouds.
In everyday life, acceptable softness of light can be achieved by sources with an island spectrum, pos. 3. It looks like 3 solid limited ones, but this is the case when quantity turns into quality: having seen 3 zones of primary colors, the eye will definitely try to see what is between them. In the gaps between the islands, something is still visible, albeit at a level of illumination that is significantly less than optimal for a given accommodation. The peaks of the islands are also quite raised upward, but also within acceptable limits.
The island spectrum is provided by most housekeepers and good LED lamps; how to distinguish them immediately upon purchase from, let’s say, not very good ones, see below, in the section on illuminators. It is not advisable to do work that requires eye strain in this light, but you can read/write for 3-4 hours a day.
The island spectrum has 2 important features for household lighting. The first is that it can be significantly softened with the help of light-forming devices, see below. The second is that the “tails” of red and blue do not go into the IR (infrared) and UV (ultraviolet) regions, but decrease to black towards the boundaries of the visible spectrum. Therefore, if details of a certain color are poorly visible in island lighting, increasing the overall brightness will only harm your eyesight. In this case, it is necessary to use local lighting with incandescent lamps or housekeepers/LED lamps of a different color temperature; their spectrum islands will be located differently.
The most harmful spectrum for vision is the line spectrum, pos. 4. In it, firstly, very narrow zones of primary colors do not overlap. Secondly, to create sufficient overall brightness, you have to “raise” the peaks of the lines, especially blue, above the maximum permissible. The light doesn't seem to be very bright, but it hurts the eyes. Everything in general seems to be visible well, but the details are lost somewhere and you can’t see it even if your eyes burst.
This kind of light is called extremely hard. It is provided by cheap LED lamps and certain models of housekeepers with a 1-layer phosphor. There is no way to soften it with light shapers, because... in the gaps between the lines nothing is illuminated at all. With prolonged use of such light, it is possible to develop not only myopia/farsightedness, but also various color vision disorders (the eye processor overexerts itself to no avail, trying to see the invisible), and even retinal detachment.
Electrical fittings
Gross and most often leading to undesirable consequences violation of safety rules in self-production chandelier – hanging them by an electrical cable: its end is passed into the light bulb socket, tied with a knot, and so everything hangs on weight. A chandelier, even the lightest one, must be suspended on a separate rod, rigid or flexible.
Everyone knows the rigid suspension of a chandelier: it is a tube into which the cable is pulled. Traditional flexible suspension - chain; The cable in this case passes through the links. Nowadays there are also special cables for chandeliers on sale; in addition to 3 wires under a common sheath, they also have a durable rope for suspension. It needs to be taken out and attached in 2 places: at the top to the hook and at the bottom to the frame of the chandelier, otherwise the rope may crawl out over time and the chandelier will hang on the wires. When hanging on a separate cord, the cable must be wrapped around it with several turns (and not vice versa!) and the ends of the “snake” secured with tape or, loosely, with soft thread.

Emergency situations with chandeliers most often occur at the point where the wires enter the light bulb socket, so the cartridges also need to be secured to the frame separately. The most convenient for this purpose is the E17 socket for a minion lamp (candle lamp) with a screw clamp for the fastening lamella (shown by the arrow in item 1 of the figure). If the frame is made of tubes, the lamellas are obtained by flattening their ends. Slats made of steel strips 1-1.5 mm thick and 10 mm wide can be attached to a wooden frame with small self-tapping screws.
Cartridges E17 with end clamp (shank), pos. 2, for home handyman less convenient, because The clamp is secured with a pair of nuts, for which you need to cut a thread on the tube. If there is enough space in the chandelier, in this case it is better to use the E27 socket (regular, “plump”) with a side clamp, pos. 4. The clamps can be carefully bent to obtain the desired orientation of the lamps. And finally, in chandeliers with a single bulb, it may be more convenient to use an E17 or E10 (super minion) socket with mounting eyes, pos. 5, but the places where the wires are connected to this should be carefully insulated.
Note: Conventional bakelite cartridges E27 can also be fixed rigidly; for this purpose, there is a special thread in the inlet fittings of their covers. But the same thread must be on the tube to which the cartridge is attached, and there are no hand taps for it on sale.
About installation and connection
A chandelier with a total power of up to 60 W can be powered from the network using a cable with a conductor cross-section of 0.35 square meters. mm; up to 120 W – 0.5 sq. mm; up to 300 W – 0.75 sq. mm. Use a 3-core, double insulated cable. A “ground” (yellow with a longitudinal green stripe) wire is connected to the neutral wire of the network, and to those coming from the switches of the chandelier sections phase wires– the remaining 2.
Note: It is unacceptable to look for a phase using a control light and flicking switches! You need to use a phase indicator!
Connecting the wires to the terminal blocks of the lamp sockets and generally wiring the chandelier is done below step by step in the following order:
- Using a phase indicator, they make sure that there is no voltage on the wires and no one can accidentally flip the switch. To do this, their levers can be temporarily sealed with tape.
- From the ceiling ends of the cable, a makeshift cable with conductors of a cross-section no smaller than the standard one is laid to the floor.
- They strip the ends of the standard wires of the chandelier and connect its common input to the temporary structure. Don't forget to insulate the connections!
- Disassemble the cartridge.
- Insert the end of the cable into the cartridge cover through the standard hole.
- Place a lock washer on it to prevent accidental removal from the cartridge. As a last resort, tie the cable in a knot.
- Seal the bare ends of the wires into the terminals. Stranded wires before sealing, they are twisted and, preferably, tinned so that the exposed veins do not cause a short circuit (short circuit),
- Insert the terminal block into the cover, placing it with the recesses on the corresponding protrusions in it.
- Check if there is a small loop of cable under the cover and if it is pulled out.
- Holding the terminal block so that it does not come off, screw the cartridge body onto the cover.
- Upon completion of installation of the sections, screw in the lamps and check by turning on the corresponding lamps. switch, whether they burn smoothly.
- The switches are again blocked from accidental activation and the temporary shed is removed.
- , connect its input to the ceiling ends.
- Check: it lights up evenly, does not blink - installation is complete, you can use it.
Lighting fixtures
The light fittings of a chandelier (light-shaping system), firstly, direct the light in the appropriate manner for a given type of room. Secondly, it softens it by reducing the surface brightness of the illuminator. And for light sources with an island spectrum, another favorable circumstance appears.
In school and even general university courses in optics, in order not to confuse students too much, it is believed that when light is scattered, reflected and refracted, its frequency remains unchanged; this makes it possible to clearly deduce their basic laws. In fact, there are no absolutely linear media, and a certain fraction of light quanta in these processes is re-emitted, due to which it changes its frequency and, consequently, color. That is, the “tails” of the spectral islands receive a small brightness “feed”, which facilitates the work of the eye processor; this amounts to additional softening of the light.
Workflows
The lighting fixtures of household lamps mainly use diffuse reflection and scattering of light. Mirror reflection is of little use, because does not itself reduce surface brightness or soften light. Refraction in transparent media is widely used: crystal pendants not only provide a pleasant play of light, but also significantly soften it without significant losses luminous flux. And finally, in some cases, for example. In lampshades made of threads, a noticeable amount of diffraction takes place in the formation of the light flux.

Note: In general, you need to be more careful with diffraction and shadows. The light in the room on the left in the figure can cause nervous breakdown and for an adult, and the prickly rays from the lamp on the right there will not benefit vision in any way. Here the circumstance occurs that at the peaks of the diffraction pattern the light intensity can be much higher than on the primary emitting surface.
Forming elements and systems
Softening light and forming its required radiation pattern (DP), see below, using refraction in transparent media and/or specular/total internal reflection requires large quantity such optical acts: in each of them the light loss is small, but the degree of conversion of the light flux is also small, because Transparent media are transparent because their nonlinearity manifests itself to an insignificant degree. Traditionally, this requires many refractive elements with high optical properties; therefore, expensive or available occasionally. Now plastics come to the rescue of amateur craftsmen: original chandelier on refraction and re-reflection it can be made entirely from waste material, see below. The appearance of such chandeliers is “airy”; service life – 1-3 years.
If you don’t have crystal pendants at your disposal, you will have to use scattering and diffuse reflection. Light loss will be greater, but in this case it is possible to make do with available materials: it is enough to obtain only 1-3% of nonlinear optical acts in the entire lighting system. An ordinary lux meter with a set of light filters does not capture such a number of “left” quanta, but it is enough for the illumination of the gaps between the islands of the spectrum to rise above the “bottom” of the accommodation range and for the eye to work without overwork.
Light formers based on diffuse optical processes are based on 3 elements: a lampshade, a lampshade and a diffuse reflector. Lamp, pos. 1 in Fig. – a cap made of frosted glass or a material similar in optical properties. Light can come out of it only after undergoing scattering. For the further formation of the luminous flux, the optical properties of the room have no or very little significance.

Lampshade, pos. 2, part of the primary light is released outside without conversion; not necessarily down. Softening of the primary light spot is achieved by illuminating it with diffused light reflected from the walls and ceiling, therefore the optical properties of the room in this case are significant. They become decisive for the diffuse reflector, pos. 3, however, this lighting system, by changing the degree of transparency of the reflector(s), their size, configuration and location, allows the formation of different patterns.
Chandelier lighting systems are built, as a rule, by combining elementary shapers. For example, at pos. 4 – a well-known chandelier made of stepped concentric lampshades, complemented by a small almost flat shade. At first glance, the light loss in it should be large, but remember: to illuminate a school gym with an area of approx. 400 sq. m and with a ceiling height of under 6 m, there were enough uneconomical incandescent lamps for a total power of 800-1200 W.
Among the new lighting systems, chandeliers-shades stand out, pos. 3. They are named so because they are both lighting and architectural ceiling lamps, see photo. The essence of this type of optics is that in the trap chamber the primary quanta experience multiple reflections and the light comes out greatly softened.

Materials for lighting systems
About purchased chandelier elements made of glass or special plastics, you can note that:
- The glass you need to choose is mirrored, colorless or pure white.
- For any light sources, except incandescent lamps, it is better to take optical parts that are not frosted from the surface, but in the mass, the so-called. milky, desired degree of transparency.
- It is undesirable to use acrylic computer disks in lighting systems: the translucent metal layer in them only uselessly absorbs light, and the almost completely transparent and colorless optical acrylic does not significantly transform the light flux.
Good homemade chandeliers are made from PET food bottles. The refractive index and transparency of PET (polyethylene terephthalate) are quite high, which makes it possible to achieve significant light softening with little light loss. PET bottles are available in various color shades and are translucent, thanks to which a chandelier can be built on the basis of both refraction and transformation, as well as diffuse processes.
In addition to being cheap and accessible, a significant advantage of PET is the ease of processing at home and, in in capable hands, good decorative qualities. For example, how to make flowers from bottles, see the master class at the link: //www.youtube.com/watch?v=8TXXoiTLhVA
Floral decor will not only decorate the chandelier, but also, thanks to an increase in the number of refractive surfaces, will significantly improve its lighting technology. Other options for optically useful and beautiful decor from plastic bottles, but we will leave them for the article about lampshades.
Other plastics for chandeliers with economy lamps are also suitable as reflectors. For them you need to take the material as white as possible and slightly rough or with a satin gloss. Translucent parts made from household plastics are not very good, because... The filler most often used is chalk or talc with coloring additives. The light loss in these will be large, and the softening of the light will only be due to a drop in surface brightness. It is preferable to use propylene, because PVC quickly turns yellow and becomes brittle when exposed to light.
The second one is very good and available material for the optical system of the chandelier - paper. If the lamp is LED, then a chandelier made of paper with it will last for several years: the paper turns yellow and loses light transmission from heat and exposure to UV, which LED lamps provide almost or none at all.

The light transmission of the paper components of the chandelier is selected by choosing a material of appropriate density, from 20 to 220 g/sq. m. The reflective properties of modern writing paper are almost impeccable: they are simply not produced with a whiteness coefficient below 0.8-0.85. By the way, some cunning manufacturers operate with whiteness coefficients of 1.05 and even 1.15. By what measurement technique they arrive at super-unit values of a value that, in principle, cannot be more than 1, who knows. But from the point of view of physics, this is a funny absurdity: I put such a leaf in front of the mirror, between them - solar battery, once you shine a flashlight, here you have a perpetual motion machine of the second kind. Or a fertile topic of discussion on technomystic forums. What's wrong with that? If KB>1, then the leaf of light and, accordingly, its energy emits more than it receives.
Note: The bulb of a 60 W incandescent lamp can heat up to more than 100 degrees Celsius. Therefore, for chandeliers with shades, lampshades and reflectors made of plastic, fabric, textiles and threads, you need to use incandescent lamps of no more than 40 W, and halogen lamps - up to 15-20 W.
Video: master class on making a chandelier from rope or thread
Chandelier in the room
The main types of DN for lighting domestic premises are shown in Fig. The cardioid is formed by a lampshade; this is light for small bedrooms, children's rooms, and hallways. The gap at the top is formed by the shadow of the base. A children's chandelier should be equipped with a spherical shade that diffuses light strongly, but without excessive light loss. Particularly soft and, highly desirable, shadow-free lighting in the nursery is necessary so as not to harm the not yet strong vision. Therefore, it is best to make the shade of a children's chandelier from paper, and avoid refractive materials for it.

A figure-of-eight pattern is obtained using several diffuse reflectors and a well-whitened ceiling, for example. plasterboard. Such light is necessary in a fairly large living room with free space in the center, an office and other rooms where areas are illuminated by local light sources.
A fan pattern is produced by a simple lampshade, while a petal pattern is the same, directed with the aperture (bell) upward. Petal lamps are typical for sconces, which are not entirely in theme here, but chandeliers with fan lamps are suitable for a small living room with dining table in the center or in the kitchen. Especially for the latter: light promotes the deposition of vapors of organic substances and their bituminization in the liquid phase, so there is no need to particularly illuminate the ceiling here; it would be better to let the potential soot go into the hood.
Note: the most uniform illumination of the floor area with minimum consumption electricity for lighting is provided by the so-called. cosecant-square DN. However, it is achieved with the help of very complex lighting devices; the walls and ceiling need to be illuminated separately. Mainly used for lighting large production premises, open areas, sports facilities, etc.
Chandelier lamps

Not all manufacturers of household lighting lamps provide their spectral characteristics on their websites and in specifications, so sellers most often do not know them. As for economy lamps, it’s easier for an ignorant buyer: the spectrum is unknown - We take the color temperature to 4300 K. In the worst case, we get a continuous limited spectrum. It won’t let you see a color postcard or an illustration in a book in all its glory, but it won’t harm your eyesight. Visually, this light is almost white with a slight yellowish tint. The standard electrical power of such lamps is 1.8-3.4 W per 1 sq. m illuminated area depending on the configuration and overall tone of the room design.
Note: phytolamps for shelves with flowers, greenhouses/greenhouses and aquariums cannot be used for general lighting. Their spectrum is sharply linear; it is useful for plants for photosynthesis, but not for human vision.
LED lamps are selected, firstly, for a color temperature of 2800-3300 K, yellowish. Whites, as a rule, have a linear spectrum, which is immediately noticeable: their light hurts the eyes even in a well-lit, naturally-lit trading floor. Based on visible design features, you should choose globe lamps with a matte bulb and a deep shank, pos. 1 in Fig. If you like the “corn” lamp, then you need to be guided by the following signs of poses. 2:
- The LED assembly must be covered with a translucent bulb; this first of all guarantees the durability of the lamp. “Naked corn”, with luminous structures under a protective film, is sensitive to dirt and external influences in general.
- The number of individual emitting structures should be at least 15-20.
- "Head of cabbage", i.e. the shell-holder of the radiating structures must be transparent. In combination with prev. condition it will give large quantity re-reflections inside the bulb, greater uniformity of the primary light and better possibilities for shaping the luminous flux.

In order not to “fall” into the line spectrum, you should also avoid imitations of globes and “corn” in the form of light bulbs with a transparent bulb sitting directly on the base, and a small amount radiating structures, pos. 3. Illumination from them in small room and visually it will be uneven, and the spectrum is most often lined. Also, LED directional lamps, pos. 4. They are intended for auxiliary/service lighting and are harmful to the eyes if used for a long time.