List of materials and equipment for installing PVC windows. How to fix the window: Overview of fastening hardware and photo report on the installed mounting fasteners for installation of PVC windows
Not long ago, metal-plastic windows were considered a certain "elite" element of the house or apartment, affordable very few wealthy owners. Today the situation has changed - these window systems have become not so expensive and switched to the category widely used almost all average families. They greatly benefit from wooden and in the degree of insulation, and on noise insulation, and by According to the dragon of all elements, which becomes a reliable obstacle for drafts and street dust. Yes, and just externally, such windows are very pretty and easily discharged into any design of the house and its premises.
In short, and during the construction of new housing, and during repairs, the issue is almost always solvable in favor of the installation of such. Companies, large and small engaged in their assembly are currently a great set in almost all regions of the country. Large firms in the price of their windows immediately laid and their installation - with large volumes of production, they can afford it. But it is often possible to meet small private enterprises that require a separate fee for the installation - and this is about 2.5 ÷ 3.0 thousand rubles for the current times. It is clear that the thought immediately arises - is it difficult to install the plastic window with their own hands? Would you not save on this by spending an independent installation?
It turns out that it is quite feasible. The main thing is to understand well in the process technology and immediately prepare the necessary consumables. Well, of course, when installing, it is necessary to show increased accuracy, strictly follow the installation instructions.
The main steps of the installation of the plastic window
Must be carried out in a clear sequence. This technology has already sustained the "time test", and adjustments to it will be inexpedient.
- First of all, the necessary promresses are conducted, an order is made on the window structure.
- After the window is made and delivered, dismantling the old frames, cleaning the opening, its adjustment - if there is a need for it.
- The next step is to prepare a new window to install. It may vary - depending on the selected way to install the window, which will be described below.
- The most important stage is the correct installation of the window in the opening, its level alignment and horizontal with leaving the required gaps, and fastening to the walls.
- Next, sealing seams between the frame and the opening, the provision of hydro and vaporizolescence.
- The next step is to install the casting outside and the windowsill indoors.
- The final adjustment of the window mechanisms is carried out, the installation of the required fittings.
- When finishes are made in the room - window slopes are installed.
Now about the main stages - with all the details.
Two main ways of fastening plastic windows
Before you take for independent work, you need to figure out a bit in theory.
- First, it is impossible to be taken for mounting the window to someone who does not exactly represent its device. For a start, look at the window outside:

1 - Window frame collected from PVC profile.
2 - The window opening is open, also made of a special profile. It can be opened in several planes, for example, be swivel-folding. It is suspended to the frame by means of special fittings that allow you to perform accurate adjustment of the position of the sash.
3 - The central stand is an impost, separating the overall plane of the entire window into two or more parts. Production material is the same frame profile.
4 - installed in the opening sash or directly into frame profile (with the "deaf" part of the window) double glass. It may be single-chamber (two glasses) or two-chamber (3 glasses).
5 - Furniture elements. In this case, the handle of the opening sash is shown.
6 - PVC window sill, which is usually ordered, acquire and installed simultaneously with the window itself.
Now let's look at the same window in the context (a through numbering is applied to convenience, that is, with the coincidence of the position with the top drawing, their numbers are saved):

- frame profile (pos. 1) has several air chambers (usually from 3 to 5 ÷ 6) - than them are more, the higher the thermal insulation quality of the window system. Profiles are counted along the horizontal line towards the street to the room. In this case, the figure is a three-chamber profile.
- Inside the profile is a reinforcing metal profile (pos. 7). This element etcotea t. T rebuilding rigidity frame design.
- The sash profile is also arranged approximately as well. The number of chambers is usually the same as on the frame, the reinforcing metallic element is also placed inside (pos. 8)
- Double-glazed windows in the frame or in the window sash is held by the strokes (pos. 9).
- The diagram additionally shows the window slope from the PVC panel. Pos. 10 - starting profile, pos. eleven - PVC Panel, pos. 12 - also made of PVC.
Of course, the windows of various manufacturers can have their own characteristic features, differ shape of the cross section of profiles and reinforcement, the number of aircases, the design of the glass package, but still typical scheme It remains the same.
In more detail about, and how to properly approach the choice of its optimal model, told in a special publication of our portal.
- Secondly, it is necessary to determine the method of fastening the window in the opening. In practice, two main approaches are applied - installation directly through the frame with dowels or anchor attachments, or installation by means of pre-fixed on the bracket window (anchor plates).

BUT. In the first case (in the figure - left), the frame is drilled through, coaxially the hole is made in it and in the wall. The fastening element of the aircraft is mounted through the frame, is delayed, and its head will then hidden the installed double-glazed window or covered with a sash.
The advantages of this method:
- The window in the opening is set much more accurate.
- The strength of fastening the entire window system is higher, so this approach is the only possible for large sizes of windows (2000 and more mm on any of the parties), or where high external loads are assumed (especially windy places, high floors, etc.)
Disadvantages:
- The window requires a mandatory disassembly - the removal of the strokes and double-glazed windows, opening the flaps. For an inexperienced master this is an extra problem.Since when dismantling the strokes, it is easy to scratch or even bend, and the removed double-glazed winding t lists a particularly careful relationship. For the need to disassembly, this method is often called the installation with unpacking the window.
- The disorder of the integrity of the profile (drilling it through) reduces its thermal insulation qualities, and under certain conditions can provoke.
- Similar installation takes more time.
B. Installation on anchor plates or other brackets, reinforced on the end part of the window PVC frame. After setting the window to the right position in the opening, these platinum are attached to dowels or anchors to the wall (schematically on the top figure shows the right). The connection and further decoration of the slopes will hide them out of sight.

Advantages:
- This installation is carried out easier and faster, especially if regular anchor plates are used, which are tightly included in the grooves intended for them on the ends of the profile.

- The integrity of the profile is not disturbed - there is no need to drill it through.
- There is no mandatory need to disassemble the window - you can install it in the mounted form. (Because of this, this method is sometimes referred to as "without unpacking"). True, this advantage can be called very conditional, immediately for several reasons. First, most often the windows are delivered from the manufacturer in disassembled form. Secondly, mount the window assembly, with installed double-glazed windows, especially on the high floor - is very difficult and dangerous due to its large mass. And thirdly, the filling of the remaining gaps outside, ensuring outside waterproofing and low-rise installation is more convenient to carry out with completely removed double-glazed windows.
DisadvantageIn principle, one, which has already been mentioned - on the strength of the installation, on the resistance of a large window by weight and wind loads, this method is significantly inferior.
Conducting measurements
Immediately appropriate to make one very important remark. The owners of the apartment, one way or another, will have to go to the firm that manufactures windows to make an order. The situation will be optimal when the manufacturer's representative comes and independently will conduct all the necessary measurements. First, a specialist in this business is much more experience, and the probability of error will be minimal. Measurers, as a rule, are already familiar with all typical buildings, and they are much easier to deal with the nuances of window openings. And secondly, if suddenly it happens that the window made for some reason suddenly will not meet the way, then all liability will fall on employees of the company, and the customer will have the right to demand the manufacture of the correct window design.
 Measures most often - free service
 Very often in serious companies, the outrocity is included in the price of the order and is not additionally paid, so it is not necessary to crush my head.
If you still have decided and measure yourself, you should first figure out the window opening configuration.

- IN panel high-rise buildings Most often occluding openings with a quarter - a monolithic side on both sides and on top of the proof forming such way External slopes (in the figure - left).
- IN brick houses Usually there are no quarters - the opening is formed by straight planes, perpendicular to the wall (in the picture - right).
Measures of different openings have their own characteristics.
Measurement of the window opening with a quarter
When the window is measured with a quarter, it takes into account that from both vertical sides, and on top of the window frame should be on a quarter of 15 ÷ 25 mm, and it should still be a gap to fill it with the mounting foam.

So, the measurement is made as follows:
- Outside in several places (from above, in the center, bottom) strictly horizontally measured the distance BUT between opposite slopes. Given the fact that the window should enter them by 15 ÷ 25 mm, 30 ÷ 50 mm is added to the resulting distance. So pre-receive the tread width of the window.

Now measurements are made inside. The width of the opening is determined FROM In the widest point, at the wall level (the same, horizontally in several places - for control). Do not be confused INwhich shows the distance between the slopes at the frame itself - this indicator in this case does not have any determining value.
Now you can compare the pre-width of the desired window with the width of the opening. Each of the sides of the sides should remain at least 20 mm on the sealing of the mounting foam. It is possible to correct the ordered width, since there is a specific range of the window of the window to a quarter.
- Now about the height of the window. The ride on the upper quarter remains the same. Under quarter usually, It does not happen in the openings, since the windowsill and external tump are installed here. To install them, it is necessary to use the installation profile under the window frame. Most often, manufacturers are mounted in the process of completing the order, but it never interferes.
 Important design element - wildcard profile
 So, how to measure and calculate the height of the window:

Measurements are made outside - from more than a quarter to a point where the tilt is under the tilt (if it is worth it) concerns the outer corner of the opening ( F.).
15 ÷ 25 mm is added to this magnitude - this is the occasion of the frame on the upper quarter. Now you need to take 30 mm - this is the height of the installation profile. Under it should also remain a gap for sealing - from 5 to 20 mm. They are also deducted from the resulting value. As a result, the desired window height should be obtained.
Promresses are made to control inside - from the top point of the opening to the windowsill ( E.), and then you need to try to measure the distance from upper The surface of the windowsill before the "naked" opening (sometimes it makes sense to remove the windowsill in general, as it will still be changed soon). The resulting height of the opening will allow you to control the correctness of the calculations - the height of the window + wildcard + not less 20 mm from above and 5 ÷ 20 mm below for sealing by mounting foam.
Note - If you do not plan to install a wildcard profile (which in itself is already a serious disadvantage), then the gap between the frame and the opening is left below not less than 40 mm.
Immediately you can make measurements to order the windowsill, low tide and slopes.
- Length is equal to the distance between the quarters (a) plus 50 mm. The width is the distance from the window to the edge of the opening plus 20 ÷ 30 mm.
- Length of the window sill - Maximum width of the opening ( FROM) Plus 50 mm. The width is usually standardized, and the option is selected for specific conditions, taking into account the distance from the frame to the corner between the opening and inner wall Plus the desired distance of the windowsill outside (usually another 30 ÷ 50 mm).
Measurement of direct opening, without a quarter.
With simple direct opening, measurements and calculations will be much easier.
 Measurement for direct opening is much easier.
 The opening is measured vertically and horizontally in a few point, in the widest places (in the scheme - but).
- The width of the window will be equal to the distance of the minus two magnitudes of the mounting gap FROM. It, as before, we take 20 mm, that is, as a result, we subtract 40 mm.
- The height of the window is determined by the difference in the height of the opening, the assembly gap from above (20 mm) and the thickness of the installation profile (30 mm) and the 10 mm clearance under it. If the profile is not put, then the mounted clearance is from the bottom - 40 mm. Total, the total height of the opening is subtracted 60 mm.
Otherwise, measurements remain the same as when the window with a quarter.
If the measurements are done, you can send the order. But again not too much It will repeat - it is better to still call the measurement to the house so that he should take into account all possible nuances, for example, a small skew of the opening, which arose due to the shrinkage of the building.
Preparation of tools and consumables
While the window will be manufactured, it makes sense to make preparation for further work. It is necessary to prepare the tool and consumables for installation.
Of the tools and materials you will need:
 | Perforator with a set of drills (6, 8 and 10 mm) and chop-blowing blades |  | Screwdriver with a set of bits |
|---|---|---|---|
 | Drill 10.2 mm for metal |  | Screwdriver Set |
 | Roulette |  | Building level, better than 300 mm long |
 | Construction knife |  | Pencil for marking |
 | Rubber hammer or special plastic, for PVC-windows |  | Spatula, width of 50 ÷ 60 mm |
 | PVC cutting hacksaw |  | Handsman on a tree |
 | Anchor plates - if the method of fastening "without unpacking" or combined |  | The clogged dowel nails, Ø6 mm - for anchor plates or Ø10 mm - when fastening through the frame. |
 | Metal frame dowels (anchors) Ø 10 mm | 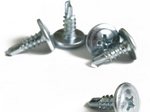 | Self-timber 4 × 16 and 4 × 25 |
 | Pre-compressed self-seeping sealing tape (psyl) |  | Thermo-vaporized tape PPE, best - foil |
 | Parry-permeable diffuse ribbon |  | Foam assembly and gun for its application |
 | Silicone sealant - should have enough small tube. |  | Wedges to exhibit the window. You can use specialized plastic or limited to wooden. |
The table requires explanation:
I.First of allWe deal with the number of points to the reposition. It depends on the size and design of the window. There are certain norms that provide reliable fixation of the window system. Below is a scheme of approximate placement of points to the reposition. Presented three very common Option - Window with an impost, a completely deaf window and a balcony unit.

In all three cases, the main values \u200b\u200bappear BUT, IN and FROM.
BUT - Distance Ot inner corner window Rama to points to repay. Mandatory from the angle are placed two points, and vertically, and horizontally. The value A is taken equal to 150 to 180 mm.
IN - Maximum distance between adjacent points on one side of the frame. It is assumed to be:
- For the "white" windows of PVC - no more than 700 mm.
- For windows made by their color PVC profiles - 600 mm.
FROM - The distance from the impost to the attachment point to the side of the larger along the sash area (if two broad sashs are the same, then it is better to install fasteners on both sides). The magnitude of this distance is from 120 to 180 mm.
Having in front of the eyes such a scheme and knowing the linear dimensions of the window of the ordered window, it is easy to calculate the required quantity of fasteners. It is advisable to even immediately draw the scheme of the arrangement of points to the reposition - it will be a good help when carrying out work.
II. What type of fasteners will be required? It depends on the wall material and on the method of fastening the window in the opening.
If the method of fastening "with unpacking" is used, that is, through the frame, they take metal, frame dowels (anchors) or dowel-nails with a diameter of 10 mm. At the same time, anchors are advisable to apply on concrete, brick (full or void brick), ceramzite concrete, foam concrete walls or folded from natural natural stone. Dowel nails are preferable on the walls made of materials that do not differ from the high degree of compressive strength, for example, from light concrete or other porous materials. They are suitable for void blocks and bricks.
In the case when the installation on the anchor plates will be applied, it will be enough for each point of fastening two dowel-nail diameter 6 or 8 mm. In addition, the plates themselves will need - and gain them better in the same organization that manufactures the window - special hooks on the plate must accurately approach the PVC profile. To mount the plate, in addition, they will need self-tapping screws with a drilling edge of 4 × 25 mm - one piece for each point of attachment.
The length of the main fasteners should be such that, taking into account the thickness of the frame and the width of the assembly enlightenment, it was provided with minimal shutoff in the walls of the wall. For various wall materials, it has its own amount - see the table:
Little 4 × 16 self-tapping screws may be needed to attach low tide and auxiliary elements to install the windowsill. They are also needed if it is assumed from the outside of the window to install a mosquito net - plastic brackets are attached to the frame profile.
- The psyral tape is purchased with the calculation to have enough for the entire perimeter of the window. It is installed with such a calculation to seal the gap between the window and the adjacent quarter - on the sides and on top. And below it will be attached when installing an external popular. If the window opening is without quarters, then, accordingly, the tapes will need less.
- PPE tape with foil - it will be necessary to completely isolate the perimeter of the window from the inside.
- Parotypes Diffuse membrane tape - covers the bottom side of the window outside when emmery With a quarter, and it is desirable to sneak it around the perimeter if the opening is straight, without a quarter.
- Mounting foam: the optimal option is to purchase cylinders with "pro" - foam, for the use of which will also need a special pistol. It does not give a "inadequate" expansion, as cheap, implemented in the pulverizers, and will not have a deformal impact on the frame rack. In addition, it is much better, more durable, apply it in required places - It is much easier, without excessive overrun.
- Finally, silicone sealant. It may be needed for sealing narrow slots between the frame and the windowsill or slopes. With the correct installation of the slot if they are, then very minor, that is large number Sealant will not need.
And finally prudantive The owner will acquire a film, which will close furniture objects, walls, the floor in the room where the window installation will be carried out - the work will initially have enough dusty.
Dismantling of the old window
After the window is made and delivered to the place of work, you can move on. It is clear that before putting a new PVC window, it is necessary to dismantle the old and release the opening. This work is rather dirty and time-consuming, but without it can not do. Approximate sequence of actions - in the table below:
| Miniature | Description of operations performed |
|---|---|
 | First of all, the largest flaps are filmed. For example, if a balcony unit is dismantled, the door is removed. There is an important nuance - to remove the sash or doors together with the glasses only if the design has saved its rigidity. If the window "plays" or hardly rotted, then for reasons of elementary safety, glass is pre-removed and taken out. |
 | All dismantled parts are recommended to immediately carry out of the work area - a great risk accidentally break the old window glass and get injured. |
 | If the window side has a window, then first remove it. If you failed to unscrew the old fasteners of the loops (and most often it turns out), then you have to make an effort - usually enough for the fortage to take off. |
 | The windows are usually suspended on the hinges, with which they can be removed by simply lifting on the bottom of the mount. |
 | All windows and windows are removed - you can move to the dismantling of the frame. |
 | Initially, the central stand is removed - the impost. To make it easier to do, imports repaid closer to the bottom of the frame. I need to cut with a hacksaw - on some Master's videos will be protected by the fact that they are used for this "Bulgarian". Repeat for them - in no case should not - it is extremely dangerous! |
 | The reperished impost itself becomes a lever that will not make much difficulty break out of the frame. |
 | Next, the lower jumper of the frame is removed. Again, for the convenience of dismantling it is advisable to fill, using an electrolybiz for this. |
 | Using a mount or a nailstode as a lever, one of the half is twisted upwards. |
 | If there is resistance at its fastening with a vertical rack, then you can help yourself |
 | After that, it is similar to the second half. |
 | After removing the lower jumper, the windowsill dismantle. It can be born with a hammer from the street. |
 | The windowsill is removed and exposes the lower plane of the window opening. |
 | Go to the vertical rack. Often it is tightly explined from above and below. Then it is better to move somewhat from the wall, and also fill the logs. |
 | Alternately pull out two halves of the rack no longer will |
 | The upper part of the frame on one side is no longer based on anything, and must move away without any problems. |
 | The last vertical frame stand should also be resistant if it is pretty posed by mounting. Sometimes in order to get to the gap between the frames of the frame M of the wall, it is necessary to perturb the punching slopes. |
 | The last stage is the purification of the liberated window opening from the old seal, construction trash, etc. Cleaning is done very carefully so that the windows remain completely clean before installing the window. Ingoda makes sense to use hard brushes and vacuum cleaners. All the garbage is loaded into the bags and immediately removes the work area. |
Sometimes you have to resort to the adjustment of the opening - the removal of defects of concrete casting, residual solutions, etc. Perform this is the easiest perforator, installing a chisel blade on it. It is also advisable immediately at the place of the future installation of the window sill to be subtred in the wall on both sides, small grooves, width and a depth of about 50 mm and a height of about 30.

After cleaning the dust, it would not be necessary to be lazy and walk along the whole layer - this will strengthen the surface to a certain extent, and improve adhesion with the mounting foam.
Preparation of a new window to install
BUT. If you plan to install the window "with unpacking", then it is advisable in the design, the order specifically will be brought in a disassembled form (and most often it happens). If not, you will have to disassemble yourself.
- Initially, the strokes are removed from the deaf sash. They can be fascinated by a stupid side of the knife or a spatula, ranging from the center. Then, when the first lumen appeared, it is expanding with the neat movement of the tool into one and the other side.
 The main thing is to carefully pose a patch in the center
 The stroke should get out of the engagement in the groove and separate in the lock part. Then it will remain to start your fingers under it and gently separate over the entire length. It is advisable to numbered a strap - so that there is no confusion during the reverse order. But it is better to make a pencil with a pencil with an inside - with PVC surface, the pencil trail is very hard rubbed.
- Extracting. It is more convenient to perform this with a special sucker, but if it is not, then you can do it. Carefully - the double-glazed windows are heavy and can have sharp edges - it is better to work in gloves.

Please note that plastic liners can be located under the windows. Their position will need to somehow note that when installing they stood at the same place.
Prices for a popular line of windows
Video: How to extract double-glazed windows from PVC window
- From the opening flap of double-glazed windows, it is not necessary to get it - it is enough to remove the sash itself. Perform it quite easily. To begin with, the handle of the sash is transferred to the "closed" position - it looks down. On both hinges, with the top and bottom, removes decorative casing - it should be easily reduced with a thin screwdriver. Then go to the upper loop. It has an axial vertical pin, a slightly protruding outward. It is deemed down, and then or neatly knocked up using a thin screwdriver (the diameter of it should be less than the diameter of the pin), or stretch, picing the pliers.

After that, the handle of the sash is transferred to the "open" position. The door leans on itself, and then removed the forward movement up from the bottom axis. Removed sash, as well as dismantled double-glazed windows, are temporarily removed from the working area to accidentally damage at further operations.
Video: How the PVC window is removed
- The next step in preparation is the drill holes for fastening the window in the opening. For this, according to the previously composed scheme for placing points to the reposition, the centers of the holes are scheduled and slightly. In the cartridge drill, the perforator (switched on an unstressed action) or the screwdriver is inserted by the metal Ø 10.2 mm.

Drilling is better to carry out the outer side of the frame. In this case, the drill, quickly passing the PVC layer, immediately, without skew, rests on the reinforcing profile. After it is passed, one non-essential barrier remains in the form of the inner PVC surface frame. If you change the direction of drilling hole, then it is much more difficult to achieve its perpendicularity and evenness of the edges.
- The presence of a wildcard profile is checked. It is attached to a conventional lock connection from below, entering the frames of the frame part. If there is no reason for some reason, it is advisable to purchase it and install it. Most often, additional fastening It does not require. Experienced masters advise in advance, about a day before the window mounting, fill the cavities of this profile by mounting foam so that it does not become a "weak link" in the thermal insulation of the entire window system.

- A protective coating is removed from the outer side. If this is not done right away, then to separate the film that visited the sun at least a little, it will be quite difficult. And in general - to shoot outside the protective coating after installing the window will be difficult. FROM inner Remove this coating can be later.
If a mosquito mesh is standing on the window, now the brackets are then mounted. They are installed on a screw of 2 × 16 mm, screwing to the PVC profile.

The placement of them should be so that it does not interfere with the window to the upper quarter of the opening, and to ensure that the mesh is reliable, as well as the installation and removal of its forward movement upwards to the upper brackets.
- The last preparatory step in this case is the gluing of the pips-ribbons in three sides of the window, in those areas where the frame will be pressed to the quarters of the opening.

Usually, the psyms are placed with such a calculation so that there is a gap of about 3 ÷ 5 mm between its internal facing the window to the window and the edge of the quarter.
B. If the windows are installed on the anchor plates, the preparation process will have its own characteristics.
- First, the declaration of a deaf sash can not be done - it will be enough to remove the opening. True, it has already been said about it, the installation is somewhat complicated due to the large mass of the window.
- Secondly, anchor plates are installed in the intended mounting points. They have gear or smooth hooks that must be perfectly coincided with the grooves on the outer part of the frame profile. It is enough to attach a moderate force, for example, having hanged by mounting hammer - and they will fall into place.
 Installation of anchor plate in the profile groove ...
 In the center there is a hole through which they are fixed to the profile with a sampentine 4 × 25 mm - it, passing through the reinforcing metal profile, reliably hold the plate in the installed place. The plates are fixed perpendicular to the frame, and then bend them in such a way that they are installed during installation in the window opole.
 ... and fixing it with a self-tapping screw
 At the point itself, on his slopes, in those places to which the plates will have, in advance the perforator can be done in-deployment. Purpose - walk to the wall material, beating unreliable plaster layer (if it is), and make it easier for itself further work on finishing the slopes - the plates will not interfere with this. However, a similar operation, especially when installing the window in the "naked" opening, is not obligatory - all this can then be closed.
The remaining actions of the software on reproduced - do not differ from those kothose stated above.
Installation and mounting windows in emmery
Very neat, with compliance with all precautionary measures and, possibly, additional insurance from overturning the frame outward, it is set in the window opening. If we open with the quarters, the frame must go tightly through the glued pips.

The next most important task - very accurately put the frame in vertical and horizontal planes, and the main tool becomes a construction level. You can give one good advice - to temporarily secure the window about the center from above on the anchor plate - the degree of freedom to be preserved, and it will work much easier.

The level is set on the inner plane of the bottom jumper - that's why the tool is preferable dLother 300 mm. The absence of a row of the vertical frame is tested with the application of the level from the room to the impost and to the side stands.

Wooden or plastic wedges are used to ensure the necessary gaps from all sides and the correctness of the frame location.

Plastic, of course, is preferable, and if you can buy them, it will be the ideal option. They "work in a pair", engaging one after the other through small teeth. Moving (hacking) them one Regarding the other, you can set the desired height with an accuracy of the lea millimeter.
Of course, it is possible to do well and wooden wedges or linings, but often it requires their trimming, replacement, setting several pieces of "pyramid", and the like.
Wedges must separate the window so that you can move to its attachment in the opening.
When installing fasteners by the "with unpacking" method, experienced masters often practice hardening the wall in the wall right through the drilled channels in the frame profile. It is quite acceptable, but only if the installer is 100% sure and as a wall, and the power of the tool, and the hardness of your hand. It happens that the punch of the perforator is bumping into the obstacle, the beating begins, which, if you do not hold it, can turn the neat opening in PVC PR.
 Drilling holes right through the frame - the case is quite dangerous
 If there are some doubts about this account, it is better for the perforator to gently schedule the centers of the holes, then remove the frame, and then take for drilling. True, it will have to reassemble the window to the previous position and expose it, but it will already be done with drilled holes.
 Anchor driving in the prepared nest ...
 The anchor is introduced into the hole directly through the frame, bubbles with a hammer to a complete immersion, and then twisted, but without a "fanatical" effort so that the head does not deform the PVC profile. If a dowel-nails are used, the plastic part is inserted first, and then the touch nail is neatly driven.
 ... followed by tightening
 Fastener heads decorated with special plugs, for loyalty slightly smearing them from the bottom of the drop of silicone sealant.

When installing the window on the anchor plates, the process is even easier. They finally attached the desired bending so that they firmly fit to the surface of the window opening. Right through their holes, holes in the wall Ø 6 mm are drilled, in which the dowel-nails are installed and clogged.
 Window installed according to the "without unpacking" method
 The standards define the two fasteners on the plate, although, judging by numerous photos on the Internet, many masters are limited to one. It is probably still with two - reliable, and they are not expensive at all. However, sometimes the twist of the plate bending simply does not allow you to install two dowels.
Sealing gaps
After the window is securely fixed in the opening, you can move to the sealing of gaps between it and the opening, the installation of the windowsill and low tide.
Important note - in the case when the installer decided to save ( absolutely unjustified) Apply an inexpensive "household" mounting foam, you must first assemble the window - the installation of flaps and double-glazed windows. The fact is that such a foam has a very significant expansion effort capable of leading even to light deformation - the deflection inside the frame profile. And even minor curvature can entail difficulties with the installation of a double-glazing or closing of the sash, it means that the window is necessary before moving to give "regular" rigidity.

Filling the openings of the qualitative "professional" foam of such consequences will not entail. With the help of a gun having a long and convenient mouthpiece, filling down up. In no case should not remain inland cavities - the foam should be evenly and tight. The residual expansion of it is insignificant, which allows economically controlling its consumption. Special attention - narrow cavities, for example, under the stage profile.

While the window in a disassembled state, nothing prevents to control the filling of the opening of foam and outside, if necessary, contributes certain adjustments. This is especially important if opening Does not have quarters.
If the width of the lumen between the frame and opening is more than 20 mm, it is likely that the foam will have to fill in two clips, with a pause between them at 2 ÷ 3 hours. The quality of filling from it will only win.
Installation is a great insulation, but very vulnerable. It must be preferred from sunlight, and from excessive humidity. It should be done immediately after it completely freezes (about a day), and excess will be cut off.
If a opening It does not have quarters, it is not worth tightening with the device of external slopes, which must completely hide the frozen foam layer from the direct hit of ultraviolet rays. Solutions here can be different, for example, locking Or closing with panels.

But in any case, it is recommended to cover the diffuse membrane outside the foam from the outside - it is necessary to ensure the free output of water vapors into the atmosphere, without allowing the penetration of moisture from the outside. Moisture, if they accumulate in the thickness of the insulation, during freezing and expansion is capable of destructive effects.

And from the inside, the other tape is used - PPE, which has both hydro and vapor barrier qualities. It will not allow from the inside to the direct fall into the layer of insulation, nor the penetration of steam. In addition, the foil layer facing the room is another line of reliable thermal insulation.
Installing the window sill and low
BUT. The installation of the windowsill can be carried out in different ways. So, they are mounted on glue or mounting foam, on special brackets or same via homemade fastenersMade, for example, from direct suspensions, which are commonly used with galvanized sheetwall profiles.

Ideally, the windowsill in its foundation should enter a special groove for it on a wildcard profile. Sometimes the frame structure itself implies the presence of a special quarter, calculated precisely for pairing with the plane of the window sill. If it is not, then then the panel can be thrown under the frame profile, exposing from the bottom for a dense adjacent to it.
To easier to figure out, the approximate scheme is given. right mounting Window sill and lowbow. Pay attention to the location film membranes.

Consider the option to install the windowsill on the mounting foam, as one of the most common.
- Cligs are exhibited under the panel of the window sill (again - better adjustable plastic), with a step of 400 ÷ 500 mm. The panel itself is manifested in the exact size, often, taking into account a small blowout in the wall on both sides. You can cut the windowsill with a shallow tooth.
- Then, adjusting the height of the wedges, achieve the panel inserted into the nest intended for it on the frame or stage profile, is occupied precisely horizontal position.
- Now the windowsill must be loaded so that when filling the foam space under it, it has not shifted from the established position. Load can be given by setting on the windowsill evenly along the entire length, for example, water tanks.

- The space under under the ending between the wedges is completely filled with the mounting foam. She will be I. thermal insulatorAnd will act as glue.
- It will be possible to remove the load only after full foam hardening.

- If a small gap remained between the frame and the windowsill, it is neatly closed with a white silicone sealant.
B. The following is to install a low-rise outside. The approximate scheme is shown in the figure.

The location of the fastening is already covered parpural The membrane that completely closed the mounting foam. On the plane of the opening, it is recommended to smoke the strip of the psyl - the casting at an angle will rely on it, which will create another barrier from the penetration of moisture from the street.
The sump itself is attached to the wildcard profile with Samors 4 × 16, with a step of 100 ÷ 150 mm. It can be mounted in a laying, and then there is a sense of the prone to sow its edge with silicone sealant. But even better, if its curved edge goes from below into a special groove of the stage profile - then afraid of the penetration of the rainwater, it is not necessary at all.
Just like the windowsill, the sump makes sense to somewhat deepen the wall plane on both sides, hollowing for this groove. They will then easily close the plaster.
Final build window
When the installation of the main elements is complete, you must bring the window in fully working state.
- The glass windows are inserted into place, using those plastic linings that were originally stood. According to the numbering, mounted on the place of the stroke. This is the most convenient to do with a special rubber or plastic hammer. Strapkik should sit down exactly along the entire length - straightness, audible click and lack of cracking will tell that he clearly took his position.

- The filmed flaps are installed in place - how to do it, it was already told and shown above. After installation, the performance of the mechanism of opening and closing the sash in all modes and the density of its adjustment to the frame is immediately checked.
- If necessary, accurate (how to do it is in a special article of the portal). If there is no need in adjustment, the loops are closed with decorative casing.
In fact, installing the window is completed. Only the question of installation remained unexplored - but this topic is already a topic for a separate consideration, which is also paid to the pages of our portal.
In conclusion - detailed video instruction Metal installation plastic windows. Read, see, evaluate your strength to make a decision - will the installation of the plastic window, do it yourself, or yet it makes sense to ask for help from experts?
Video: Instructions for self-installing PVC windows
September 26, 2016
Specialization: Master in the construction of plasterboard structures, finishing work and laying flooring. Installation of door and window blocks, finishing of facades, installation of electricians, plumbing and heating - for all types of work I can give detailed consultation.
Today I will tell about a special fastener for window and door structures, which builders call the window or frame anchor. This type of product is different from other options for a variety of features, and to choose the best option, you need to figure out in some nuances.
I will tell you what types there are products, how they are arranged and what to pay attention to when choosing. We will also deal with how to install.
Types of products and their features
For some reason, all overviews on the network are written only about one embodiment. Meanwhile, two types of structures are used, which differ significantly on the principle of action and design. We will understand first of all with this aspect.
Type 1 - Classic Window Anchor
To begin with, we will deal with their design, all components of the product are painted under the photo and drawing:

- The steel cutting sleeve is made of galvanized steel, on it in the upper part there are protrusions that prevent the fastening of the element when it is fastened, and the lower groove is made in which a special nut. When tightening the sleeve expands and thereby achieved the robust fixation of the anchor in the surface;
- The threaded screw is inserted into the sleeve, thanks to it and the fastener is made. The head is made under the PZ3 slot, which allows you to work and powerful power tools. Length can be different depending on the size of the fastener you are;
- The nut of a special conical shape is screwed to the screw, it has special protrusions that are inserted into the incision of the bushings. When tightening the nut pulls up to the hat and crushes the sleeve until it reliably fix the anchor.
Type 2 - window anchor for hollow structures
If you need to fix windows in the structures in which there are emptiness, the classic option may not be suitable, you need an improved solution that will provide solid fixation in both hollow and solid bases. We will deal with the design features:

- The bushing is distinguished by the fact that the cuts in the lower part are not located at the very end, but with an indentation from it. It turns out the system as in the butterfly dowels, when the protrusions are moved when fixing, which can be perfectly fixed fasteners and in the hollow material. The photo is clearly visible and the principle of action of this version of the anchors is clearly clear;
- The stud is used as the same as in the version above with the only difference that it can be longer the threaded part. It is necessary in order to tighten the anchor to the maximum strong fixation of the fastener in the emptiness;
- The nut in this case is not a cone-shaped form, but flat, as it should not paint the sleeve, but pull it away.
After you have determined what type of products is best suited in your situation, you can proceed directly to the choice of a particular option. It is from this aspect that we will begin consideration.
Criteria for selecting window anchor
To begin with, we should deal with product size sizes, there are two main options:
- Anchor with a diameter of 8 mm, suitable for small weight designs and can have the following length: 72, 92, 112, 132, 152 and 172 mm. Length is selected depending on the thickness of the frame and the distance to the base. Remember one simple rule - the minimum depth of fixing in the slope should not be less than 30 mm, only can be guaranteed reliable mounting;
- Products with a diameter of 10 mm are more in demand due to its strength and reliability. In this case, the size range is much wider, the length can be from 52 to 202 mm, so as not to paint all the characteristics and options, the table below is presented in which all data indicate that only may be needed during calculations.

When you were determined with the size, you can acquire need optionBut there are a lot of products on the market, and not all of them meet the requirements of reliability and durability. Therefore, it is worth choosing anchor very carefully, the quality of installation of windows is largely dependent. The table below shows the main criteria, considering which you exactly choose a qualitative option.
| Technical parameter | What to pay attention to when choosing window anchors |
| Material of manufacture | Good fasteners are always made of steel, it provides maximum reliability. But I met the options in which the screw and nut are made of powder metal, which is not distinguished by reliability. You can distinguish poor-quality goods by weight: powder elements are very lungs, while steel is much heavier |
| Quality of coating | Many believe that once anchor for plastic windows is not visible after installation, then they do not need to cover very high demands. In fact, this is not the case, the outer surface should be reliably protected by a zinc layer, it eliminates the emergence due to high humidity and extends the fastener service life. Yes, and a serious manufacturer will never allow the sale of an infraced coating |
| Reliability of the sleeve | As you could understand from the materials outlined above, it is the sleeve that is responsible for the strength of the confusion of anchor, because it is drunk when twisting. To ensure reliable installation, the thickness of the bush should be at least 0.8 mm, if you see that this item is too thin, then it is better to search another option |
Personally, I always define the reliability of the product quality: a good coating, a clear slot for a screwdriver and a tightly located spacer nut - a sign of a good anchor. In addition, you can take the middle of the sleeve and squeeze it with your fingers, if it succumbes, it means that its thickness is too small.

The price of products varies depending on the size, so an anchor with a diameter of 8 mm will cost you from 6 to 12 rubles, and the elements with a diameter of 10 mm cost from 5 to 14 rubles. These are averages and they may differ in some regions.
How to install
I will briefly tell you how to fasten the window with the help of anchors, the process is easy if you figure it out. The instructions for carrying out work with their own hands looks like this:

- First you need to prepare the opening. If there were old structures in it, they should naturally remove them, after which it is possible to clean the surfaces and, if necessary, close significant irregularities that may be formed when dismantling;
- From the window frame you need to remove the sash, if it is deaf, then the glass windas should be removed. This, firstly, simplifies the work due to a decrease in the mass of the product, and secondly, we will not be able to hold the window without removing the elements, so it is necessary to release the side racks from the inside of the window in any case. The frame is set up by the level, the wedges or bars are led by it if necessary;

- Next, it is necessary to place the fasteners, they usually range at a distance of 30 cm from the upper and from the lower angle, that is, on the middle window of enough four fasteners. For large designs, the number of anchors need to be increased. The frame is drilled by a metal drill with a diameter of 8 or 10 mm depending on the selected anchors, under the hat are made by the drill with a diameter of 16 mm, so that the fastener was worked out, and not fraud on the side;

- Through the holes in the frame, you need to drill and the base, you do not need to remove the window, as it is already exhibited, and there is no point in doing work twice. Gently insert the drill on the concrete until it stops into the slope, then perform a drilling to the depth you descend, which should be at least 30 m, although it is better if the anchor is 40 and more. For loose bases depth can be up to 100 mm;

- Before installing, turn the anchor until it stops, that is, tighten the screw into the nut until it rides in the sleeve (it should not break it). Next, you need to insert fasteners into the hole, most often it goes very tightly, and manually plot it is unlikely to succeed. Therefore, you should take the hammer and carefully score fasteners until it stops or until the hat is rolled into the frame, do not overdo it and do not move the design;

- Lastly, the anchor for PVC windows is tightened with a screwdriver with a pz3 stall or a screwdriver with an appropriate nozzle. Again, you do not need to cry very much, spend the work evenly throughout the perimeter, otherwise the design can shift, and you will have to let go fasteners in one place and tighten into another to alignment.
To hide the attachment sites when buying anchors for windows, purchase and special plugs under the color of the frames.

Output
Anchor is ideal for any solid foundations, especially they are good on narrow slopes, where the other fastener simply does not fit. The video in this article will show the installation process using frame anchors clearly, and if you still have questions about the topic, then write them in the comments at the bottom of the page.
September 26, 2016.If you want to express your gratitude, add clarification or objection to ask the author - add a comment or tell me thanks!
There are several ways to install plastic windows. Anchor plates for PVC windows are used quite often, they can be attached differently. Each method has certain positive parties, but not devoid of flaws. We will illustrate them by providing the reader to choose the one-acceptable option for it, since it is impossible to offer a universal solution.
Mounting difficulties
The fastening of the frame by anchors, although it may seem like a simple occupation, can actually cause many negative consequences, especially if the installation will conduct a non-professional. Before deciding whether you need such a mount, you should carefully study possible consequences Errors when working.
- In this case, the frame is attached using anchor bolts. In order to make such a mount, it will be necessary to drill the frame. The disadvantage of such actions can be immediately called the depressurization of the windows chambers.
- Another problem can be a freezing of the structure, as the reinforcement of the system is disturbed when drumming. If the double-glazed windows are freeze, you will encounter an excessive moisture indoor, and mold may appear on the slopes.
- Installation should conduct an experienced master, since with inaccurate work plastic design can stretch out. If the frame geometry is broken, it will be difficult or not at all can be returned to normal.
However, despite all the cons, this method of fastening has an important dignity: the window will be securely fixed, and it will be possible to dismantle it, only thoroughly disassemble from the inside. The installation takes a little time, does not require alignment, as it happens with foam, after the installation is completed, the design is immediately ready for use. The connection is considered as reliable and durable. The bolts and plates themselves are inexpensive and sold in all building stores.
Types of mounting windows
How to mount on the plates?
Anchor plates for helping to make the design of the construction of the construction rapid and easy. One of important advantages is the lack of need to pull out the glass windows. The profile system will not be drummed, and therefore it will be possible to avoid problems that occur when the frame drilling. Double-glazed windows are not deposited, the design will not lose stiffness, it will not start wrapping. The risk of skewed frame is completely absent. However, it is also impossible to name the way perfect: one of the important deficiencies is not attractive appearanceSince part of the mount after installation will be noticeable. 
Council: anchor plate can be hidden under the slopes if it is competently installed and disguised with its overhead elements.
A second significant disadvantage is an increased load on the design with a frequent opening of the sash. The window can quickly fail, which is why experts are recommended to be attached to this way only the deaf design.
Other methods for fastening the plastic window
There is a method in which several methods of fastening the frame are combined, in this case, some of the drawbacks of both the methods listed above can be avoided. In the combined method, the upper part of the frame is attached to the anchor plates for windows, and the bottom is fixed by anchors. This avoids the frames of the frame when opening, as well as adjust it in height.
 Fastening plates with a window on a self-tapping screw
 How is the installation of windows on an anchor plate?
Mounting plates for PVC windows are available different, so before installing you need to choose the right one. There are only two types of structures: universal, suitable for any window frames, and special, which are manufactured for non-standard windows. Such elements have special ears, with which they can be fixed with self-stakes, putting in a groove window profile. The universal plate does not have ears and fastened with bolts.
Council: For mounting, you need to choose a bolts of 4.5x25 mm. Pay attention to the sting, it should have a car for metal, otherwise drilled the design will be hard.
 Attachment on the anchor
 Sequence of work when installing the window on the anchor plates
If you use standard windows, then about 5 anchor plates will be required. One of them will be located in the center of the frame, the rest are placed by retreating from the angle of about 20 cm. When installing, it is not necessary to shoot double glazing or pull out the strokes: the plates will be attached to the outside of the window opening, fasteners in this case are made through.
 Installation places anchor plates on the window
 Council: If the design has a large size, for example, exceeds 4 square meters. m, it should not be attached to the plates, as the window will have a big mass. You can use a dowel compound that can be combined with anchor plates.
The position of the plates on the wall is placed in advance so that the fastening was better, in the wall chops are knocked out for the plate. To fall into the recess, the fastener should be tight, not speaking out of its limits. After mounting the design of the slit, it is recommended to fill in the mounting foam: it will help to avoid drafts, as well as secure the window.
Output: Plates Mounting for PVC windows – fast I. convenient way Fastening, although not deprived of flaws. With a competent approach, it will become an affordable and fast solution for reliable mounting of the window structure.
Reading time: 10 min.
Plastic windows have several advantages over wooden counterparts, so they gained wide popularity. An important aspect proper Installation The window is the choice of technology and the consolidation system. Fasteners for plastic windows is responsible for noise insulating properties and duration of operation.
Types of fasteners for mounting plastic windows
There are several types of fasteners for plastic windows. Each of them has several advantages and disadvantages, which determine the feasibility of use in each concrete case. They are divided into the following types:
- Anchor dowel. The most rationally use fastener with a diameter of 10 mm. Hardware provides reliable fixation of the frame. The length of the dowels depends on the place of installation and features of the walls.
- Nog. He got distribution in Europe, in domestic stores it is difficult to find high-quality fasteners.
- Anchor plates. Each type variety is equipped with fastening plates of a certain type, but there are universal models. Sometimes the plates are not screwed into the frame, but snap.

Earlier, screws on a tree were used to install windows, but such a system has a low reliability indicator. Their only advantage is low cost, but on the installation window should not be saved. The choice of fasteners for windows should be based on the characteristics of the system and the level of the masters.
Anchor or anchor dowel

Mounting windows Anchor to install PVC-windows perform professionals. Structurally, the device consists of three parts: the inner sleeve, threaded screw and sleeve. The movement of the screw over the thread leads to the expansion of the sleeve of the sleeve, so that the fastener provides a high degree of reliability. In some cases, the considerable force of fixation refers to the shortcomings, since it is very difficult to dismantle such a system: reinstalling windows or their replacement will require serious physical and time costs. In addition, the installation should be engaged in an experienced specialist.
An anchor dowel is not suitable for use in apartments with multi-layer walls. The strut will not be able to gain, and the device will fall. The walls of the P-44 panel houses have an air layer with a thick insulation, to fasten the frame by an anchor in such a wall is impossible.
Dowel dimensions are different, but experts prefer devices with a length of 10-20 cm and a thickness of 0.8-1 cm. The size of the size is based on the distance from the frame to the slope. Anchor is mounted in the inner cavity of the system right below the glass. As a rule, the frame has a thickness of 40 mm, the minimum length of penetration into the wall should also be at least 40 mm, from these calculations it is necessary to repel when buying hardware. Optimal option - 110-160 mm.
Beething or screw on concrete

It is a standard screw, which provides less reliable fastening than in the previous case, but it is easy to dismantle if necessary. The minus of the product is the complexity of the installation in insulated walls. The fastening of the plastic window with impudent is used if the window opening is made of concrete or brick.
The size is selected by the same principle as the size of the anchor dowel. The most rational solution will be the purchase of a screw with a thickness of 8 mm and a length of at least 100 mm.
Anchor plates

Disputes about this type of fasteners do not subside over for many years, but leading windows manufacturers refused screws and dowels in favor of plates. The product is two types: non-reflective and swivel (the long section changes the angle of inclination). Installation technology is characterized by simplicate and speed of implementation: the plate is fastened on the end side of the window, and the second edge is fixed to the wall with a simple dowel of plastic. The benefits of the method include the following:
- lack of need for end-to-end framework;
- if the wall is present in the wall or another obstacle, then the product is easily rotated at the desired angle, the second hole is not necessary to drill;
- this is one of the few fastening options that are suitable for fixing in the walls of the P-44 series.
Many home masters claim that such a system is unreliable because it is not able to withstand a serious wind load, but this assumption is erroneously. About 90% of the total load falls on the mounting foam. When using another type of insulation ( mineral wool Or foamflast) should be preferred to screws and dowels.
Dimensional row includes various options. As in previous cases, 10-20 cm will be sufficient, but in order to save items, the plates of 12-13 cm are preferred. Specialists recommend ordering the fastener with the window, which will be a guarantee of quality and reliability of fixation.
Basic Methods Mounting Window

Before starting the installation of the plastic window, it is necessary to deal with its structural elements and consider the features of the PVC system. Depending on the manufacturer, the products are distinguished by the configuration of reinforcement, a cross-sectional form, the number of aircases, the design of the glass package. Depending on these indicators, the installation method is selected. Two options are available: fixing plastic windows with anchor plates and dowels through the frame.
IN lately There were new developments that replace wooden and plastic counterparts, their installation has a number of distinctive nuances. Fastening for mounting soft windows consists of a chamfer, a swivel bracket, a strap from silicone and a French castle.
With the application of the plate
After leveling the design relative to the opening, the plate or brackets are attached to the frame and the wall. In the future, they will hide behind the windowsill and finishing finish. Positive method qualities:
- simplicity and high installation speed, which is especially noticeable when using the standard type anchor plates - these devices are included in special grooves on the profile end;
- there is no need to drill the frame;
- suitable for fastening plastic windows in a wooden house;
- fixing the window is carried out without prior disassembly;
- the lack of holes ensures the tightness and preservation of thermal insulation properties.

By resistance to wind and weighing loads, the method is inferior to the first. Therefore, the installation of windows on the upper floors of the apartment building is carried out using dowels and other types of anchor mounts.
Installation of the window frame on the anchor
In this case, the frame is drilled through. The hole in the frame should coincide on the axis with the hole in the wall. The fastener is inserted into the frame and is delayed, its upper part is hidden behind the double-glazed room or a suitable sash. The benefits of this method include the following factors:
- high installation accuracy;
- reliability of consolidation.
Significant disadvantages:
- Installation of the system requires a mandatory disassembly: you need to dismantle the glass and the strokes. These are unnecessary problems for the wizard without experience and skills.
- Due to drilling holes in the frame, thermal insulation properties are reduced. During circumstances, it provokes a fogging window.
The main steps of installing the window
Installation of the window consists of several consecutive stages. Each of them needs to be approached as responsibly, given the recommendations of specialists. The process begins with measurements, and ends with the installation of the windowsill and finishing of the opening of plastic slopes.
Conducting measurements

First of all, it is necessary to contact the company for the production and implementation of windows. Ideally must come a specialist who will independently determine the size of plastic windows. It will be a guarantee of high quality and proper manufacturing. In case of errors, all the wines will be assigned to it, so the company compensates for the damage. Serious organizations The cost of measurement of the opening is included in the price of products.
The calculation is carried out taking into account the configuration of the place where the metal-plastic design will be installed. The windows of the window with a quarter assumes that from two vertical sides, and on top of the frame drank on a quarter, that is, 15-25 mm, the clearance is taken into account under the installation foam. Sizes are removed as follows:
- From the bottom, on top and the center, the distance between the opposite surfaces of the slopes is measured. It should be noted that the window must be in them at least 15 mm, so 40 mm is added to the result obtained. This indicator allows you to determine the width of the future product.
- The edge of the framework remains the same. As a rule, openings do not have a lower quarter, because the windowsill and external tump are mounted in its place. Their installation requires a special profile.
Measures outside are produced from the upper quarter to the point where the tilt is tilt towards exterior corner Opera. 20 mm is added to this value and the height of the profile is taken, and the sealing clearance must be taken into account.
Meet the straight window without a quarter to do much easier. The opening is measured horizontally and vertically in the widest places. The height is the difference in the size of the opening, the upper mounting clearance and the profile thickness along with its gap. Without profile, the magnitude of the installation clearance will be 40 mm. The total value is the height of the opening minus 60 mm.
You can determine the width of the window with a simple mathematical formula. The indicator consists of the difference in the widest point of the opening and two sizes of the mounting gap (on average 20 mm).
Preparation of tools and consumables

The manufacture of the window will take at least 3 days. At this time, you can prepare the tools and the necessary auxiliary materials. The speed and quality of work depends on this. For installation you will need:
- perforator;
- screwdriver;
- screwdrivers;
- roulette;
- building level;
- drill for metal;
- rubberized hammer;
- putty knife;
- pencil or pen;
- hacksaws on wood and metal;
- anchor plates, dowel-nails;
- self-tapping screws;
- sealing tape;
- thermal insulation;
- mounting foam;
- silicone-based sealant.
The kit may vary depending on the configuration and features of the product. The cost of these materials and tools is significant, therefore it makes sense to use the services of a competent master.
Dismantling of the old window

After preparatory activities, you can move directly to work. This process begins with dismantling the old window frame with glass. It is performed in the following sequence:
- The most dimensional flaps are removed, glass is previously removed.
- Footages are dismantled from the panels, sometimes without use of force make it difficult.
- The windows are removed from the loops by mounting (you need to lift).
- To dismantle the frame, you should start from the central rack, it is repaired in the middle of a hacksaw.
- All parts of the design are easily removed by mounting and nail.
- After that, go to the windowsill. If he does not succumb to, it can be fiered from the street.
- Side racks are repaired, and the top is removed without difficulty.
Window opening should be cleaned of garbage and dust. If necessary, the shortcomings of concrete casting are adjusted, get rid of the residue of the solution, etc. For this, the perforator is used. With it, you can make grooves for the future window sill.
Preparation of windows and components for installation

If the "with unpacking" installation is selected, then you need to specify the company in advance with the design to be sent in a disassembled form. Otherwise, the disassembly needs to be performed independently. To secure the PVC window, you need to do the holes for fasteners. The diameter of the drill is 10.2 mm, the device is inserted into a screwdriver or a perforator (without shock mode).

A protective coating is removed from the outer surface of the frame. If you plan to install a mosquito net, then it needs to prepare brackets. The elements are mounted on the self-tapping screws right in the PVC profile. In the places of the joint of the fourth openings with the frame gluits psyl-tape.
Installation using anchor plates has a number of distinctive features. A deaf sash can not be disassembled enough to do it with opening parts. Of course, it will negatively affect the convenience of mounting, since the weight of the design will be impressive. Plates are applied to the outlined fixation points. They are equipped with hooks, ideally coinciding with the elements of the profile on the frame. For reliable fixation, the place of consolidation can be milded with a soft hammer to a characteristic click, applying moderate power.

In the center of each plate there is a hole, the screw is robbed to fix with the profile. The plates are installed at a right angle to the frame profile, after which it is flexing so as to ensure a dense adjacent to the impact.
Fixation of the window frame in the opening
The quality of the plastic window fastening in the opening depends on the correct location. Align the design in the horizontal and vertical plane can be using building level. Adjusting tilt is performed by special plastic or wood wedges.

Installation according to the method "with unpacking" involves doing the holes through the finished channels in the frame. This technology is actively applied in practice, but for this the master must have experience. If the perforator stages an obstacle, it will lead to a beyon that will cause the PVC profile damage. For safety, the perforator is scheduled for the centers of future holes, dismantle the frame and move to a full-fledged drilling.
The anchor is inserted into the hole through the cavity of the frame, boils until it stops and screws up, and the force must be moderate, otherwise the head will damage the surface of the frame. When using a dowel-nail, the plastic element is inserted primarily, and only after that the nail of the spacer type is driven. The head is lubricated with silicone sealant and closes with a plug.

Installation using anchor plates is much easier. The main thing is that they feel tightly to the way, for this you need to set the necessary bending. Holes are done in the wall right through them. The mounting system is fixed with a dowel-nail.

Repellation of gaps and device moisture protection
After fixing the frame and the remaining parts of the window should be installed before fantasticing gaps. Since foam expands, light design May be deformed, which will lead to difficulties when assembling.
Then the bottle is inserted into a special pistol with a thin and long tip. Repeadation is taken from bottom to the uniform and dense layer. It is impossible to save on the foam. If the clearance thickness is more than 20 mm, then the filling of space is carried out in two passages, between them kept the pause of 2-3 hours. This approach is a guarantee of qualitative performance. Mounting foam has excellent thermal insulating properties, but it is exposed negative influence humidity and direct sunlight, so after a day after applying you need to install slopes.

The foam is covered with a diffusion membrane to ensure that there is extracted moisture and protect the product from its penetration from outside. From the inside, PPE is used - the film has vapor and waterproofing properties. The foil side should be directed towards the area for thermal protection.

Build window adjustment of sash
Double-glazed windows are inserted into places, the strokes are mounted in the set sequence. For convenience, a rubberized hammer is used. It is important to ensure that the strokes come in exactly and published a characteristic click. Next, the sash is mounted and the performance of the mechanism in the mode of ventilation and full opening is checked.

With respect to the horizontal plane, the sash is adjustable when the fasteners are mounted. To eliminate the problem, you must insert a hex key to the window loop. Turns clockwise remove the sash to the distance. The vertical setting is carried out using a mounted loop placed at the bottom of the frame. First you need to remove the protection cap. Rotation clockwise raises the sash, counterclockwise lowers.

Installation of windowsill, low tide and plastic slopes
The windowsill is mounted on the mounting foam, glue, brackets or homemade devices. As the last homemade craftsmen use direct suspensions. Some windows constructions imply a frame conjugation and windowsill. With its absence, the panel is laid under the framework profile to provide a complete connection. Films on the windows are mounted after the windowsill is installed.

Location location covers a vapor-permeable membrane to protect mounting foam. On the perimeter of the opening, the psyl tape is punctured, so that the tilt of the tide will have a support, providing an additional obstacle to street moisture .

Mounting a low tide to the profile of the plastic window is carried out by self-draws. There are 10-15 cm between each of them, the distressed places are embarrassed by plaster and silicone sealant. The slopes of plastic windows are finally separated, plastic sheets are mounted on the prepared design.
Additional recommendations of specialists in the installation and operation of plastic windows
Many users face the problem of condensate formation on the windows. To eliminate it, you need to ensure the movement of the warm air flow to the glass surface. Systematic ventilation reduces moisture in the room, which reduces the likelihood of fogging several times, especially this is true for rooms such as a bathroom and a kitchen. Experts recommend to equip the ventilation system in the house. If you attach the thermometer to the plastic window, then the ability to control and minimize the temperature difference.

Periodically, it is necessary to clean the channels of the drainage, they remove excess moisture from the inner cavity of the windows. After installation, you should get rid of garbage, traces of putty, mounting foam. Apply sharp tools is strictly prohibited. It is recommended to use a plastic spatula and vacuum cleaner.
Products out PVC profile Do not need special care, but compliance with some rules will help increase the term and ease of operation of windows. The main requirement is presented to the composition of detergents. Preference should be given to special substances intended for plastic and glass surfaces.
Contact with acetone, gasoline, solvent harms the profile surface.
Installation and fastening of plastic windows is an important and responsible moment that requires the masters of certain skills. In the presence of tools and knowledge, install installation can be independently. However, in case of failure, the manufacturer may refuse warranty. Calling a specialist will entail additional costs. For high-quality installation of plastic windows, select a proven company.
Decision on replacement wooden windows Plastic has all the advantages, since modern double-glazed windows are much more functional and more reliable. A considerable value is the correctness of their installation, for which several methods are used. The most popular of them is the installation on the anchor plates.
Most often, one of two ways are selected to install plastic windows:
- Direct fastening of the frame in the opening with screws.
- Use anchor plates.
The first option is considered more complicated, because It implies a complete disassembly of the design, including the removal of sash (and deaf, and movable). This makes it possible to fly a profile without interference by attaching it to the walls of the opening on the self-tapping screw. After installing the frame, the window is collected again: this procedure includes adjusting the sash, installation of fittings and double-glazed windows.
Such work is quite time-consuming, therefore most beginner masters prefer a faster second way. It is important to remember that designs of more than 2 m² It is recommended to install only directly (This option is more reliable).

The material of the manufacture of anchor plates for plastic windows is galvanized steel with a thickness of 1.5 mm, which is used for the stamping method. The products are equipped with a series of holes round shape under fastening screws. For the possibility of pre-adjusting, the plate in some areas are equipped with a guide notch. The depth of bending directly depends on the thickness of the installation gap: it is selected at the installation site.

It is most convenient to carry out the fixation of the anchor plates is made on the window mounting screws 40x5 mm. For fastening flexible plates in the opening, plastic dowels and locking screws will be needed. Each anchor must have at least two attachment points. There will be no screws 50x6 mm.
There are three main types of anchor window plates:
- Swivel.
- Non-reflective.
- For wooden windows.
Rotary products Used in those situations where the mounting of the window block in the opening is difficult for one reason or another. Thanks rotary mechanism The plate is positioned on the site of the wall that provides the most sturdy landing.

If everyone is done correctly (accurately combine the turn signal and external bent teeth), the product will be fixed as securely as possible. It does not arise the danger of profile deformation. The presence of a rotary element and the ability to carry out the element bending makes it possible to use various mounting angles. Most often arched, trapezoidal and polygonal systems are installed in this way.
With the help of simple non-reflective anchor plate The installation of plastic windows inside the opening is carried out, with the possibility of selecting the optimal angle of fastening. To improve the strength of fixation in some models, the clawing charge is additionally present.

Concerning Anchors for wooden windowsthen for installation plastic Systems They are not used.

The ability of anchor plates to quickly ensure a reliable connection between window block And the wall is the main advantage. As a result, it is possible not only to save time and strength, but also to resist seasonal and daily fluctuations in temperature (this is fraught with deformation of the design).
This type of fastening has other dignity :
- Easy installation. Unlike the fastening through the frame, the plates allow you to abandon the need to completely disassemble the window system. This is speeding installation work, at least twice.
- The choice of the optimal fastener. Moving mechanisms allow you to fix the window at the most convenient angle.
- The ability to install the block exactly in terms of the level. By adjusting the tension of the side screws, it is possible to achieve accurate positioning of the frame in space. In this case, you will not need to put pegs or adjust the openings.

- The speed of dismantling work. If necessary, the plate is unscrewed, and the window is removed. This is much faster than in the case of the use of through bolts.
- The ability to reinstall the block. Since the profile is not exposed to abuse, the window systems on the plates can be reinstalled to another place.
- Use on walls from different material. In addition to concrete and brick surfaces, the anchor plates hold well on wood, foam concrete, gasilicate blocks etc. Especially they are comfortable in cases where multilayer walls are used in the house: rod fasteners (screws, anchor bolts) are powerless in such situations.
- The possibility of disguise. Anchor devices open the ability to use platbands, windowsill and overheads, well masking assembly clearances. In this case, it disappears the need for blending plates into the surface of the slope, followed by sealing the formed deepends with plaster or putty.
- Reliability of fastening. The plates are well tolerated by significant operational loads, including a strong wind and return during the opening of the sash.
- Cheap fasteners.
Anchor plates and weak sides :
- Restrictions on the weight of the window structure. The reliability of the mounting on the plates is guaranteed only for small and medium-sized window blocks. Heavy structures (most often - balcony type) it is better to install through end-cutting through the frames. This also applies to those cases when several series of windows are located on top of each other.
- Danger from frequent opening of sash. In this case, the windows frame is experiencing additional loads, which can adversely affect its integrity. Those flaps that open very often are recommended to additionally enhance the bolted fastening.
- Violation of decorativeness. Masking the anchor plate is far from always. First of all, it concerns the use of plaster or putty, as the final finish. The fasteners are not always drowning into the slope surface, especially if we are talking about concrete walls.
Before starting work, you must acquire the following tools:
- Shock drill or perforator.
- Electric jigsaw or hacksaw for metal.
- Hex key for adjusting accessories.
- Anchor plates.
- Measuring devices (level, roulette).
- Fasteners (screws, screws).
- Silicone sealant.
- It is forbidden to fix the windows on the mounting glue, foam, etc. Only screws are allowed as a fastener.
- Carrying must be carried out very carefully, avoiding contacts of the cartridge drill and plastic frame. In order to avoid damage, it is recommended to use a long drill and a special plastic lining.
- The activation of the shock mechanism is preferably used only on concrete walls.
- The brick wall having vertical voids is drilled on the butt interlocks.
- Screw screws are allowed by a screwdriver. Especially convenient models that have a built-in motion limiter, which allows you to control the depth of immersion of self-press in the frame.
Installation of anchor plates
The first thing is to install anchor plates. The optimal distance between individual fasteners on the frame is not more than 100 cm. The windows of a considerable height is recommended to equip an additional fastener. The distance between the extreme plate and the angle of the window should not exceed 25 cm, otherwise it threatens the loss of stability of the block. Before marking, the outer plane frame is released from a protective film. To install the gear elements of the plate in the profile there are special protrusions.

To make fasteners more reliable, it is reinforced by a window screw. Next, the plates in the same way make the installation throughout the profile, following the above recommendations on the distance between the individual elements. When preventing the plate in places, we need to ensure that the first bending lay down to the frame, and the second was above the wall mount.
Rama installation
Installation of the window frame must be accompanied by compliance with all proportions and distances. The distance from the frame to the opening is in the range of 20 to 35 mm. Narrow openings have to make additional landing sites under fasteners.

After preparing the opening, the frame is inserted into it. The adjustment of its vertical position is carried out under the horizontal sections of wooden or polymer linings with a thickness of up to 30 mm.

Having exhibit the design, you can fix it to the way. On brick and concrete walls, dowels 6x40 mm are usually used, on wooden - 42x45 mm. In order not to disperse, when attaching it is recommended to follow the sequence. It is best to first fix the bottom corners, which will allow to align the frame in the level. The upper mount is carried out at the final stage. It is recommended to fix each anchor plate with two bolts.

Laying foam
Having finished the main installation work, you need to fill the mounted foam clearances between the frame and the walls of the opening. Volumetric gaps are better filling in two clips, with a pause by 1.5-2 hours. The sale presents several types of mounting foam with different characteristics. When choosing suitable option Focus mainly on the weather characteristics of the region. Most often on the package there are instructions on this.

To insulate the inner part of the mounting seam is best of all polyurethane foam, construction sealant or vapor insulation warning tape based on butyl. Putting the foam is recommended very verified: the lack of the material will not allow to achieve a good tightness of the room, and the extra quantity threatens the deformation of the window profile. After the frozen, the foam spokes were cut off with a sharp knife. It is better to do this after 48-36 hours.
Mounting window sill and low
According to the rules, the windowsill is allowed to mount 24 hours after the gate of the gaps: it gives the time to dry well and grab. In practice, this recommendation is often ignored (especially if the assembly brigade works). When choosing a suitable window sill, you need to consider only those options whose width exceeds the thickness outdoor Wall. Plastic product Easily clipped along the length of the electric jigsaw or hacksaw for metal.
Send the windowsill, exhibit it in terms of the level and secure. The emptiness that is formed under the bottom should be filled with foam by installing several cargoes on the surface (waters, bricks). In this position, the product is left until the next day.

In parallel with the windowsill, low-end installation is carried out. It is inserted into a niche under the main frame and fasten to the bottom plank. As a result, it is created additional protection From entering external moisture to the room.

Exterior finish
By installing the plastic window on the anchor plates, it is necessary to make an outdoor slope. At the same time, both decorative and practical goals are pursued, because Unlocked foam is inclined to gradually collapse under the influence of atmospheric influences. The easiest option is to use plaster or starting putty. Obtaining a solution, it is important to achieve full coverage of mounting seams. Concerning interior decoration Sloves, it is usually carried out at the same time with the overall repair of the room.

Output
Choosing an option to fasten the plastic window, it is recommended to stop on the anchor plates. This is especially true when mounting works are conducted by newbies. In the course of the work, it is important not to rush, accurately fulfilling the above recommendations.
You can also watch a few videos.