Table around a tree in the country. How to make a table. Making a wooden round table
You can make a garden table with your own hands from scrap materials, which many will find absolutely useless. We offer you unusual ideas for the dacha, which relate to the creation of various garden furniture and tables, among others. Look at the photos of garden tables and choose for yourself best option. When implementing any idea for a summer house, you can use your imagination and make the changes you need.
How to make a garden wooden table with your own hands: photo
A wooden garden table represents the aesthetics of the natural landscape of the dacha and the ease of manufacture. Photos and photos will help you make a garden table with your own hands. detailed instructions. Before you start making a garden table with your own hands, prepare everything necessary materials and tools. Be sure to look at the photo on how to make a garden table with your own hands: they show the production process.
This is a very stylish and original table that can be used both in the garden and country interior. The costs are minimal, because it is based on a pallet of bricks.
You will need:
- brick pallet;
- swivel wheels with a diameter of approximately 10-12 cm;
- antiseptic stain for wood of the color you need;
- sandpaper;
- screwdriver;
- ordinary screws;
- screws for metal tiles;
- brushes
The procedure for making furniture and detailed instructions on how to make a garden table with your own hands.


Sand the tray well: first with coarse-grained sandpaper, then with fine-grained sandpaper. You can also use a grinder with a grinding wheel.
Attach swivel wheels to the bottom of the pallet. To do this, use ordinary screws, onto which put washers removed from the screws for metal tiles (since on the bases of the wheels large holes). You can directly fasten the wheels with screws for metal tiles, but then you will need a special attachment for a screwdriver.
Cover the table with an antiseptic wood stain, preferably containing wax. In this case, the table can be tinted to resemble walnut, rosewood, oak, pine, larch, or use a transparent antiseptic to only highlight the structure of the wood without changing its color.
Please note: not all pallets are the same! They are different sizes and with different intervals between the slats. Choose a pallet that suits you best.
Round garden tables made of wood and their photos
If you have an old round garden table, don't rush to throw it away! Of course, it has absolutely no appearance and is broken, but it is a real find for your garden. In its new guise it will decorate not only a relaxation corner in the garden, but also a country house.

Garden tables made of wood will go with many styles, as their decor is universal.
Look at the photo of garden tables with similar design options:


You will need:
- old wooden table;
- wood putty;
- old tiles of various colors or broken tiles;
- white facade paint;
- tile adhesive;
- white grout for joints;
- priming;
- copper and gold contours for glass;
- putty knife;
- sponge.
Manufacturing procedure


Fill cracks and gouges and sand the table with fine-grit sandpaper, then prime everything except the tabletop. Paint the table white (except the table top).
Wrap up tiles in a piece of drape or other dense soft fabric and break it with a hammer. Apply an even layer of tile adhesive on top of the tabletop and lay out the surface of the tabletop with tile fragments. Trim the edges with a trowel. When your mosaic has dried a little, wipe the surface with a sponge soaked in water to remove any traces of glue from the surface.
After the glue has completely dried, treat the seams between the pieces of tile with white grout.
Paint the sides of the table top with white paint, and then decorate them, as well as the legs of the table, with gold and copper glass outlines.
Plastic garden table
 Typically, garden furniture is made of plastic, wood, rattan, presented in soft natural colors.
However, if a bright multi-colored “character” appears in the garden, especially one made of colored glass, then all attention is immediately drawn to it.
And it was made from an old broken flower stand, covers from metal barrel and regular round glass.
However, all these elements can be replaced with scraps of colored plastic.
So, let's look in more detail at how to make a plastic one. dining table with your own hands.
You will need:
- metal part from a flower stand;
- lid from a metal garden barrel;
- round glass with a diameter of 50-60 cm;
- a piece of rubber seal for windows;
- paper;
- pencil;
- copper circuit for glass;
- copper acrylic paint;
- white paint for rust;
- acrylic primer;
- means for obtaining patina;
- paints for glass painting.
Manufacturing procedure


On a piece of paper, draw a circular pattern in the Moroccan style. Then enlarge the pattern to the desired size using a photocopier. Place the pattern under the glass and outline it with a copper outline. Dry the circuit thoroughly for the time recommended by the manufacturer (usually 8 to 24 hours).
Paint the interior parts of the ornament with bright stained glass paints. It is important that the paints you use are distributed evenly within the outlined area, so before you paint the tabletop, practice on a small piece of glass, identifying required quantity paints for fragments. Dry the finished painting well.
If desired, add additional ones to the finished painting. decorative elements copper circuit.
Paint the barrel lid with white rust paint. Now let's move on to the main part of the tabletop.
Prime the stand piece and paint it copper acrylic paint, then apply a patina product in some areas.
When the “foot” of the table is dry, glue small pieces of window seal onto the parts that will be in contact with the tabletop. This will allow her to hold on well.
Assemble the table: place the painted glass on the lid of the barrel, and place this “tabletop” on the foot.
DIY ideas for a garden and cottage using scrap materials: photos and descriptions

Further on this page you can see ideas for a summer house made from scrap materials and photos of the process of their implementation in practice. We necessarily accompany all ideas for a garden and dacha with your own hands with photos from different angles so that you can clearly see the whole creative process.
Folding garden table
 Try making a universal folding garden table for your utility room. It looks beautiful and saves space. And most importantly, it is very convenient and will help you keep your small utility unit in perfect order: everything is in sight, and nothing will get lost.
You will need:
- a piece of edged pine board measuring approximately 60 X 20 cm;
- two ready-made wooden fastenings for shelf;
- light yellow façade paint;
- red acrylic paint;
- small glass jars with screw caps;
- screws;
- screwdriver or screwdriver.
Manufacturing procedure


Sand the board and paint it light yellow.
Decorate the ends of the board simple ornament using red paint.
Paint the lids of the jars with red paint.
Attach the jar lids to the board at regular intervals using small screws.
Hang the finished shelf on the wall of a utility room or workshop using ready-made fasteners (the covers should be on the underside of the shelf).
Fill the jars with screws, nails, small fasteners, staples, nuts and other small household items and screw the jars to the lids.
You can decorate jars with simple painting, applique and any other methods.
Interesting ideas for your dacha, home, garden and vegetable garden with your own hands with photos
 And now we offer interesting ideas for a dacha and garden with your own hands in relation to other interior items necessary for the household.
This will be a comfortable seat on which you can relax after gardening. All our interesting ideas for a summer house and garden are accompanied by photos and can be implemented using various available materials.
Make a garden ottoman from old car tires. There are practically no costs, and the effect will exceed all expectations. This ottoman is not a simple one, but an ottoman-chest. You can store garden items in it. This will definitely not happen to anyone!
You will need:
- two old car tires one diameter;
- thick plywood;
- beautiful textiles of your choice;
- façade paint that matches your fabric in color;
- white spray facade paint;
- “liquid nails” or silicone sealant;
- construction stapler;
- jigsaw
Manufacturing procedure


Coat both tires with white spray paint and dry. Then paint both tires with light green paint, in a thicker layer, and dry.
Lay the tires one on top of the other, fastening them with liquid nails or silicone sealant. To do this, apply “dotted” small portions of any of the products in a circle on the surface of the lower tire.
Cut a circle out of plywood with a diameter slightly smaller than the diameter of the tire. Cover it with fabric and secure the fabric with a stapler.
Place the fabric-covered circle on the tire base. There you go! The seat is removable, so the inside of the ottoman can be used as a place to store small items.
The paint color of the tires and the color of the seat can be anything, depending on the style of your garden and the color of other garden furniture. In any case, the ottoman will look impressive
Garden furniture: tables and benches
 Garden tables and benches are indispensable attributes of a cozy and comfortable country life, in which it is possible to enjoy privacy in a shady corner of the garden.
How to do it garden furniture tables, you could already fully recognize their examples published above. And now we propose to make an exclusive design of a garden bench with your own hands.
A garden bench is not just a necessary thing, but a very necessary one.
It’s so convenient to care for plantings and weed, not on your knees, but sitting on a bench, especially one as beautiful as this one. Even if it stands just like that, it is already a garden decoration, no worse than any figurine.
Add green paint to the pictures: add branches and leaves.
Add accents with gold paint: make painterly strokes on the drawings, emphasizing the lines and details.

When the bench is dry, cover it all, along with the pasted pictures, with a clear or slightly tinted wood preservative.
If desired, the bench can be slightly tinted with blue-gray acrylic paint, creating the effect of old wood.
For those who live in big cities, country cottage area- this is a peculiar paradise. Fragrant herbs, fresh air, the smell of a fire and definitely a wonderful home that feels comfortable and homely. Special comfort country house and the outdoor area is furnished with custom-made furniture that can enliven the space. In this article we will tell you how to make a table for your garden with your own hands.
Agree, it’s still easier than making a sofa or wardrobe. To implement your plans, you do not need to specifically study or invite specialists. To work, you will need inspiration and prepare the necessary materials.
Preliminary stage
The appearance of the finished product is important. When you make a table for your dacha with your own hands, do not neglect this.
It will be nice to see the admiration and surprise of your guests, to whom you will tell that you made it yourself.

- Its main basis is a wooden tabletop. As a rule, ready-made boards or wide boards are used for this.
- An important factor is also the selected type of wood from which you decide to make the table:
| Conifers |
|
| Deciduous |
|
- In addition to the tabletop, the table must have legs. You can make them from a wooden board or buy ready-made ones.
Advice: if you don’t find them in the store, look at the counters where they sell auxiliary materials for making stairs - 4 pieces of balusters made of metal or wood may be quite useful to you.
Factory-made blanks will add some gloss and chic to your table.

Preparation
First you need to determine where you will install the furniture and whether you plan to remove it from the house. For example, a good solution for country house there will be a narrow and long table that will ensure freedom of movement for people around the room.

Materials and tools
- The boards are tongue and groove. They will create a tight connection and protect the table from liquid getting into the cracks. You can also use a pair of ready-made wooden panels measuring 2000x300 mm.
Tip: to ensure the table’s resistance to loads, select the thickness of the boards to be approximately 30 mm.
When choosing a material, make sure that the panels or boards are even, they must fit each other absolutely exactly, this will save time on separate measurements and cutting.
- Rails for fastening - 3 pieces. They are needed for the stability of the structure. The most suitable size is 2000x100 mm with a thickness of 28 mm.
- Table legs (finished) or balusters, their price depends on the quality of the material.
- Hacksaw.
- Self-tapping screws.
- Electric drill. Please note that this tool must be available. You will definitely need it, so if you don’t have your own, then rent it or ask for temporary use.
Advice: if there are power outages in your area, renting a diesel generator for your dacha will help solve the problem.
- Polyurethane varnish. You can choose either glossy or matte. The second one shows the structure of the tree well. Instead, you can use natural oils that will protect the wood from external factors.

In the photo - a country diesel generator
- Good quality brushes.
- Grinding machine. Its absence will make work much more difficult.
- Sandpaper with fine and coarse fractions. This will make it possible to provide the table with the desired smoothness.
Process
Below are step-by-step instructions:
- Connect the boards or boards and lay them outer side down. At this stage, it is necessary to monitor the docking so that country table was smooth.
- Secure boards or boards. Place the slats along the long sides. This will strengthen them and fix them along short boards. To ensure the stability of the table, additionally secure the boards (or panels) using slats in the center in one or two places.
- Be careful when securing slats. Screw in the screws slowly, without changing the degree of pressure, angle or intensity. Otherwise, the shield or rail will crack, which will affect the quality of the product.
- Secure the table legs at a distance of 50-70 mm from the edge. Using an additional rail, strengthen the attachment point so that the support does not deform after a while. This will allow the table to look perfect for a long time. Secure the legs also slowly.
- Turn the table over and remove debris and sawdust, sand all rough edges using sandpaper and a sanding machine.. Dry the table thoroughly with a dry cloth.
Decoration
Building a country table yourself is not all.
Now you need to start finishing, and, if you want, decorating.
- Cover the entire surface of the table with polyurethane varnish. (See also article.)
- Then you need to let it dry for 24 hours.
- Carefully examine the surface of the table, sand it again with sandpaper and varnish it a second time.
- If you wish, then you can paint the table, for example, with acrylic paint.
- Once the surface is completely dry, the product can be used for its intended purpose.
Conclusion
This article described in detail one of the methods self-made country table made of wood. Although at first glance the work seems difficult, in fact the process is quite exciting, which will make it possible to make good quality furniture for little money. The video in this article will help you find Additional information on this topic.

OLYMPUS DIGITAL CAMERA 

How to make a country table
Arranging a summer house is a constant process. Either you build something or improve it. Moreover, furniture is constantly needed and tables are most in demand in the country. And put it in the garden, and near the house, and also in the gazebo. We will tell you how to make a table for a summer house with your own hands in this article using the example of ready-made projects.
Homemade table from pallet boards
The material for this table was disassembled pallets. Naturally, you can use new boards. There is only one condition - they must be dry. You can buy dry ones (this costs more) or buy regular ones, put them somewhere in ventilated stacks and keep them for at least 4 months, or better yet, six months. In general, any furniture, including garden benches. made from dry wood.
We are assembling the table for the street - to put it in a gazebo, so we will not glue the boards of the tabletop, but will fasten them from below, using planks. This is a very simple country table and very cheap.
Having disassembled the pallets, we get boards with individual colors and patterns. Having worked a little magic, rearranging them several dozen times in different ways, we achieve the required result. It turns out to be quite a nice tabletop.
We assemble a tabletop from boards
Take the side parts of the pallet. We use them for the table frame. We first sand them with coarse sandpaper, then fine sand them to the required smoothness (grain 120 and 220).

The side slats will go to the sides of the table
We take the planks that remained unused and use them to fasten the tabletop. We place them in the place where the joints of the boards are located. We use two self-tapping screws to fasten each board with a joint, and one for a solid one.
From the treated sidewalls and two boards (also sanded) we assemble the table frame. We fasten its parts with self-tapping screws at the end (two for each joint). The frame can be glued or also “planted” on self-tapping screws. Only they are long. For each, we pre-drill holes with a drill whose diameter is slightly smaller than the diameter of the screws.

The tabletop is almost ready
We turn the assembled tabletop over and sand it. The procedure is the same - first use sandpaper with coarse grains, then with fine grains.
Next is installing the legs. We select four boards of the same size, check their length, and adjust if necessary. Then - sanding again. This is easier than sanding the legs that are already screwed on. We screw the sanded boards to the frame. These will be the legs. For each there are two self-tapping screws, fixed diagonally (look at the photo). For greater stability, we install jumpers at the bottom. You can leave about 10 cm from the floor to the lintels. We connect everything with self-tapping screws, so that the boards do not crack, we pre-drill holes.


The DIY garden table is almost ready. All that remains is to coat it with varnish
After removing the dust, varnish again. In theory, the varnish should lie flat, but it depends on the wood, so another sanding/painting cycle may be needed. As a result, we get this homemade country table.

DIY garden table ready for use
If you don’t like mismatched boards and traces of old nails, you can make the same design into boards. This table can be rectangular, or square. All sizes are arbitrary - please see the space available.
Country table made from leftover boards
This DIY garden table is assembled from leftover boards different breeds and sizes. Pine boards 25 mm thick and 50 mm wide were used for the tabletop frame, and 15*50 mm leftovers for the legs. We make the frame according to the dimensions you need. This table will stand on the veranda, which is small in width. So let's make it narrow - 60 cm, and length 140 cm. The height of the legs is 80 cm (everyone in the family is tall).

Assembling the frame, attaching the legs to it
Immediately cut two long boards of 140 cm each. To make the tabletop width 60 cm, subtract twice the thickness of the board used - this is 5 cm. Short bars should be 60 cm - 5 cm = 55 cm. Fold the frame, following right angles, twist with self-tapping screws. We check whether the bars are folded correctly - we measure the diagonals, they should be the same.
We cut the boards into four 80 cm boards and attach them from the inside to the assembled frame. You can use 4 screws for each leg.

Making jumpers for the shelf
At approximately the middle of the height of the legs we attach the crossbars. This is a frame for a shelf. The shelf can be used for its intended purpose, and it also increases the rigidity of the structure. We fasten strictly at right angles, checking with a large square.

We put the frame on the floor and check whether it wobbles or not. If everything is done correctly, it should stand rigidly. Next, take sandpaper or a sander and sand.
Let's start assembling the tabletop. From finishing works There were boards of different types of wood left, some painted with stain. We alternate boards of different colors.

We fasten the tabletop boards with finishing nails, carefully finishing them off with a hammer. You can secure it to the shelf with regular nails or self-tapping screws. Then we level it with a sander. The last stage is painting. Very unlucky with the choice of varnish. We bought it too dark and didn’t like the look. I'll have to sand it again and paint it a different color.

Homemade table for the cottage is ready
Wooden table with glued top
This design features L-shaped legs. They are assembled from boards of the same thickness. IN in this case 20 mm. In order for them to hold well, 5 self-tapping screws are needed. We pre-drill holes with a drill with a diameter 1-2 mm smaller than the diameter of the screws. Then, using a drill of a larger diameter, we drill recesses for the caps. Diameter can be matched to furniture plugs suitable color or make them from a wooden rod. Another option is to use wood putty, to which you add wood dust that remains after sanding. After drying and sanding, the marks will be difficult to find.

Legs with markings for fasteners
When assembling the legs, you must ensure that the angle is exactly 90°. You can choose timber as a pattern. First, coat the joint of the two parts of the leg with wood glue, then install the screws in the following sequence: first the two outer ones, then the middle one, and only then the other two. After the glue has dried, we sand the legs, varnish them and dry them.

Table legs are ready
It's time to make the tabletop. We assemble it from boards of the same thickness. We select the size as needed. You can use fragments of different widths. It is only important that everything looks organic, and that the sides of the boards are smooth and fit together without gaps.
We coat the sides of the boards selected for the tabletop with glue, lay them on a flat surface (some kind of table) and tighten them with clamps. In this case, we got by with one, but preferably at least three. We tighten it so that there are no gaps in the resulting shield. Leave it for a day. Having removed the clamps, we get an almost finished tabletop. It still needs to be trimmed - align the edges, and then sand it. You can trim with a jigsaw or a regular handsaw. It's difficult to get a straight line using an angle grinder, but you can try. After sanding we get a beautiful tabletop.

Gluing a tabletop from boards
Using the same technique, you can make an oval or round tabletop. You just need to draw the appropriate line and trim the glued boards along it.
To make the table look more attractive, we will make a frame. We take a thin strip, sand it with sandpaper and fasten it around the perimeter of the tabletop. You can also use finishing nails. Only we also first coat the planks with wood glue, and then with nails.

We fasten the bar around the perimeter
After the glue has dried, we sand the joint again with sandpaper.

This is what the finished tabletop looks like
Now you can attach the table legs. We assemble a table frame from four boards (there is no photo, but you can do it as in the previous paragraph). We attach it to the back side of the tabletop with glue, then install furniture confirmations through the tabletop. A preliminary hole with an extension for the cap is drilled for the confirmations. The holes for fasteners are masked in the same way as on the legs.
We attach the legs to the fixed frame. We place them inside the frame. You can attach it with regular self-tapping screws. That's it, we made a table for the garden with our own hands.

The board table is ready
How to make a garden table from wood with benches
For this table we used 38*89 mm boards (we unraveled them ourselves), but you can take standard sizes. A difference of millimeters will not greatly affect the results. In the photo below you can see what should happen.

To connect the parts, 16 cm long studs with washers and nuts (24 pieces) were used. All other connections are made with nails 80 mm long.

We connect the table parts together with studs, washers and nuts.
The parts are installed in place, a through hole is drilled with a drill. A stud is installed in it, washers are put on both sides and the nuts are tightened. Everything is tightened with a wrench. Why is this option convenient? For the winter you can disassemble it and take it to a barn or garage.
Making seats

Drawing of a bench with dimensions
According to the drawing, we cut the boards to the required size. Everything is needed in double quantity - for two seats. We sand the boards, pay special attention to the ends.
The short sections that we use to fasten the three boards of the seat along the edges are cut at an angle of 45°. First, we assemble the structure that is attached to the seat from below. We take a board about 160 cm long, and attach two short boards sawn at an angle to the end of it. You need to attach it so that this board is in the middle.

Bottom seat support assembly
Then we attach the legs to the resulting structure (you can use nails). Then we add more boards cut at an angle and tighten everything with studs and bolts.
We attach the seat boards to the resulting structure. Since this is an outdoor table, there is no need to knock them together closely. Leave a gap between two adjacent ones of at least 5 mm. We nail it to the supports (which have been sawn down), two for each board.

Fastening the seats together
We fasten the finished seats using four boards 160 cm long. We fasten each leg with hairpins (if you walk, you can put two hairpins, installing them diagonally or one above the other).

We connect the legs to the boards using pins
Assembling the table
The table is assembled according to a different principle. Please note that for the tabletop, the transverse boards along the edges are cut at 52°. We attach them at such a distance that the legs fit in. 2 nails for each board. You can use finishing ones, with small heads, or you can drive them deep and then mask the holes with putty.

How to make an outdoor table out of wood
Now we need to assemble the cross legs. We take two boards, cross them so that the distance between their ends is 64.5 cm. We outline the intersection with a pencil. At this point you will need to remove the wood to half the thickness of the board.

This will have to be cut out
We make the same notch on the second board. If you fold them, they turn out to be in the same plane. We connect with four nails.

How to make X-shaped legs for a garden table
We make the second leg for the table in the same way. We are not assembling the table yet.
Installing the table
Now you need to attach the legs to the structure on which the benches are installed. We place them at an equal distance from the benches and fasten them with pins.


Table leg fastening unit
Now we install the tabletop. We also fasten it with pins. The last stage is painting. Here everyone does as he pleases.
Outdoor table for a summer residence with benches
Variations on a theme
According to this drawing, you can make separate benches and a table for a summer house or garden. The design is reliable and simple to implement.

Separate benches and a table for the garden according to the same drawing

You can make the appearance more decorative by slightly changing the design of the seats and tabletops

Another option with separate benches

Painted white
DIY garden table: drawings

Stable country table

Simple table with X-shaped legs

Garden table made of wood

Homemade wooden table with crossbar at the bottom
http://stroychik.ru
The table is an essential attribute kitchen interior. At the same time, it must not only combine style, beauty and comfort, but also be quite reliable. And what could be more reliable and durable than natural wood? The problem is that the quality wooden furniture It’s not cheap, so not everyone can buy it for their kitchen. However, do not despair, because making a wooden table with your own hands is a completely doable task for a person who is able to distinguish a screw from a nail and knows how to use a drill, jigsaw and sanding machine.
The choice of kitchen table design depends on several factors, such as the size of the kitchen, the number of occupants and interior design. If you look at the options offered by furniture manufacturers, then among the variety of designs we can distinguish three categories:
- medium sized tables for 4-6 people;
- oversized tables for a large family or entertaining guests;
- practical folding tables for small kitchens.
A table in the kitchen should combine three qualities: aesthetics, convenience and practicality.
To do kitchen table with your own hands, you need to have a drawing of the product at hand, necessary set tools and at least some woodworking skills. Below are design options for standard, large and small kitchens with photo instructions and detailed description each stage of making a wooden table.
Rectangular dining table on balusters
Rectangular design with standard size 1200x600mm is considered the most popular due to its practicality. This table can comfortably accommodate a family of 4 people. In addition, it can be installed either in the center of the kitchen (if space allows) or placed close to the wall in order to save free space.
Schematic drawing
In order to make the wooden table more attractive, we will use balusters instead of straight legs. If you don't have it at hand lathe, then such legs can be ordered separately at the nearest furniture workshop.
For your information! Balusters are shaped pillars that are primarily found on the railings of stairs, balconies and roofs. However, the use of these elements in the manufacture of kitchen tables is also far from uncommon.

Drawing rectangular table on balusters
To assemble the product you will need the following materials and tools:
- 4 ready-made baluster legs 720 mm high;
- furniture board 30 mm thick for table top;
- board 20x100mm for the frame;
- wood screws about 30 mm long;
- drill (screwdriver);
- a circular saw;
- sander;
- sandpaper of different grain sizes;
- building level;
- square;
- roulette;
- wood glue
Step-by-step assembly instructions
A kitchen table made of wood on balusters is made with your own hands in the following sequence:
- We prepare the cross members of the frame. To do this, we cut a 100 mm board into 4 parts (2 x 400 mm, 2 x 1000 mm), after which we remove the burrs and bring the surface to a smooth state using sandpaper or a sanding machine.

- We take the balusters and connect them in pairs with short crossbars (400 mm), making a small indent from the edge of the leg (about 15 mm). Fastening is carried out using glue and screws, which are twisted at an angle with inside boards.
Advice! To prevent cracks from appearing, it is better to pre-make holes for the screws.

Attaching short crossbars to legs
- We connect the finished pairs of legs with long crossbars (1000 mm). The fastening algorithm is the same as in the previous stage.

The final stage of installing the table frame
- After we have made the frame of the wooden table with our own hands, we move on to the tabletop. If it comes to the kitchen, then it is better to purchase a ready-made furniture panel. Although for a gazebo or cottage, where the requirements for the appearance of the tabletop are not so stringent, it can be assembled from tongue-and-groove boards.

Furniture panel for table top
- The finished tabletop must be connected to the frame. To do this, lay it face down on a flat and clean surface, and evenly place the base with legs on top. The crossbars are fastened to the tabletop using screws according to the same principle as described in paragraph 2. However, in this case you need to be extremely careful not to drill through the countertop.

- At this point, making a kitchen table with your own hands can be considered almost complete. The last stage is characterized by the process of polishing the surface, as well as applying stain or varnish, the color of which is selected to match the interior of the kitchen.
Note! The number of layers of varnish depends on the type of wood. Hardwoods, such as oak or hornbeam, do not absorb varnish very well, so in this case 1-2 layers are sufficient. But for pine or spruce you will need at least 3 layers of coating.

Dinner table made of wood on balusters
Wooden table for a large family
A large table, at which you can dine with a large family or arrange a feast by inviting friends, must have reliable design. The usual four legs are usually not enough to support a heavy tabletop. Therefore, additional measures have to be taken to strengthen the frame.
Product design
In this example, we’ll look at how to make a large wooden table for the kitchen with your own hands, measuring 2337x978 mm (of course, minor deviations in one direction or another are allowed).

Drawing large table made of wood
Before starting work, you should prepare lumber for:
- supporting frame (38x90 mm);
- countertops (38x140 mm);
- support strips (19x64 mm).
You will also need the following tools:
- a circular saw;
- jigsaw;
- drill;
- screws (4x65 mm);
- drills (3 mm);
- furniture glue;
- pencil, tape measure, sandpaper.
Manufacturing stages
To make the table reliable and attractive appearance, you need to approach each stage responsibly. So let's get started:
- Using purchased lumber, we make parts for the future wooden table with our own hands:
- 2 upper cross beams (38x90x978 mm);
- 4 legs (38x90x695 mm);
- 2 bowstrings (38x90x921 mm);
- 1 longitudinal lower beam (38x90x1575 mm);
- 1 longitudinal upper beam (38x90x1473 mm);
- 2 braces (38x90x772 mm);
- 7 blanks for the tabletop (38x90x2337);
- 6 support strips (19x64x432 mm).
We carefully grind all parts, achieving an absolutely smooth surface without burrs.
Important! The quality of sanding a wooden surface depends on the correct grit size of the sandpaper. For primary grinding, the grain size should not be larger than 200 microns. Final processing is carried out with finer-grained sandpaper - 80-100 microns for soft wood and 50-63 microns for hard wood.
- We fasten the legs together in pairs using transverse beams (above) and bowstrings (below). We use two screws for each connection.

- Using a longitudinal lower beam, we connect two strings together.

Attaching the lower cross beam
- We strengthen the structure using the upper transverse beam.
Advice! In order for the beam to reliably connect the two halves, in addition to screws, additional wooden dowels with a diameter of 10 mm should be used.
- We cut the ends of the blanks for the braces at an angle of 45 degrees. After this, we attach both braces to the upper and lower transverse beams.

Attaching the upper cross beam

- We connect the wooden boards intended for the tabletop to the transverse beams on the inside of the structure.

- Additionally, we strengthen the tabletop with support strips. Make sure that they do not extend beyond the dimensions of the table.

Strengthening the structure with support strips
- If desired, you can make semicircular corners in your wooden kitchen table, which will give the product a more elegant look.

This option is suitable for both a large kitchen or dining room, and for a summer house.
Folding wooden table for a small kitchen
If there is not enough space in the kitchen to place a large or medium-sized table, then you should look for a more original approach. One such solution is a folding table, which is attached to the wall and can be easily removed, freeing up occupied space.
Materials and tools
To make a folding wooden table for the kitchen with your own hands, you will need the following:
- furniture board 30 mm thick;
- wooden beam 20x60 mm;
- loops (6 pcs.);
- corner lamella (2 pcs.);
- wooden dowels;
- dowels;
- screws;
- drill;
- jigsaw;
- sanding machine or sandpaper;
- glue;
Assembly: step by step
Advice! Before you begin, decide on the location where the table will be installed. Since the structure is attached to the wall, it is very important to take into account all the features of the future kitchen interior, so that you do not have to rearrange it later, leaving unsightly dowel holes in a visible place.
Steps to assemble a kitchen table with your own hands:
- We prepare the parts for the folding legs. To do this, we cut the wooden beam into 8 parts: 4 720 mm long, 4 320 mm long. We sand each element, removing burrs.

- We assemble two rectangular frames. The slats are connected to each other using furniture dowels, for which it is first necessary to drill blind holes with a diameter of 8 mm.

- We connect the finished frames with hinges. In addition, it is also necessary to attach a narrow strip to one frame using hinges, which will be attached to the wall.

- We fix the frame to the wall using dowels, after which we install corner slats on the sides. It is important to arrange the slats in such a way that they do not interfere with the folding of the legs.
Advice! Instead of corner slats, you can use any furniture corners of the appropriate size, matched to the color of the table.

Fastening the structure to the wall
- We cut out a tabletop measuring 900x600 mm from a wooden panel. For more impressive looking corners can be rounded. After this, all ends should be sanded using a machine.
- We “separate” a piece 250 mm long from the tabletop, which will be attached to the wall structure. The two parts are connected to each other by means of hinges.


- We install the 250 mm part on the corner slats and connect the elements with screws.

The final stage of installing a folding table in the kitchen with your own hands
- You can refine the table at your discretion by applying stain, varnish or paint. But even in its original form, such a product looks very good.

Wooden folding table – original solution for a small kitchen
On the Internet you can find a lot of options on how to make a wooden table with your own hands. We looked at three of the most simple solutions for standard, large and small-sized kitchens, the production of which is quite economical and does not require specialized machines and extensive experience in working with wood. To manufacture more complex structures, we recommend seeking help from specialists.
Finally, watch a video that shows how to make old wooden planks You can make a pretty decent kitchen table.
Video: DIY wooden table
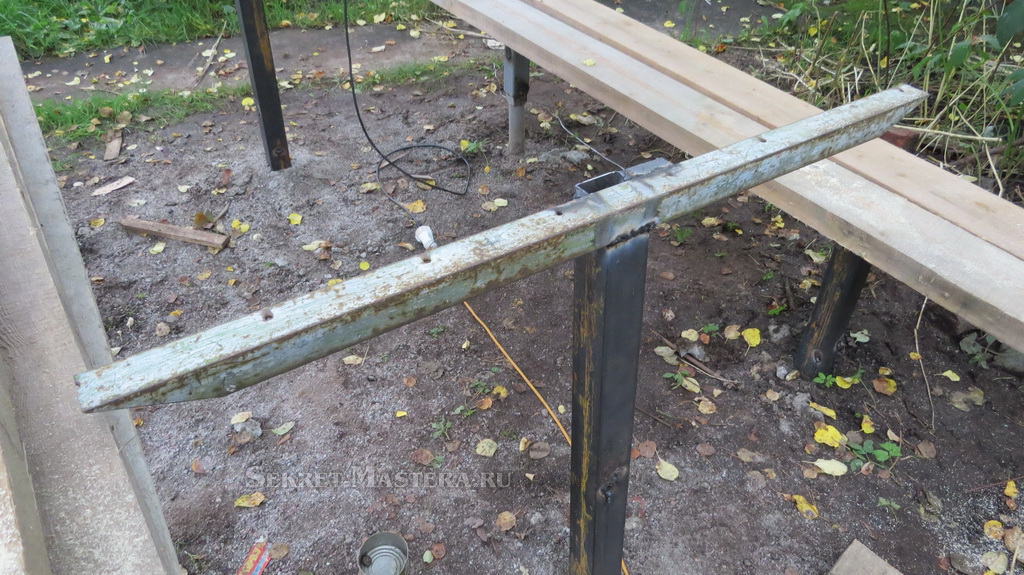
How to make a table for the dacha. Garden table and do-it-yourself benches. We will talk about installing a new table with benches in the garden at the dacha. To unite the family, it was decided to install a new table through collective efforts. The old wooden table according to the quickly erected scheme was no longer suitable; it had to be renewed every 5-7 years. In the construction of the table and benches, new and traditional Construction Materials- metal and wood. The table turned out to be reliable and, compared to previous versions, it will last a long time. Provides detailed step-by-step instruction with photos and videos.
How to make a table with benches with your own hands

The design of the table was developed through collective efforts, taking into account material capabilities, skills and the availability of tools. The table is done and the choice of design option is probably no longer worth discussing. Old table was built from wood. Raw pillars were buried in the ground in the open air and boards for benches and tabletops were attached to them. The lifespan of the pillars is 5-7 years depending on the thickness; the boards last up to 10-12 years. The table and benches were actively used from April to early October. Table and benches all year round exposed to precipitation in the form of snow and rain. New table made on metal frame, and the flooring of the table and benches is made of boards. The boards are dismantled in October and put away in a protected place, and in the spring they are fixed back to the frame. In this way, the life of the flooring and the entire table is extended. For critics, I want to say that there is a resting place under a canopy in the garden ( ).

 Pile "Yuventa"
Materials for the construction of tables and benches:
- Six Yuventa screw piles for installing a fence, 2400 mm long, head section 50x50 mm;
- 10 — 12 edged boards 2000 mm long with a cross-section of 150×50 mm, to speed up the work it is better to purchase planed ones, pay attention to the thickness of the boards - it should be the same;
- square metal pipe 60×60 mm, 4 m long;
- metal corner with shelf 40-5o mm, length 3.5 m;
- metal paint 1 liter;
- yacht varnish 1-4 liters;
- paint brush;
- solvent for paint and varnish 0.5-1 l;
- self-tapping screws for fastening boards 50 pieces;
- cement, sand
Tool for building table structure:
- Welding inverter;
- a circular saw;
- laser level, tape measure, bubble level;
- electric plane;
- grinding machine with cutting and cleaning discs;
- screwdriver with a set of drills and bits.
Instructions for making a table with benches with your own hands


A drawing was prepared to install the table. See photo. The table width was chosen to be 1100 mm (6 boards 150 mm wide and one 200 mm wide). When changing the width of the table, pay attention to the distance between the bench and table posts.
- The location of the table was chosen a long time ago, under the crowns of apple trees and next to artificial pond with fish. On site, pegs mark the places where the piles will be installed.
- We install Yuventa piles. To do this, a device for wrapping was made from a piece of 60x60 mm pipe. See photos and videos. In view of the features of my area, which are described in detail during construction on sandy soil, we had to make recesses for each pile. Without this recess, the pile would collapse before it was fully tightened. The recess is made petrol hole drill
. The recesses for the bench piles are dug at right angles. And for two table piles at a certain angle towards each other. This was done deliberately to make the table more stable.

 Digging a hole with a motor drill
 "Iuventa" piles for the table
 - The Yuventa piles were driven according to the standard scheme. Watch the video. Be sure to control your efforts so as not to destroy the pile before it is fully tightened. In my case it was a team effort. When tightening, you must try to comply with the intended locations of the pile and their inclination. Small errors in accuracy can be compensated for during subsequent assembly. See the details of the work at video example
.


 The Yuventa pile is twisted
 - After tightening the pit piles covered with sand in layers with humidification and compaction.
- For long service life of piles inner space piles are necessary, small mechanization was used. After concreting, we close the heads from exposure to precipitation and allow the concrete to harden. The piles must be cleaned of contamination immediately.

 Concreting piles
 - We cut square pipes 60x60 mm into 4 pieces of 550 mm and 2 pieces of 900 mm.
- We insert the pipes into the pile heads at a distance of 10-20 mm from the ground.
- We weld 60x60 mm pipes onto the heads, using the installation gap to eliminate inaccuracies in installing the piles. Try to install the bench posts strictly vertically, and the table posts coaxial to each other. Welding was carried out at 6-8 points at the points of contact between the head and the stand. Immediately clean the welding areas from scale.

 The posts are welded to the piles
 - mark the pipe cutting lines. Do it exactly. The cutting level from the ground surface for bench posts is 500 mm, table posts are 760 mm.
- Using a grinder with a cutting disc, we cut the posts according to the markings. You need to cut carefully and precisely. The surface of each cut must be horizontal. Corners will be installed and welded to the ends of the racks.


- We cut the corners. The size of the corners for attaching the bench boards is 250-300 mm, you only need 4 pieces. The table will require two corners of 1000-1100 mm each (determined by the selected table width). The edges of the corners in the vertical plane are cut into a cone, and all edges are rounded. The surface must be smooth and free of burrs.
- We weld the corners to our racks, controlling the horizontal plane of the shelf along two axes using bubble level. Just in case, gussets were welded to reinforce the welding site to the rack. When welding the corners of the benches, you can slightly shift the center of the welding of the corner to compensate for errors in installing the pile (the distance of the table stand from the bench stand).

 Welding corners
 Corners are welded to the posts
 - I used boards for the table and benches from construction scraps. frame house. The boards were not planed. Therefore, half a day was devoted to partial planing and sanding of the boards.
- We try on the boards and place them on the corners. The boards of the benches should be parallel to the boards of the table. The boards are marked for subsequent assembly. The position of the boards at the corners is also marked.

 Trying on boards
 - We mark holes in the corners for the screws for fastening the boards. A total of 14 holes for the corner of the table and 4 holes for the corner of the bench. We drill holes.

 Drilling holes in the corner
 Holes on the corner of the bench
 Holes on the corner of the table
 - The boards are impregnated with an antiseptic and, after drying, covered with paint or varnish. I coated the boards with yacht varnish.


- At the same time as varnishing the boards, the posts and corners are painted with protective paint. To prevent water from getting inside the racks, plugs are made ( polyurethane foam) at the ends of the pipes.