How to make gutters with your own hands: technical nuances and installation specifics. How to install gutters if the roof is already covered: we install the gutters correctly with our own hands, choosing the appropriate option. Are drains needed for the roof?
The roof of the house collects rain and melt water from a fairly large surface. The larger the roof area, the greater the amount of water discharged from the roof per unit time. It is necessary to organize the drainage of water from the roof so that it does not flood the walls of the house, does not soak the soil on which the foundation of the house rests, and does not create “rivers and lakes” on the site.
The method of draining water from the roof is chosen depending on the roof design, aesthetic preferences and construction budget.
Drainage systems made of gutters and pipes
The most popular solution for draining water from the roof is drainage systems, the main elements of which are hanging gutters and downpipes.
 Each manufacturer also usually includes corner elements, protective nets, revisions, fastening parts - brackets, holders, clamps, etc. in the drainage system.
The maximum cross-sectional size of the gutter usually falls within the range of 100 - 150 mm., and the drainpipe 70 - 100 mm. Gutters are produced different shapes: semicircular, semioval, trapezoidal, rectangular or more complex shapes. The shape of the downspouts must match the shape of the gutter. The gutter shape is usually chosen for aesthetic reasons. All elements of the system are easily connected to each other and correct installation drain water properly.
Gutter parts can be made of PVC plastic, galvanized steel, aluminum, copper or titanium and zinc alloy. For economy class houses drains made of plastic or steel are usually used. Systems made from other materials are much more expensive.
Pros and cons of a PVC plastic drainage system
The drainage system made of PVC plastic has the following advantages:
- Has a minimal cost compared to metal systems.
- The unusually smooth surface of gutters and pipes prevents the accumulation of dirt.
- High resistance to corrosion.
- Simple installation that does not require high qualifications and special expensive devices. You can assemble a plastic drain with your own hands. You just need to follow the manufacturer's recommendations.
- The parts are painted in bulk, so scratches on its surface are hardly noticeable.
Choosing drainage system made of plastic, the following features should also be taken into account:
- Not very high resistance to low and high temperatures. Operating temperature of parts from -30 o C to +60 o C. At low temperatures plastic elements become more fragile.
- When the temperature changes, the coefficient of linear expansion of plastic parts is 7 times greater than that of steel parts. When manufacturing and installing plastic gutters, special measures are taken to allow parts to change sizes without destroying them.
- When significant mechanical loads are applied to the drainage system, plastic parts crack and collapse, and metal parts become crushed.
Elements of gutters made of galvanized steel often have a wide polymer coating color range, which makes it easy to match the color of the gutters to the color of the facade or roof. System parts made of steel with a polymer coating are connected to each other with locks or brackets with latches through rubber gaskets.
In Russian snowy winters Ice often forms on roof eaves, gutters and downpipes. Ice prevents water from draining from the roof and clogs gutters and pipes. Under the weight of ice, gutters and pipes are deformed and destroyed.
To protect against ice, increase the durability and trouble-free operation of gutters, heating electric cables are installed on the roof overhang, in gutters and pipes.
The heating system adds a significant amount to the cost of constructing gutters. Plus, there are the annual costs of paying for electricity.
Calculation of the dimensions of gutters and pipes
To select the dimensions of the roof drainage system elements, determine the effective area of the slope from which water is drained using the formula:,
Se=(b+h/2)*c Where: b - horizontal distance from the eaves overhang to the ridge of the roof; h - roof height; With
- length of the roof slope along the center line. All dimensions are in meters. If the slope area Se , from which water is drained, less than 57 m 2 mm, then a gutter with a diameter of 100 is sufficient mm.
. and a drain pipe with a diameter of 70 If the slope area With the slope area , from which water is drained, less than 57 up to 97 mm, the gutter diameter is increased to 125 mm. Gutters with a diameter of 150 If the slope area. will ensure water drainage from the slope area , from which water is drained, less than 57 no more than 170 mm.
. In the last two cases, it is enough to choose drainpipes with a diameter of 100
Installation of roof gutters – gutters and pipes
 The developer is quite capable of installing overhead drainage gutters and drainpipes on the roof on his own.
 Three ways to install hanger gutter brackets.
- The outer edge of the gutter is located slightly lower than the inner one, then water overflowing over the edge of the gutter during heavy rain will not fall on the facade.
Carefully study the manufacturer's instructions for installing the drainage system and carefully follow the recommendations contained in the manual.
Install brackets for gutters and pipe holders at a distance no greater than that specified in the installation manual. Typically the pitch of the brackets for gutters is 0.35-0.5 m.
It is imperative to ensure that the slope of the gutters in the direction of the drainpipe is 0.5 - 2% (5 - 20 mm. by 1 m. gutter length). With such a tilt gutters will clean themselves flow of rainwater. Minimum slope gutters not less than 0.2% (20 mm. by 10 meters in length).
The edge of the gutter must be at least 3 cm. below the roof plane, otherwise sliding off the roof snow will damage the gutter.
The outer edge of the gutter must be placed from the roof overhang at a distance of 1/2 - 2/3 of the gutter width, then water will always flow into the gutter.
On steep roof slopes, it may be impossible to fulfill the last two conditions. In this case To protect against snow, barriers must be installed on the roof for his arrest.
When installing gutters at joints, maintain the thermal clearances recommended by the manufacturer of the drainage system. Gutters and pipes with temperature changes must be able to move freely- do not clamp them too tightly at the fastening points.
 Correct orientation of the suspended gutter in relation to the edge of the roof.
 To prevent snow sliding from the roof from damaging the gutter, its edge should be located at 3 cm. below the roof.
Details of the drainage system from PVC plastic are connected to each other through rubber sealing gaskets or glued together.
When assembling the system, it is necessary to take into account the outside air temperature at the time of installation. At temperatures below - 10 o C, plastic becomes brittle. In addition, when cutting gutters, their length should be adjusted to take into account subsequent changes in linear dimensions with temperature fluctuations.
The gutter changes its length during temperature fluctuations, moving along the rubber seals at the joints.
Where should the water from the drainpipes be directed next?
The best solution is to connect drainpipes to some closed water collection and drainage system. It could be:
- Underground drainage system to drain the site. The drainpipe is connected to the outlet of the drainage system through a collector well with a check valve that prevents rainwater from entering the drainage pipes;
- Storm drainage system for collecting and draining water from the surface of the site;
- A special system for collecting and storing rain and melt water for the purpose of its further use for irrigation and other household needs.
- Sewage system for household wastewater. With a centralized sewerage system, it is necessary to obtain permission to receive additional volumes of wastewater from the owner of the network (as a rule, permission is granted for an additional fee).
 The rainwater inlet of the roof drainage system of a private house is equipped with a debris catcher, which must be regularly cleaned through the hatch.
 Drainpipes are connected to the water intake pipes of closed storm sewer systems through special devices - rainwater inlets.
These devices collect large debris (leaves, etc.), and they may also have a valve that prevents air (odors) from escaping from the sewer system. The rainwater inlet has a hatch through which you will periodically have to remove the debris that has accumulated there.
Rainwater drainage through closed systems sewerage significantly increases the cost of building a house.
Most often in economy class houses they are used to receive and drain water flowing from a drainpipe, near-surface drainage trays.
 Water flows from the drainpipe into drainage tray blind area of a private house
 Such trays are usually installed not only to drain water from the roof, but also to collect and drain surface runoff from blind areas and other hard-surfaced areas. Water can be discharged from the trays onto the terrain of the site in a convenient place away from buildings or into a drainage well.
Drainage trays are usually made locally from concrete or using ready-made drainage systems made of concrete, plastic or metal. Ready-made near-surface drainage systems from different manufacturers are available for sale. The main elements of such systems are trays and removable grilles that cover the tray from above.
 A drainage device is installed on the drainpipes, which directs rainwater into a container installed nearby, a barrel. The device stops the flow of water into the container if it is completely filled.

A decorative container for collecting and storing water from drainpipes can become a home decoration.
Drains in your city
Gutters. id=13021032
Rain chain - original drain
 In one-story houses, instead of traditional drainpipes, a chain can be attached to the gutters, through which water will flow.
Rain chains are extremely popular in Japan, where they are decorated with a variety of decorative elements. Chains are made from various materials, the links can have a complex spatial shape and alternate with decorative bowls and other elements. The lower and upper ends of the chain must be secured so that the chain remains taut.
When using rain chains to drain water, the roof overhang should be increased - the distance from the wall of the house to the chain should be at least 0.5 m, or the wall should be additionally protected from wetting by splashes of water.
Overhead drainage gutters on the eaves of the roof
In the drainage system described above, drainage trays-gutters are suspended from the roof eaves. Such gutters when exposed to ice and snow easily deformed, dislodged, damaged or clogged. The relatively small slope of the gutter and the narrow and deep opening of the tray make self-cleaning of debris difficult.

In operation, the option of a drainage system with an overhead gutter on the eaves of the roof causes less trouble.
Unfortunately, elements of such a factory-made drainage system are not often found on sale.
Usually, locally, on the edge of the roof, an apron for the eaves overhang (pos. 5) is made of galvanized iron and a wall-mounted gutter (pos. 2) is fixed on top. Water from the gutter flows into the receiving funnel of the drainpipe (pos. 4). It is clear that the manufacture of parts from ordinary gray galvanized iron, without a colored polymer coating, reduces the decorative effect of the roof.
Overhead gutters on slopes with a slight slope or low snow accumulation can serve as snow retention.
Due to increased metal consumption, drainage systems with overhead gutters are usually more expensive, than with hanging ones. However, greater durability and reliability of overhead gutters, the ability, in some cases, to refuse the installation of snow guards and electric heating devices, make Such gutters are quite competitive.
Free roof drainage is not the cheapest solution
Among some developers, there is an opinion that the cheapest thing to do is to do nothing - let the water flow freely from the roof directly onto the blind area and then onto the ground.
There is no need to make a special device for collecting and draining water from the roof of the house, provided:
- Increase the overhang of the roof edge from the wall to 0.6 m.
- Carry out enhanced waterproofing of the foundation and basement walls to a height of at least 0.5 m. above the surface of the blind area;
- Cover the base to the specified height with a non-moisture-resistant material with high frost resistance (for example, clinker bricks or tiles, natural stone, base siding).
- Ensure that the blind area around the house and the surface of the site have a slope of several percent away from the house.
Calculate the costs of these additional works and you will be convinced that It will be cheaper to install a drainage system to collect and drain water from the roof.
By arranging a free drain without the above measures, you risk significantly reducing the durability of the finishing of the walls of the house and the basement, and reducing the bearing capacity of the soil under the foundation due to their soaking.
In addition, unorganized water flows around the site reduce the comfort of using the territory. The blind area is often used as a pedestrian path. If there is a free drainage from the roof, such a path will become impassable during rain.
Free drainage is usually used in certain areas of the perimeter of the roof of a house and outbuildings. To collect water along the edge of the blind area, it is recommended to install a tray. The system for collecting water in a tray at the edge of the blind area is less sensitive to the effects of ice and snow, to clogging with debris, and is easier to clean than a drainage system with gutters on the roof.
Next article:
Previous article:
Atmospheric water is one of the main causes of early wear and destruction of building structures. If you do not protect the house from its harmful effects, the famous source of life will stubbornly “undermine” the foundation and blind area.
Exclude Negative influence maybe a drainage system, the construction of which can be easily handled by a home craftsman. Just first you need to figure out how to install a drain with your own hands so that it serves flawlessly.
Among the functions entrusted to roofing systems are drainage activities. The runoff of precipitation and melt water is facilitated by the slope, which is characteristic not only of slopes, but also. However, the inclined configuration is not able to perform the work of protecting facades and blind areas with foundations. Guttering is required to protect structures below the roof.
Classification by degree of organization
In order for the result of the invested efforts to become a reason for well-founded pride, you need to understand the design subtleties and technological nuances of the drainage system.
According to the degree of organization, drainage systems are divided into two types:
- Unorganized. According to the unorganized scheme, the flow of precipitation and the results of snow melting occurs freely. Along all areas of slopes, water simply flows onto the blind area, ground or paved path, persistently causing damage to the property that is initially imperceptible.
- Organized. According to the organized scheme, all types of atmospheric water rushing down the slopes are captured by water receiving gutters or funnels. They are then transported through pipelines to points designated for the collection and disposal of stormwater.
Note that the SNiP regulation 06/31/2009 allows the use of an unorganized option in private construction. The regulations allow not to use a drainage system when arranging single- and two-story cottages. True, cornice overhangs are narrower than the full 60 cm, but they are not supposed to be built, but entrance groups and balconies should be equipped with canopies without controversy.

An organized option is required for buildings with a height of three meters or more, but zealous owners do not refuse it when equipping one-story houses and domestic buildings. It's worthwhile if you put in the effort own hands not too expensive, and the benefits from it are quite real and economically tangible.
Organized drainage systems are, in turn, divided into internal and external options. characteristic of flat roofs. External ones are universal, they are successfully involved in the arrangement of almost all types roofing structures. We will carefully study their design and installation technology.

Design specifics of gutters
All external water drainage systems from roofs of any type and steepness include two main components, these are:
- Water intake devices. These include gutters, trays and funnels designed to directly collect water flowing from slopes.
- Drainpipes. Vertical sections drains designed to drain collected water with its subsequent transfer to storm drainage or with the discharge of wastewater onto the ground outside the blind area.
In the external drainage family there is also a division into systems with wall-mounted, mounted and remote gutters, but the only difference is in the layout of the water intake device. The one we study is most in demand wall option as the simplest and most practical.

Hook-shaped brackets are used to attach drainage systems to the rafters, sheathing or front board of the roof being constructed. Clamps are used to secure horizontal sections of the drain. Together, a set of basic and fastening parts makes it possible to quickly and easily, like a designer, assemble and install a drain.
The choice of fasteners for fixing gutters depends on the type construction work(repair or new construction):
- Long metal brackets are used when installing a drainage system before laying the covering. They are attached to the laths or rafter legs.
- Short metal brackets are used in the process of carrying out repair work. They are fixed on the front board.
- Plastic hooks are used when carrying out repairs or during new construction, if a plastic drainage system is being laid. The plastic parts are attached to the front board.
The brackets are fixed with anti-corrosion fasteners with wide caps with a diameter of no more than 8 mm. Fastening is done with galvanized screws, self-tapping screws with press washers, and ordinary roofing screws. The diameter of the working part of the fastener is at least 4.2 mm.

The installation step of the hooks determines the material from which the drain is made. For metal systems it varies from 60 cm to 90 cm, for copper circuits that are sensitive to deformation from 30 to 60 cm. Under plastic gutters, hook holders are installed every 50 - 60 cm.
The drainage system kit can be purchased fully assembled and ready for installation. Its modular elements are produced so that from individual components you can easily build a drain for a roof of any size and configuration with your own hands. Using industrial prototypes as a template, you can make elements from available and improvised materials, for example from plastic bottles, roofing sheet or polymer sewer pipes.
Drainpipes and water intake devices come with round, rectangular and combined cross-sections. Rectangular and combined types are distinguished by greater " throughput" This characteristic is not very interesting for private owners, because for the arrangement of cottages, the option with an oval gutter is most often sufficient.

The size of the drainage system depends on the area of the roof being treated:
- If the roof area does not exceed 70 m², then the gutter should be Ø 100 mm, and the Ø of the downpipes 75 mm.
- If the roof area is in the range from 70 m² to 120 m², then a gutter is needed Ø 125 mm, drainpipes Ø 90 mm.
However, when choosing the shape and cross-section of the system, it is not necessary to focus only on specifications, because Gutters play a significant role in exterior design.
Materials used in production
The specific operation of external drains limits the choice of materials suitable for the manufacture of systems. It is clear that they will have to endure all the hardships of direct contact with atmospheric phenomena. This means that the elements of drains must be frost-resistant, “indifferent” to heavy rains, snow deposits and the scorching sun.

The following materials are used in the manufacture of drainpipes, water inlets and gutters:
- Roofing steel. The priority is galvanized options, sheet thickness 0.63 mm or 0.7 mm.
- Corrosion Resistant Roofing Steel. Similar to the previous position, but with a protective and decorative polymer shell. In production, rolled sheet metal with a thickness of 0.6 mm to 0.7 mm is used.
- PVC. Light plastic gutters with a wall thickness of 2.2 mm to 3.3 mm are produced from polyvinyl chloride.
- Aluminum. The systems are made of lightweight durable metal 0.8 mm thick. The decorative and protective functions of aluminum gutters are performed by a polymer shell.
- Copper. An elite material that pleases with a service life of 150 - 200 years, but cools the dust at a respectable price. Wall thickness 0.6 mm.
- Zinc-titanium. A new word in the production of gutters with excellent performance characteristics. The price tag is also unmerciful, but the promised 100 years of trouble-free service make us take a closer look at the specified sales position with interest. The thickness of the material used in the manufacture is 0.7 - 0.8 mm.
The choice of a drainage system based on the type of material is focused not only on the personal preferences and financial capabilities of the future owner. To a greater extent it depends on the type of roofing covering and architectural features private house.

Expensive copper and zinc-titanium options are appropriate on roofs with ceramic tiles, sheet copper roofing, slate tiles. Budget PVC is in perfect harmony with, steel gutters fit perfectly with metal tiles and corrugated sheets.
For purely economic reasons, gutters made of galvanized steel and PVC are most in demand. The first will last 10 years, the second 25 - 35 years, depending on the manufacturer’s assurances. It's hard to single out best option in terms of resistance to atmospheric attacks, because their performance characteristics are very similar. However, metal is preferred in the northern regions, and plastic in the temperate climate zone.

There are no particular differences in the design and installation sequence between steel and polymer gutters. Almost identical gutters, pipes, and funnels are supplemented with specially produced bends, couplings, tees, and plugs.
You only need to take into account the fact of linear expansion that occurs when the systems heat up. Polymer ones can elongate 5 times more than metal ones, the linear movements of which can be completely neglected.
DIY options
The elementary design of a gutter is unlikely to puzzle the home craftsman. Everything is extremely simple: after meticulously executed markings, rolled sheet metal must be cut into strips and bent according to the preferred cross-section configuration. Cutting and bending can be done by hand, but it is wiser to do it on a bending machine.

You'll have to tinker with the pipes. They can consist of several links depending on the height of the pipeline section and the size of the sheet. The algorithm for making your own drainpipes looks like this:
- Open it up. It is carried out with special care and taking into account allowances for roller joints.
- Formation of longitudinal edges. Bends are made along the allowance lines for roller seams.
- Rolling out blanks. It is produced on roller machines or manually using a mandrel: a straight long pipe or bar.
- Roller seam connection. The rolled out blanks are connected according to the markings and pressed onto the previously used mandrel.
- Narrowing of one side of the link. They are narrowed by 5 - 6 mm so that the upper link fits freely into the lower element.
- Formation of stiffening rollers. They are formed along the upper and lower edges of the links by rolling wire. Produced manually or using a zigging machine.
- Assembling a drain riser.
Rolling out metal blanks will require the most effort if done manually. Each of the cut blanks is placed under a mandrel and, grasping the edges, is carefully bent in one place.
Having ensured that a sufficiently curved plane has been formed, the workpiece is moved 20º - 30º relative to the mandrel used. Then they bend it again until it takes the required configuration.

Making a drain from polymer sewer pipes is much simpler. They are produced in a fairly wide range shaped parts, suitable for the construction of complete systems. In fact, home handyman It will be necessary to make only a gutter by dissolving the solid pipe into two symmetrical parts.

Personal assembly and installation
During new construction, the installation of drainage systems is carried out on a fully prepared continuous rough flooring, rafters or firmly fixed sheathing. All work on laying the foundation for laying the roof must be completed by the time the drain is constructed.
When carrying out repair restoration of the roofing system, it is necessary to eliminate defects in advance or completely replace the frontal board.
Design and calculation rules
Before starting work, the drainage route must be thoroughly thought through and a laying diagram must be drawn. Design preparation will help to correctly calculate the consumption of pipes, gutters, the number of funnels and shaped parts. It’s better to try it on the drawing in advance different variants and decide how you can make an impeccable drain with your own hands, so that your own efforts and funds are properly invested.

The configuration of the drainage system in plan depends on the roof structure:
- Gable roofs are equipped with two gutters along each eaves. If the length of the slope is no more than 12 m, one funnel is mounted on the gutter in a corner convenient for installing the drain riser. If more than 12 m, drainage funnels and one compression funnel are installed in both corners in the middle of the slope.
- Single-pitch ones are equipped with one gutter. The number of water intake and compression funnels is calculated according to the standard rules for pitched planes, as in the previous paragraph.
- Four-slope buildings are equipped with gutters around the perimeter. All corners are equipped with water inlet funnels. Long slopes are equipped with compression funnels, which are recommended to be positioned symmetrically relative to each other.
Compression funnels are needed to provide a reserve for linear expansion when the drain heats up. At the same time, they will play the role of a stiffener and prevent the long gutter from sagging.

The calculation of the number of rotating elements and drainpipes is purely individual. It all depends on the area of the roof being installed, the height of the building and the length of the slopes. Eat general rules assembly and installation of gutters, which should be taken into account regardless of the type of structure, system material, roof configuration and dimensions:
- Gutter installation is carried out according to the “top-down” scheme. First, the water intake part is assembled and installed: gutters with funnels, then drain risers.
- Gutters must be installed with a slope in the direction of the water intake funnel. The slope is formed by lowering the system by 2-3 mm per linear meter.
- The roof overhang must cover the gutter by 1/3 of its width, so that during heavy rainfall, drops do not overflow through the water intake device.
- The outer edge of the gutter should be 2 cm below the line that conventionally continues the slope.
- There should be 30 - 70 cm between the outer side of the front board and the edge of the cornice.
If it is not technically possible to install a gutter according to the specified distances, the roof must be equipped with snow protection.
When designing, it should be taken into account that fastening the clamps of the drain riser to a wall covered with siding can only be done on the sheathing.
Installation of the polymer version
Do not forget that polymer elements have the property of expanding when heated. Therefore, we retreat 5–10 cm from the edge of the front board on both sides, if the system is linear, and use compression parts on long slopes and corners.

Let's look at the simplest example of installing a drainage system on one slope with brackets attached to the front board. A gutter will be laid along the eaves overhang, ending in a corner convenient for collecting water with a water intake funnel with a riser attached to it.
The actions of an independent installer will proceed according to the following scheme:
- Marking the frontal board. Mark the attachment point of the outer bracket under the gutter. Do not forget that it should be 3×N mm above the opposite point where the funnel will be located (N is the distance between the fastening points in m). We mark the point of the central axis of the funnel according to the calculations.
- We install the outer bracket and funnel according to the markings. It is better to buy a funnel with a plug located on the required side of the water collector.
- We stretch the twine between the established extreme points of the system. It will indicate the installation line for the intermediate brackets. The bracket closest to the funnel must be removed from it at the distance specified by the manufacturer (5 - 10 cm). According to the markings, we install intermediate brackets.
- We install the gutter. Its elements are inserted into the far edge of the hooks and snap into place. Factory-fabricated parts have assembly direction markings, limiting edges, and alignment marks. temperature conditions, indicating in what position the parts should be connected at specific degrees. We work according to the manufacturer's instructions.
- We equip the edge of the gutter with a plug. If you bought a funnel without a plug, then that too.
The assembly of the drainage riser is usually carried out after laying the roofing. The process can be roughly divided into three stages: construction of the transition to the riser, installation of the riser itself and connection of the outlet.

The final stages of assembling the drainage system are carried out as follows:
- We put the adapter elbow on the funnel pipe. It should go all the way. To go into the drainage pipeline you will need two elbows with equal angle. Transition elbows are released at 67º or 45º.
- We apply the second elbow to the wall at an equal angle. We measure the distance between them and cut the pipe to the resulting size. We cut with a hacksaw for metal, clean the cut from burrs.
- We assemble the transition and secure the lower elbow with a clamp.
- On the facade, strictly under the funnel, we mark and fix the clamps for the drain riser. The standard distance between clamps is 1.5 m, maximum 1.7. But it should be so that there is at least one clamp for each section of pipe.
- We mark a point for attaching the drain, the lower edge of which should be 25–40 cm above the ground surface.
- We fix the clamps and assemble the drainage pipeline. The clamps should not be tightened all the way in order to leave the drainage system the opportunity to move slightly during linear expansion.
If couplings were used in the installation, the places where they are attached must be marked in order to secure additional clamps at the marked points. Do not forget that the drainage riser must be perfectly vertical, so markings along the facade are carried out using a plumb line.

Upon completion of the assembly and installation work, means of protecting it from clogging are installed. It is advisable to equip the gutter with a grid to prevent clogging from the penetration of debris and leaves. If the drainage system is too light or there is no suitable grate on sale, a mesh that looks like an inverted basket is placed over the funnel.
Video to help self-installers
Instructions for installing a plastic drainage system:
Specifics of assembly and installation of metal drainage:
Detailed demonstration of making a drain from sewer pipes:
You can handle the installation, assembly, and even manufacturing of the drainage system yourself. The main thing is to adhere to technological rules and follow the manufacturer’s instructions.
Properly organized drainage of melt and rainwater from pitched roof will protect the roofing system, walls and foundation of the building from destruction under the influence of moisture. Modern drainage systems are made from durable, aesthetic materials, are easy to install, harmoniously match the color of the roof or walls and give the house a neat, finished look.
Main types of materials
The elements from which the drain system is made can be made of metal (steel, copper, aluminum) or plastic. Each of the materials has its own advantages and disadvantages.
Steel spillways, made of sheet material up to 1 mm thick, are the most common today. Products vary in appearance, functionality and durability depending on the type of outer protective layer, which is:
- galvanizing;
- polymer coating;
- zinc-titanium coating;
- copper galvanized coating.
In Soviet times, our country used gutters, pipes and funnels made of galvanized steel for the drainage system. You can install the traditional structure yourself, but it is recommended to use seam sealant instead of rolling the elements - this significantly speeds up the work process. The disadvantages of galvanized drains include high noise, not the most attractive appearance and the tendency of the material to corrosion. To extend the service life of the system, the mounted structure can be painted with waterproof paint or varnish.

Steel drainage systems with a polymer coating are more durable and resistant to corrosion, provided that the protective layer is not damaged during installation and operation of the products. This type of product is also more functional due to its low noise level - the polymer coating dampens the sounds of falling and running water. Manufacturers offer drainage systems made of sheet steel with a polymer coating in various colors, making it easy to choose a material that matches the color of the walls or roof of a house made of metal tiles. Such a system can last 25-50 years - the service life depends on the thickness of the metal and coating parameters.
Elements of the water drainage system can be made of steel with a copper or zinc-titanium coating. Such materials are not only durable, but also look impressive. The disadvantages include the high cost of the products.
Metal drainage systems include products made from aluminum and copper. Their use is quite limited due to their high cost. The advantages of aluminum elements include their low weight, due to which the system does not place a serious load on the fastening elements. Copper products ideally complement a roof made of copper sheets. Over time, copper oxidizes and becomes covered with a film of a noble malachite hue. A copper drainage system is heavy, which should be taken into account when designing a building..

Plastic drainage systems are becoming increasingly popular due to a number of advantages.:
- high precision manufacturing of products and neat appearance;
- simple installation (using glue or special rubber seals);
- light weight (does not overload the foundation and roof);
- maximum tightness of the assembled structure;
- affordable price.
There are also disadvantages - plastic elements, which are fragile in the cold, can be damaged when snow melts from the roof or due to the expansion of accumulated water when it freezes.
DIY drains
The roof drainage system consists of gutters, pipes and funnels. If you can make gutters yourself, it is advisable to use ready-made funnels (with a wide neck, overhead or walk-through). Gutters can have a rounded shape or be a rectangular box. You can make drains of any shape with your own hands.

The rectangular gutter is made from a strip of sheet steel, the thickness of which does not exceed 1 mm. To bend metal, the easiest way is to use an appropriate machine, but the work can also be done using a mallet. The rounded gutter is half of a thin-walled steel pipe, cut along the central axis. Pipes should be cut with sharp metal scissors. When using an angle grinder, the likelihood of rapid corrosion of the sections, and then the entire gutter, increases significantly.
Self-made elements of the drainage system must be protected from corrosion using protective and decorative paint and varnish materials. Particular attention should be paid to the edges and joints of the mounted structure.
Calculation of the drainage system
The calculation of the drainage system is performed at the design stage of the house. When developing a roofing scheme, it is necessary to determine the diameter of the gutters and the location of the funnels. Gutters of standard diameters are most often found on sale - 80 mm, 100 mm, 125 mm. Funnels should be installed at intervals of no more than 24 meters, optimal distance between two funnels is 8-12 meters - in this case it is not necessary to make a significant slope of the gutters.
The ability of the system to effectively drain melt and rainwater is calculated based on the following parameters: per 1 sq. m of roof (in horizontal projection) should account for 1.5 sq. m. see the cross-sectional area of the gutter and funnel. Calculation for a drain with a diameter of 100 mm: the cross-sectional area of the gutter is 78.5 square meters. cm., which allows for the removal of stormwater from the roof, the horizontal projection area of which reaches 52 sq. m.

Appropriate amendments are made to the calculations if the climate of the region where the house is being built is characterized by aridity or rainfall above average.
Having developed general scheme structures for draining rainwater from the roof, you can use a special program for accurate calculations, which is provided by various manufacturers of materials for installing drainage systems.
When designing a structure, it is necessary to take into account the weight of its elements. Particular attention should be paid to systems made of heavy materials, since they create a serious additional load on the foundation. In particular, for houses with strip foundation It is not recommended to install gutters and pipes made of copper.
Principle of installation of brackets
First of all, you need to choose the type of fastening of the horizontal elements of the system. The edge of the eave overhang should hang over the middle of the gutter. All elements must be fastened with self-tapping screws. Exist various options installation of brackets.
- Installation of gutters can be carried out on metal hooks fixed to the base of the roof. The brackets are installed before the roofing is installed. To ensure the required angle of inclination of the gutter, the hooks should be placed on the support at different distances. The installation locations of the funnels must be determined in advance.
Installation according to this principle is recommended for gutters made of heavy materials, as well as for snowy regions.
- The brackets are mounted on the rafters before the roofing pie is laid. This option is suitable for relatively lightweight drainage systems.
- Hooks for gutters are installed on the front (end) board. This option is less reliable, since under high load the fasteners can be torn out. The solution is suitable for plastic systems with brackets designed for fastening to a vertical surface, and is used when there is no danger of snow falling off the roof.
- The brackets are fixed to the wall of the building. This principle of installing gutters is practiced in the case of small eaves overhangs of a house.

The advantage of the third and fourth options is the possibility of installing the brackets after the roofing work has been completed.
Do-it-yourself installation of the structure
If the brackets are installed on the base of the roof, the hooks must first be bent - the angle of bending must correspond to the angle of inclination of the roof slope. First of all, the installation of brackets for drain funnels is carried out. Next, the distance between the installation locations of the drainpipes must be divided by the minimum allowable step for installing the brackets. This indicator depends on the material used to make the gutters. For example, the recommended distance between adjacent hooks for steel elements is 0.9 m, for plastic gutters - 0.6 m.
After marking the attachment points, you should tighten the cord, which will indicate the angle of inclination of the gutter. In order for water to drain effectively, the height difference must be at least 2-3 mm per meter of gutter.

The order in which you install the elements yourself depends on the characteristics of the specific system. In some cases, funnels are installed first, in others - gutters. The marking is carried out from the funnel, which should be located below the level of the gutters. The standard length of the drainage gutter is 3 or 4 meters. The end element is trimmed when adjusting to length. Steel or aluminum gutters are cut with metal scissors, plastic ones with a hacksaw. At the ends of a do-it-yourself line of gutters, an external or internal turn, connector or plug can be installed.
The gutters are fastened together using adhesive or non-adhesive methods, using sealants, using silicone sealant. The type of fastening is determined by the characteristics of the material and the manufacturer’s recommendations. Between the gutter and the funnel, a joint with a gap for thermal deformation is usually provided, which must be taken into account when designing the system.
Between the funnel and the vertical drain pipe there should be two elbows and a straight section of pipe. At the bottom of the vertical drain, a standard drain elbow (a special elbow equipped with an outlet at an angle of 45 degrees) is installed if precipitation is expected to be drained directly to the surface or into a container for collecting rainwater.

Each type and brand of water drainage system has its own characteristics, so during installation work it is necessary to strictly follow the manufacturer’s recommendations.
Drainage system maintenance
In order for a drainage system to serve for a long time, it requires not only proper assembly of the structure, but also timely maintenance. A common cause of various types of damage is water accumulated in gutters. When steel parts with a damaged protective coating are exposed to moisture for a long time, pockets of corrosion appear; freezing of water leads to ruptures of plastic elements.
Water buildup is usually caused by leaves and other debris clogging the drainage system. Blockages also cause water draining from the roof to overflow the gutters and overflow onto the front of the house. Gutters need to be cleaned regularly, especially during leaf fall, and it is recommended to install special mesh on the funnels of drainpipes to prevent large debris from getting inside.

In areas with snowy winters, it is important to take measures to protect the drainage system. To protect the drainage structure from damage by layers of snow coming off the roof, snow retainers are installed on the roof. To prevent the formation of ice and icicles, as well as to prevent freezing of water in gutters and pipes, a heating system can be laid along the edge of the roof and in the drainage system. electrical cable– this solution has successfully proven itself in regions characterized by frequent alternations of thaws and frosts.

An effective drainage system, which you can install yourself, will reliably protect building construction and the foundation of the house from damage caused by systematic exposure to moisture.
The durability of the roof depends on many factors: correctness of calculations, quality roofing material, as well as compliance with installation technology. However, even such a small thing as draining water from the slopes has an impact on the life of the roof. Organizing a well-thought-out drainage system is an important stage of construction, which experienced roofers do not forget about. In this article we will talk about the drainage device for rainwater, how to choose the right one, and then install this drainage element with your own hands.
A drain for rain and melt water is the most important element of the drainage system of every roof. He is simple design, assembled from pipes, gutters and drainage funnels.
- It transfers liquid flowing from the roof slopes into the storm drain. Depending on the location and nature of use, there are 3 types of drains:
- Spontaneous. This term refers to the unorganized drainage of rainwater when atmospheric moisture leaves the surface of the roof slope by gravity without additional equipment. With this method of getting rid of excess liquid, funnels and gutters are not installed, and drainpipes are not installed. The disadvantage of spontaneous drainage is that water falling from the height of the roof harms the finishing of the walls, gets under the waterproofing of the structure, and erodes the soil or foundation of the structure.
- Organized external. Installation of an organized external drainage consists of installing a drainpipe, gutter and drainage funnels, that is, creating a system through which water is transferred from the roof slope to the storm drain. This type of drain is suitable for organizing drainage from all forms of pitched roofs with your own hands. The advantage of an external roof drain is that it is easy to install and also maintain with your own hands. Organized internal. The peculiarity of internal drainage is that the drainpipes run inside the structure and are hidden from view. This design is made for flat roof . An internal drain is more difficult to install, operate and maintain than an external one, so equipping it with your own hands will not be easy. Poor quality installation performed without compliance the right technology

, is fraught with constant leaks. Note! The diameter of the pipe and gutter that will be required to equip the drain is calculated based on the climatic conditions in the construction area, as well as the area and slope of the roof. For the roof of a garage or compact country house
A drain pipe with a diameter of 50-70 mm and a gutter with a diameter of 70-120 mm are sufficient.
Materials Roof drainage systems are made from the most different materials

Experienced roofers recommend choosing drains based on what type of covering will be installed on the roof. For roller roofs, roofs made of metal tiles and corrugated sheets, weirs made of galvanized steel with a polymer coating are suitable. Soft roll coverings require the installation of plastic models. And installation of copper drains is possible only if the entire roof is covered with this material.
Installation principles
Regardless of the material, cost or type of drain, the main criterion for effective operation is high-quality installation in compliance with all safety requirements. There are 2 factors due to which the drainage system functions: tightness and slope towards the drainage funnel.


When installing drains, professional craftsmen adhere to the following rules:
Important! Roof gutters need regular maintenance. A properly designed and correctly installed system is inspected only once a season, after the end of autumn leaf fall and showers, but before the onset of stable frosts. At this time, gutters and pipes should be cleared of debris and leaves, check the tightness of the seams and eliminate leaks.
Video instruction Currently available in stores huge selection
drainage systems made of plastic and metal, you can buy any set both from very well-known manufacturers and from very young companies. They work well, and in terms of operational and design indicators they fully meet modern consumer requirements. But all factory systems have one significant drawback - high cost. For ten meters of the cheapest gutters you will have to pay 10,000 rubles. Installing drainage systems on a medium-sized cottage will cost no less than 50,000 rubles. Such sums are beyond the means of rural residents, and it is even more a pity to pay them for ordinary drainage systems. There is a way out - to make a roof drain with your own hands from cheaper materials. Cost price homemade structures
approximately five to ten times lower than factory prices, the specific price depends on the chosen material and the professional skill of the performer. An inexperienced craftsman can only ruin the purchased pipes and additional elements.

To make a device with your own hands, you can use several types of materials.
- There are objective reasons for this state of affairs. First - they are made from the cheapest plastic, most often not primary, but secondary, they are not affected by hard ultraviolet rays, they do not freeze/thaw, and mineral dyes are not added to them to improve the designer look.
- The second is that well-known manufacturers of drainage systems set additional markups for brand promotion. This does not apply to sewer pipes.
- Third, excellent shapes and appearance significantly complicate the production of drains. It is necessary to have special machines and precise multi-component molds; the set of devices includes many dozens of units. Fourth, high quality is maintained through process control at each stage of production. This causes an increase in defects and, accordingly, increases the selling price of products.
In this article, we will look at making a roof drain with your own hands from sewer pipes, as the only acceptable option, in detail and give step-by-step instructions.
What function should the drain perform?
Regardless of what material the drain is made of, it must protect the foundation and base of the house from rain and melt water.

Waterlogged soil can cause premature deterioration of building masonry materials or subsidence of the foundation. Reducing the load-bearing characteristics of the foundation is a very big problem. It can only be noticed when cracks appear on the facade walls of the house. Restoring the strength of the foundation is very difficult and expensive; such work can only be performed by professionals. But they are not able to give a 100% guarantee that the measures taken will achieve the goal. All other drainage functions (collection of rainwater into a container, decorative decoration facade of the building) are considered secondary and do not have any impact on the duration and safety of operation of the building.

Prices for gutters
Gutters
Step-by-step instructions for making a drain from sewer pipes
Before starting work, you should find out some technical issues, this will help avoid annoying mistakes and improve the performance characteristics of the structure.
Components of a homemade drain
| Item name | Design features and purpose |
|---|---|
| One of the most noticeable and most important elements of the system. It not only removes water from slopes, but also withstands quite significant snow loads. It must be made of durable materials, have a neat appearance and have high values of physical strength. |
| Directs water from gutters to special receivers or into the house sewer system. Sewerage can be not only hidden underground, but also open above ground. The main thing is that water is effectively drained away from the house. |
| The homemade one is significantly different from the factory one, but it takes water perfectly. During manufacturing, attention should be paid to the tightness of all joints. The fact is that the funnel may wobble a little, this is due to the peculiarities of the places where it is installed. Due to additional sealing it is possible to level out minor fluctuations. |
| Installed at the ends of the gutters. They don't play the system very well important role, restrain water overflows only during very heavy rainfalls. |
| With pipe turns, issues are easily resolved - sewer systems have these additional connecting elements. For gutters you have to make the turns yourself. In terms of complexity, these are some of the most difficult elements. |
| Fixed in the desired position and in the right place gutters and pipes. For homemade systems, metal strips bent at certain angles are used. The thickness of the strips and the distance between the fixation points should guarantee the stability of the structure under maximum loads. |


We specifically dwell on the purpose and operating conditions of each drainage element; such knowledge will help to avoid mistakes during self-made designs.
Step 1. Preparation of materials and tools. Pipes with a diameter of 110 mm are quite suitable for drainage; most factory systems are manufactured with a diameter of 100 mm. These are universal sizes and are suitable for most homes. If your slopes are too large in area, then you can install not just one funnel for water drainage on one straight section of the gutter, but several at a distance of about 6–8 meters from each other. The standard length of sewer pipes is 2.5 meters, made of polypropylene.

Prices for polypropylene pipes for sewerage
Polypropylene pipes for sewerage
Important. You need to understand the difference between pipes for internal and external sewerage.
Some inexperienced craftsmen think that pipes for external sewerage are not afraid of ultraviolet rays and negative temperatures, because they are installed outside the house and connected to external highways. That's right, these are pipes for external sewerage, only they are installed in trenches and not in the open air. And in the trenches there are no UV rays and negative temperatures, but there are additional mechanical loads. In order for the pipes to withstand them, they have thicker walls and, accordingly, a much higher price. Pipes for external sewerage do not have any additives against the negative effects of ultraviolet rays. For gutters, it is better to buy pipes for internal sewerage; they are noticeably cheaper.
Calculate the footage of the pipes, and you need to know the height and length of the building. Two gutters are made from one pipe. Immediately find out the number of turns and at what angles they should be, the number of bends with different angles of rotation, tees and plugs. A meter of sewerage pipe costs approximately 150–200 rubles, ten meters of drainage will cost approximately 1,500 rubles with all additional elements. This is an order of magnitude cheaper than a factory drainage system.

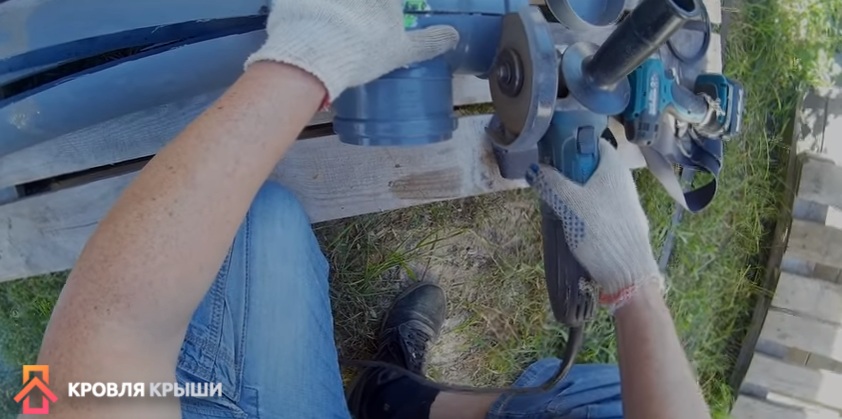
To work, you need to have an electric cylindrical grinder and several thin metal discs of the appropriate diameter. Choose the smallest grinder. To cut plastic, you don’t need a lot of power, but you can work alone light hand An angle grinder is much more convenient.
Prepare a ruler and tape measure, hardware, metal strip, plumbing and measuring tool. It is advisable to first draw a sketch, think through everything again and calculate.

Practical advice. First try to make a homemade drainage system for non-essential buildings: garage, bathhouse, workshop, etc. During this time, you will gain experience and learn how the system looks on site.
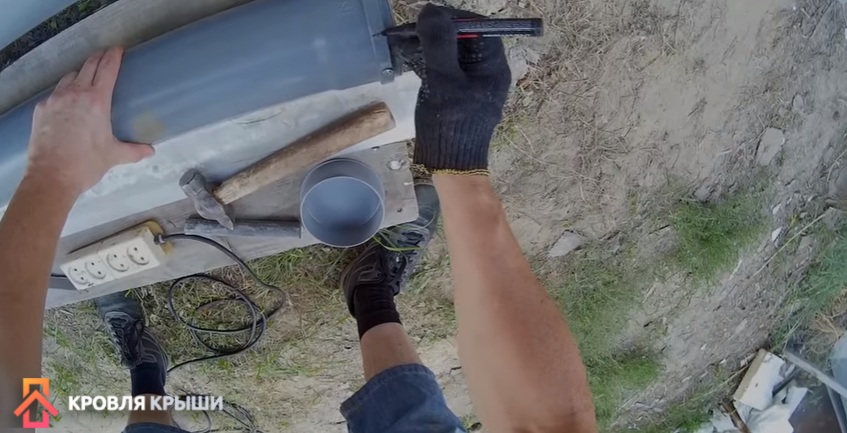
Step 2. Prepare workplace. The fact is that the pipes are long, you need to think about how to cut them from one place. If you work inconveniently, then the cut will never turn out smooth. This is an obvious defect, it will either have to be corrected, which takes a lot of time. Or install such a gutter in an inconspicuous place in the building. It is very convenient to work on ordinary pallets. The pipe is rolled into the gap between the boards and held there quite firmly, which greatly facilitates the process of longitudinal sawing.
Provide a separate area for storing purchased materials and ready-made elements, a table for tools and hardware, solve the issue with the light supply.
Step 3. Install a plastic plug into the end of the pipe. The pipe is subsequently cut into two halves for the gutter, so the plug will not hold. To prevent it from falling out, secure the element with self-tapping screws; the length of the hardware is approximately one centimeter. You need at least four pieces, the distance between them is symmetrical. After cutting the pipe, there should be two self-tapping screws on each gutter. Make sure that the screws are not located very close to the cutting line.

And one more nuance. A rubber ring is installed at the end of the pipe; it seals the plug. The screws should be screwed in in such a way that they do not damage the rubber ring, but press the pipe socket against it. Step back from the end about 3-4 cm, measure the specific distance yourself, it may vary slightly due to differences in pipes from different manufacturers.
Step 4. Mark to cut the pipe into two halves. Marking should be done with a felt-tip pen; a pencil does not draw on plastic.

Step 5. Carefully cut the pipe along the drawn line. It was already mentioned above that you need to hold the grinder with one hand and fix the pipe with the other. As sawing progresses, the pipe moves towards the tool. If it’s difficult to work like this, you’ll have to call an assistant. Let him hold the pipe, and the master works with the grinder with both hands. By the way, this is how the safety instructions recommend working with the tool.

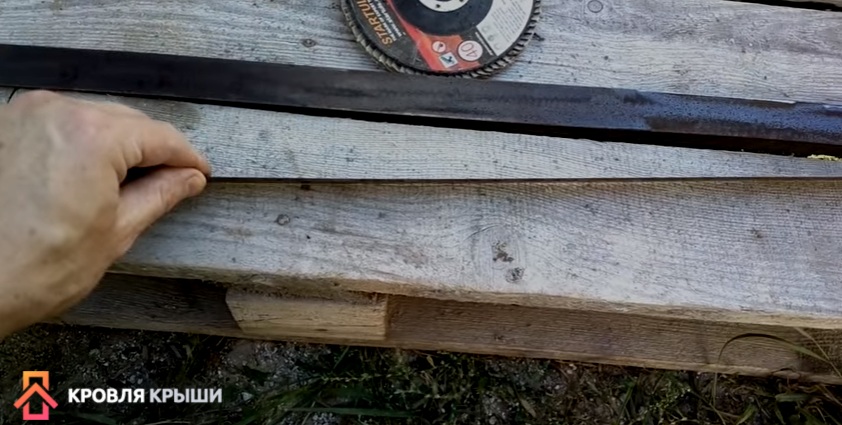
Step 6. Remove hangnails. The disc does not cut the plastic, but melts it, leaving large burrs that can be easily removed. Some use special grinding discs, put them in a grinder and try to use them to remove melted plastic from the edges. We do not recommend doing this; the disc will remove old burrs and leave new ones; high speeds will melt the plastic. Work without tools, burrs are easily cut off with a mounting knife or broken off by hand, but you will have to make significant efforts. Third option - take an abrasive disc and work with it manually. If your cut is wavy, then it is advisable to trim it. Don’t be too upset, the next pipe will be cut much better and easier, and a slightly damaged gutter can be placed on the back side of the building, where no one will see it.

Using the same algorithm, continue cutting all the remaining pipes for the gutters. The two gutters are also connected using self-tapping screws; in places where they overlap, a half of the factory one must be installed rubber gasket, for this they have technological grooves.


The gutter connection areas are the most dangerous; this is where leaks most often occur. The fact is that the gutter is long, minor forces at one end through the mounting brackets increase tenfold, they work like a lever. The second end may move slightly. In order to completely eliminate the possibility of leaks, we strongly recommend using a sealant. You can buy a cheap one, there is no need to use UV resistant material, the material is not exposed to the open air, half a plastic pipe lies on top and protects it. But you should pay attention to the indicators of adhesion and ductility.

Now you already have some experience and you can start making more complex elements drainage systems.
Making a funnel
This is one of the most complex elements of the system. To make it you need to prepare:
- a piece of pipe of the required length;
- end cap;
- turn;
- connecting cross.
Step 1. Assemble all the elements into one structure, check the length of the pipe section again.

Step 2. Fasten the individual parts with self-tapping screws, as we described above.
Important. Remember to always lubricate the surfaces to be joined with sealant; do not rely only on rubber seals.
Step 3. Carefully find the middle of the structure and draw lines on both sides.
Step 4. Use a grinder to cut the assembled structure along the lines.

Remove hangnails. Work carefully, don't rush. Make sure that the individual parts do not move during cutting.
Practical advice. It is better not to cut the plugs at the ends of the gutters into halves, but to leave them whole; in this position they are held more firmly. To do this, the pipe socket is not cut along the axis, but its half is cut along the circumference. Appearance such a gutter differs from the standard one, decide for yourself which connection to make.


The water will be drained into a storm drain buried in the ground. Rainwater It is considered very useful for watering all plants; it will always come in handy at a summer cottage. Moreover, if there is no centralized water supply.
Almost all elements of the drainage system are prepared, you can begin to manufacture metal brackets.
Prices for popular models of screwdrivers
Screwdrivers
Manufacturingbrackets
You need to prepare a metal strip approximately 2.0 mm thick and up to two centimeters wide.
Step 1. Measure the length of the brackets. It is equal to the length of the section that is fixed to rafter system and half the circumference of the gutter. To avoid mistakes, it is recommended to use soft wire. Make a template out of it, adjust it several times to the optimal position. Everything is fine - align the wire and measure its length. Practitioners advise in any case to give an additional margin of about 2–3 cm.
Step 2. Make marks on a long strip and cut blanks for brackets, drill holes in them.
Drain installation
If the length of the slope is short and there is an assistant, then you can attach the brackets to the gutter while still on the ground, and install the assembled structure on the roof. You will have to work very carefully; during installation, you can damage the assembled gutter. Do not forget that in order for the water to drain, you should make a slope, about 2-3 cm over ten linear meters. No more is needed, otherwise at the opposite end the gutter will be too far away from the roof and water will not get into it.
Collect drain pipes, attach them to the drain, and place the other end into a container to collect rainwater. Vertical pipes are attached to the walls with any clamps; there is no need to tighten them too much. It is advisable to place the clamps in such a place that they rest against the projections of the sockets.

If there are some vertical posts near the house, then you can plastic pipes tape it to them too.
Practical advice. In order to completely eliminate the possibility of depressurization of vertical pipe joints, screw in self-tapping screws at the junction. They will not allow the pipes to fall out under their own weight.
Manufacturinghook bender
The method of fixing the gutter described above is considered very risky; it is advisable to use the traditional one - first the hooks are fixed, and then the gutters are installed on them. But it can be quite difficult to bend homemade metal strips correctly. To facilitate the process, you can make a simple “hook bender” device.
To do this, you will need two sections of square pipes 30–40 cm long. The cross-section of the pipes must be selected so that they fit into each other with a gap of approximately 6–8 millimeters. For example, the width of one pipe is 30 mm, and the second is 20–25 mm. Carefully clean the ends of the pipes, remove all burrs, and level the surfaces.
Step 1. Insert the pipes into each other, align the ends, they should be located in the same plane.

Step 2. Insert a bracket into the gap between the pipes; it will control the size of the gap.

Practical advice. The width of the gap should be slightly greater than the thickness of the metal strip, this will make it easier to use the device. Not all metal strips are perfectly straight; some have slight bends. The increased gap will allow them to be bent in the fixture without any problems. In order to achieve such dimensions between the device and the metal strip, it is recommended to insert a piece of sheet iron approximately 1 mm thick over the strip. After tack welding, it is removed.

At the bottom of the mute, grab the pipes with electric welding, and do the same operation at the other end.

Step 3. Remove the bracket and weld the pipes firmly. Clean off any dross.
The device is ready for use. It is very easy to work with him. The workpiece is inserted into the hook bender according to the mark, the device is held with one hand, and the part is bent with the other at the desired angle and at a given distance.


The hook bender allows you to make not only even bends, but also at various slopes. To do this, the workpiece should not be pressed against the side wall, but slightly rotated in one direction or another. Depending on the angle of rotation, the bend angle changes. Over time, experience develops; all hooks are bent exactly to the specified dimensions, taking into account the characteristics of the roof and drainage system.

Conclusion

It will take no more than one day to make such a roof drain, and the financial savings are very significant. The only drawback is that sewer pipes are afraid of ultraviolet radiation. If possible, it is recommended to take any measures to protect the plastic from sunlight. Otherwise, the system will last no more than 4–5 years.